Category: Software & Apps

  • How to Choose and Set Up a Password Manager Safely: A Step-by-Step Guide

    How to Choose and Set Up a Password Manager Safely: A Step-by-Step Guide

    Reusing the same password across websites is convenient until one service is breached. If that password is exposed, attackers can try it on your email, shopping accounts, social media, banking services, and work tools. The safer alternative is to use a different strong password for every account. A password manager makes that realistic.

    A good password manager stores your credentials in an encrypted vault, creates strong random passwords, fills them when you sign in, and can help you identify reused or weak passwords. The difficult part is not understanding the idea. It is choosing a trustworthy service and setting it up correctly.

    This guide walks through the process from selection to recovery planning so you can use a password manager without creating a new single point of failure.

    What a password manager actually does

    A password manager keeps login information in one encrypted vault protected by a master password or device-based authentication. Instead of remembering dozens of passwords, you remember one strong master password and let the manager generate unique credentials for individual accounts.

    Well-known options include 1Password, Bitwarden, Dashlane, and password tools built into ecosystems such as Apple Passwords and Google Password Manager.

    The best option depends on the devices you use, whether you need family sharing, how much control you want, and how comfortable you are with recovery procedures.

    Decide whether you need a cross-platform or ecosystem-based manager

    If you use only Apple devices, an Apple-based solution may be simple. If you use Android, Windows, macOS, Linux, multiple browsers, or share credentials with family or coworkers, a cross-platform manager may be easier.

    Ask these compatibility questions

    Does the manager work on your phone, computer, tablet, and browser? Can it fill passwords inside mobile apps? Does it support importing from your current browser? Can you access the vault when traveling? Is there an offline mode if the internet is unavailable?

    A password manager that works perfectly on one device but poorly on another will encourage you to create shortcuts. Compatibility is a security feature because convenience affects whether you keep good habits.

    Check the security model before choosing a service

    You do not need to become a cryptography expert, but you should understand the basics of how the service protects your vault.

    Look for clear documentation about encryption, account authentication, data handling, recovery, and security audits. A reputable provider should explain how vault data is protected and what information the company can and cannot access.

    Look for independent security review

    Security audits, bug bounty programs, published security architecture, and a history of transparent incident communication are useful signals. No provider can promise zero risk, but good security practices make risk easier to evaluate.

    The U.S. Cybersecurity and Infrastructure Security Agency recommends strong, unique passwords and the use of password managers as part of safer account security.

    Understand cloud-hosted versus self-hosted options

    Most people are better served by a reputable hosted password manager because the provider handles syncing, backups, updates, and availability. Some technically experienced users prefer self-hosting for more control.

    Self-hosting adds responsibility

    If you self-host, you are responsible for server security, backups, updates, certificates, availability, and recovery. A badly maintained self-hosted setup can be less secure than a well-run hosted service.

    Choose self-hosting because you understand and want the responsibility, not simply because “local” sounds safer.

    Create a master password you can actually remember

    Your master password protects access to the vault. It should be unique and never reused on another site.

    A long passphrase made from several unrelated words can be easier to remember than a short complex password. Avoid famous quotes, names, birthdays, keyboard patterns, and phrases someone could guess from your public information.

    Do not store the master password inside the same vault as the only copy

    If you forget the master password and the provider cannot recover it, you may lose access. Keep a secure recovery copy outside the vault. A written copy stored in a safe place can be more reliable than an insecure digital note.

    Enable multi-factor authentication on the password manager account

    Multi-factor authentication, or MFA, adds another step after the master password. Depending on the service, this may use an authenticator app, security key, passkey, or another supported method.

    A hardware security key from companies such as Yubico can provide strong protection for important accounts. If you use one, register a backup key and store it separately so one lost device does not lock you out.

    Avoid weak recovery paths

    Strong MFA is less useful if your account can be recovered through an insecure email account. Protect the email address linked to your password manager with a unique password and MFA as well.

    Save recovery codes before importing everything

    Many services provide emergency recovery codes. Save them before you move all your important credentials into the manager.

    Do not keep the only recovery code in the vault it is meant to recover. Store a printed copy in a secure location or use another protected method that remains available if you lose your phone and computer.

    Install the official app and browser extension

    Download the password manager from the provider’s official website or the official app store. Browser extensions should come from links published by the provider or a verified extension listing.

    Why extension safety matters

    A fake extension can capture credentials. Check the publisher, reviews, permissions, official documentation, and exact extension name before installing. Do not trust a sponsored search result simply because it appears at the top.

    Import passwords carefully

    Most managers can import passwords from browsers or other password managers. This saves time, but exported password files may be stored as plain text.

    Delete temporary export files after the import

    If your browser creates a CSV file containing usernames and passwords, that file may not be encrypted. After confirming the import worked, permanently delete the export from your Downloads folder and empty the recycle bin or trash where appropriate.

    Do not email the export to yourself or upload it to a general cloud folder for convenience.

    Start with your most important accounts

    You do not need to change every password in one night. Start with accounts that can unlock other accounts or cause the most damage if compromised.

    Use this priority order

    Begin with your primary email account. Then secure banking and payment accounts, cloud storage, Apple or Google accounts, work accounts, social media, shopping accounts, and finally lower-risk services.

    For each one, generate a unique long random password and save it in the manager before moving to the next account.

    Use generated passwords instead of inventing your own

    Humans tend to create predictable passwords. We reuse patterns, substitute numbers for letters, and add familiar dates or symbols. A password generator avoids those habits.

    For sites that support long passwords, use a random password generated by the manager. You do not need to memorize it.

    When a site has strange password limits

    Some older services restrict length or allowed symbols. Let the manager generate a password that fits the requirement. Do not reuse an old password just because the form is inconvenient.

    Use passkeys when they are available

    Passkeys are designed to reduce dependence on traditional passwords and are resistant to many common phishing attacks. Major platforms including FIDO Alliance members support the standard.

    Many password managers can store and sync passkeys. If an important service supports passkeys, review the provider’s instructions and consider enabling them.

    Keep account recovery updated

    Passkeys improve sign-in security, but recovery still matters. Make sure your trusted devices, backup methods, phone number where appropriate, and recovery information are current.

    Do not automatically fill passwords on every page

    Autofill is convenient and can protect against phishing because a good password manager checks the website domain before filling. Still, you should look at the address bar before entering credentials on an important site.

    Watch for lookalike domains

    A fake site may use a misspelled or similar-looking domain. If the password manager refuses to fill a login you expected it to recognize, treat that as a warning. Do not immediately copy and paste the password to bypass the protection.

    Use separate vaults or collections for shared credentials

    If you share streaming accounts with family or business credentials with coworkers, use the manager’s sharing feature instead of sending passwords in chat or email.

    Shared vaults let you update a password once and control who can access it.

    Do not share your master password

    Your master password is personal. Even in a family or team plan, each user should have their own account and authentication.

    Review old and reused passwords after setup

    Many password managers can flag duplicated, weak, or exposed passwords. Use that report as a cleanup list.

    Change reused passwords first. If five accounts share the same password and one is breached, all five are exposed to credential-stuffing attacks.

    Remove passwords from insecure notes and documents

    After the vault is working, search the places where you used to keep credentials. This may include browser notes, spreadsheets, text files, phone notes, screenshots, email drafts, and chat messages.

    Do not create duplicate insecure copies

    The value of a password manager is reduced if every password also remains in an unencrypted spreadsheet. Clean up old copies carefully and keep only secure recovery material outside the vault.

    Keep your devices protected

    A strong vault cannot compensate for an unlocked laptop or phone. Use a device PIN, password, fingerprint, or face authentication. Keep the operating system updated. Enable full-device encryption where supported.

    If your manager offers automatic vault locking, choose a timeout that fits your environment. A home computer may use a different setting from a shared office space.

    Plan for a lost phone

    Imagine your phone is lost while you are traveling. Can you still sign in to your email? Can you access the password manager from another device? Do you have your MFA backup method? Can you locate or wipe the missing phone?

    Run a recovery drill

    Before an emergency, open the password manager on a secondary device and confirm that your recovery information works. You do not need to log out of every device. The goal is to understand the steps while you are calm.

    Plan for family or emergency access

    Some password managers provide emergency-access features that let a trusted person request access after a waiting period. This can be useful for families, especially when one person manages important household accounts.

    Do not share everything with everyone. Decide which information someone would genuinely need during an emergency.

    Watch for phishing that targets the password manager itself

    Attackers may send fake emails claiming your vault is locked, your subscription failed, or your account needs urgent verification.

    Open the app directly instead of clicking urgent links

    If you receive a suspicious message, open the password manager app or type the provider’s known site address yourself. Check account notifications from there.

    Legitimate security alerts should still be taken seriously, but urgency should not bypass verification.

    Keep the password manager updated

    Update the desktop app, mobile app, and browser extension through official channels. Security software is not something to install once and forget.

    Review release notes when a security issue is announced

    If a provider reports a vulnerability or incident, read the provider’s official statement. Follow recommended actions such as updating the app, rotating credentials, or changing account settings.

    Do not confuse password storage with full account security

    A password manager solves one important problem: creating and storing unique credentials. You still need MFA, safe recovery, software updates, phishing awareness, and secure devices.

    Think of it as the foundation of an account-security system, not the entire system.

    A practical setup plan for one evening

    First, choose a reputable manager that supports all your devices. Create a unique master passphrase. Enable MFA and save recovery codes. Install official apps and extensions. Import existing passwords, then securely delete the export file. Change the password for your main email account and a few other high-value accounts. Turn on breach or reuse monitoring if the service offers it.

    Continue the cleanup over the next week

    Each time you sign in to an old account, replace a reused password with a generated one. Within a few days, most frequently used accounts will be unique without turning the process into a huge project.

    How to evaluate a password manager before paying

    Use a short trial period to test the real workflow. Add it to every device. Try filling passwords in browsers and apps. Create a test secure note. Check passkey support. Test sharing if you need it. Review export and recovery options.

    If the manager regularly fails to fill credentials or makes you bypass it, choose another option before moving all your accounts.

    Common password manager mistakes to avoid

    Do not reuse the master password. Do not skip MFA. Do not keep recovery codes only inside the vault. Do not leave password export files on your computer. Do not install unknown extensions. Do not send vault passwords through chat. Do not ignore account-recovery planning.

    Most of these mistakes are easy to avoid during setup, which is why the first hour matters.

    Conclusion

    A password manager can improve security and make daily sign-ins easier at the same time. The safest setup starts with a reputable service that fits all your devices, a unique master passphrase, strong multi-factor authentication, and a recovery plan that works even if you lose your phone.

    Import carefully, delete temporary password files, replace reused passwords in priority order, use passkeys where available, and keep the app updated. You do not need to fix every account immediately. Build the habit one login at a time.

    The goal is simple: every account gets a unique credential, while you keep one secure and recoverable system for managing them.
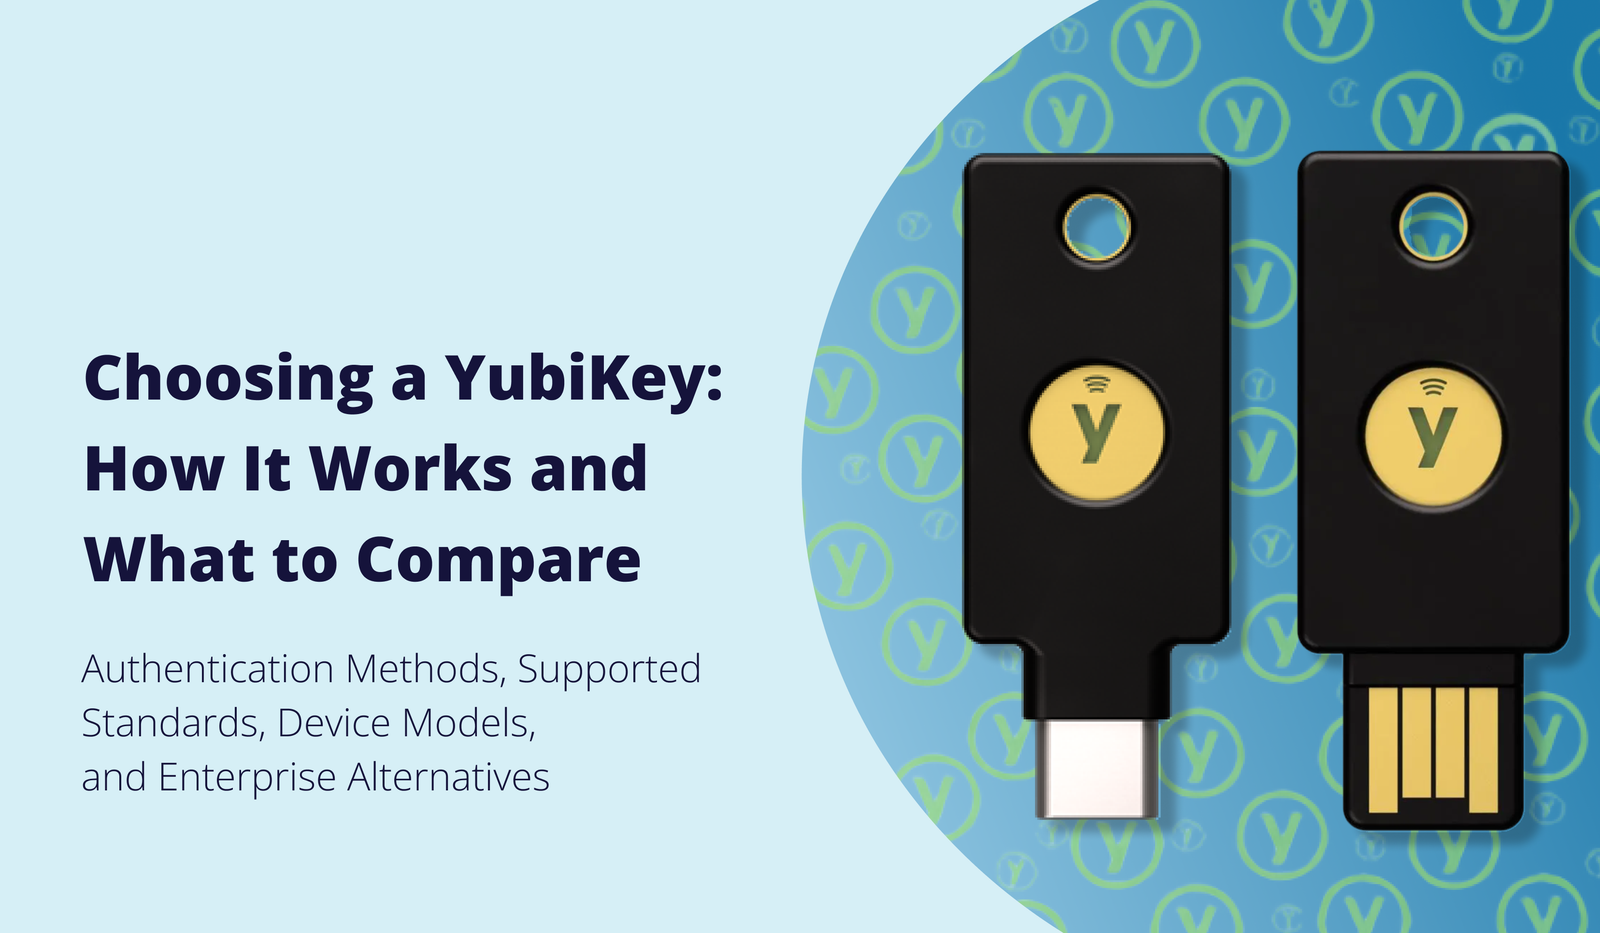
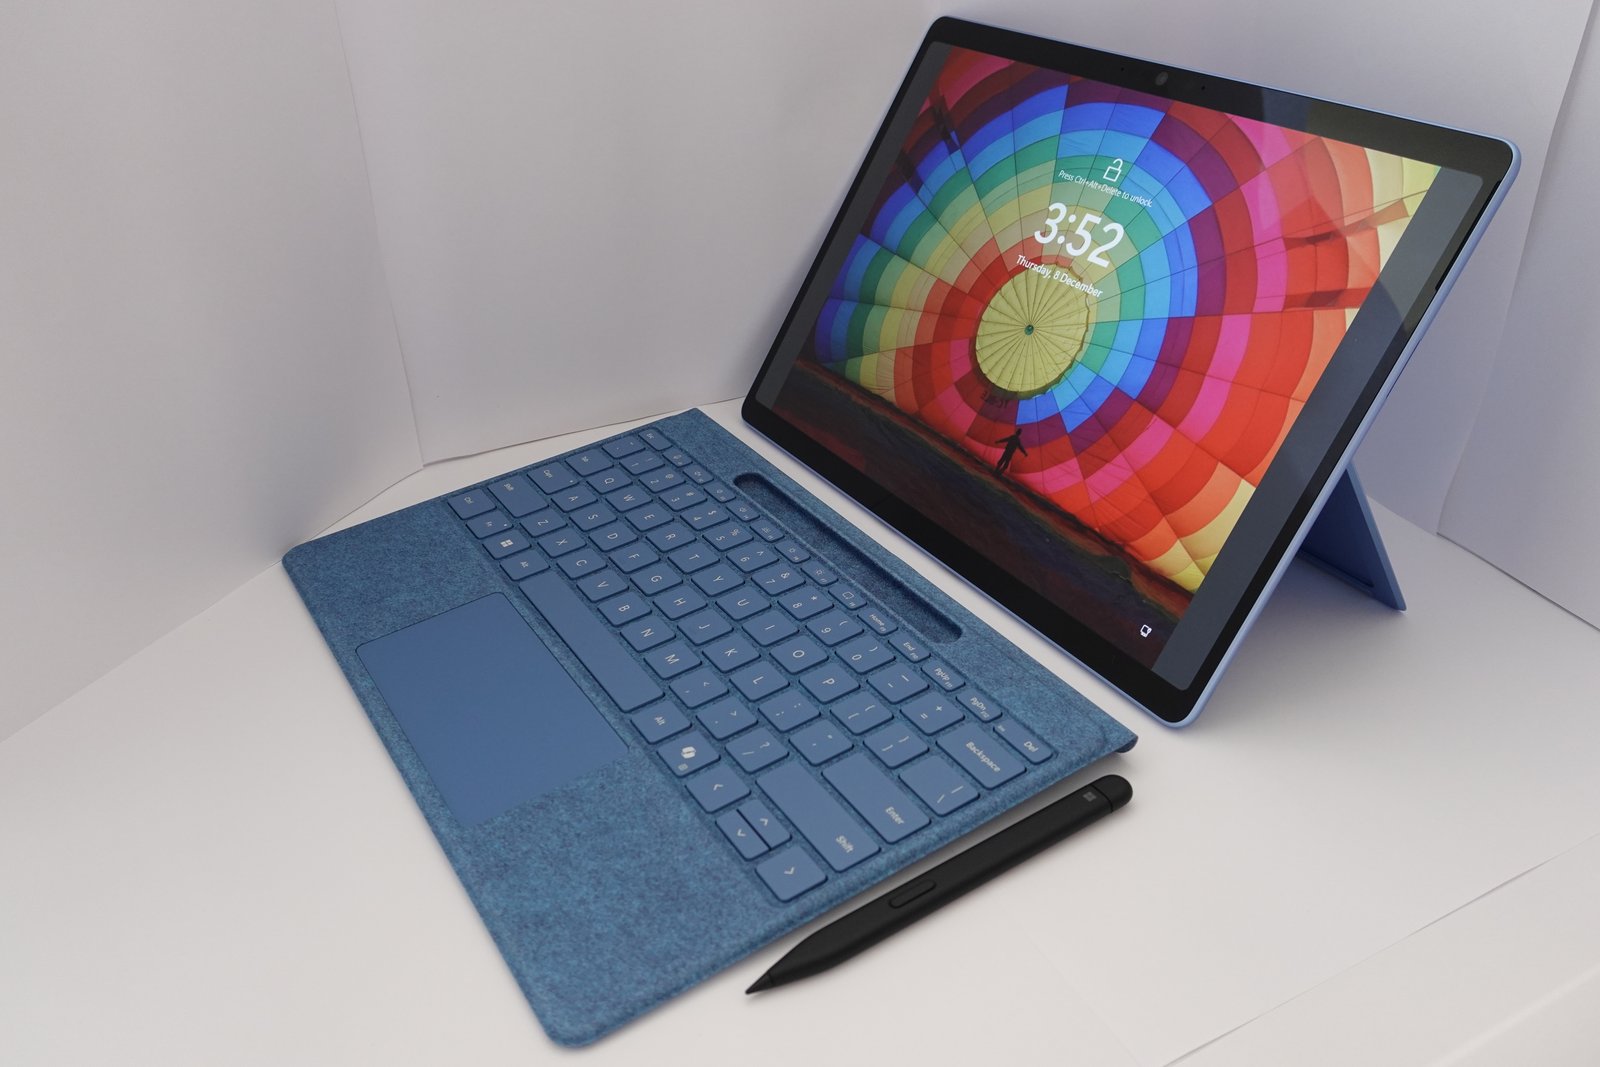
    Hardware security key used as a strong second authentication factor
    Computer sign-in screen used with a password manager
    Smartphone biometric authentication protecting access to saved passwords
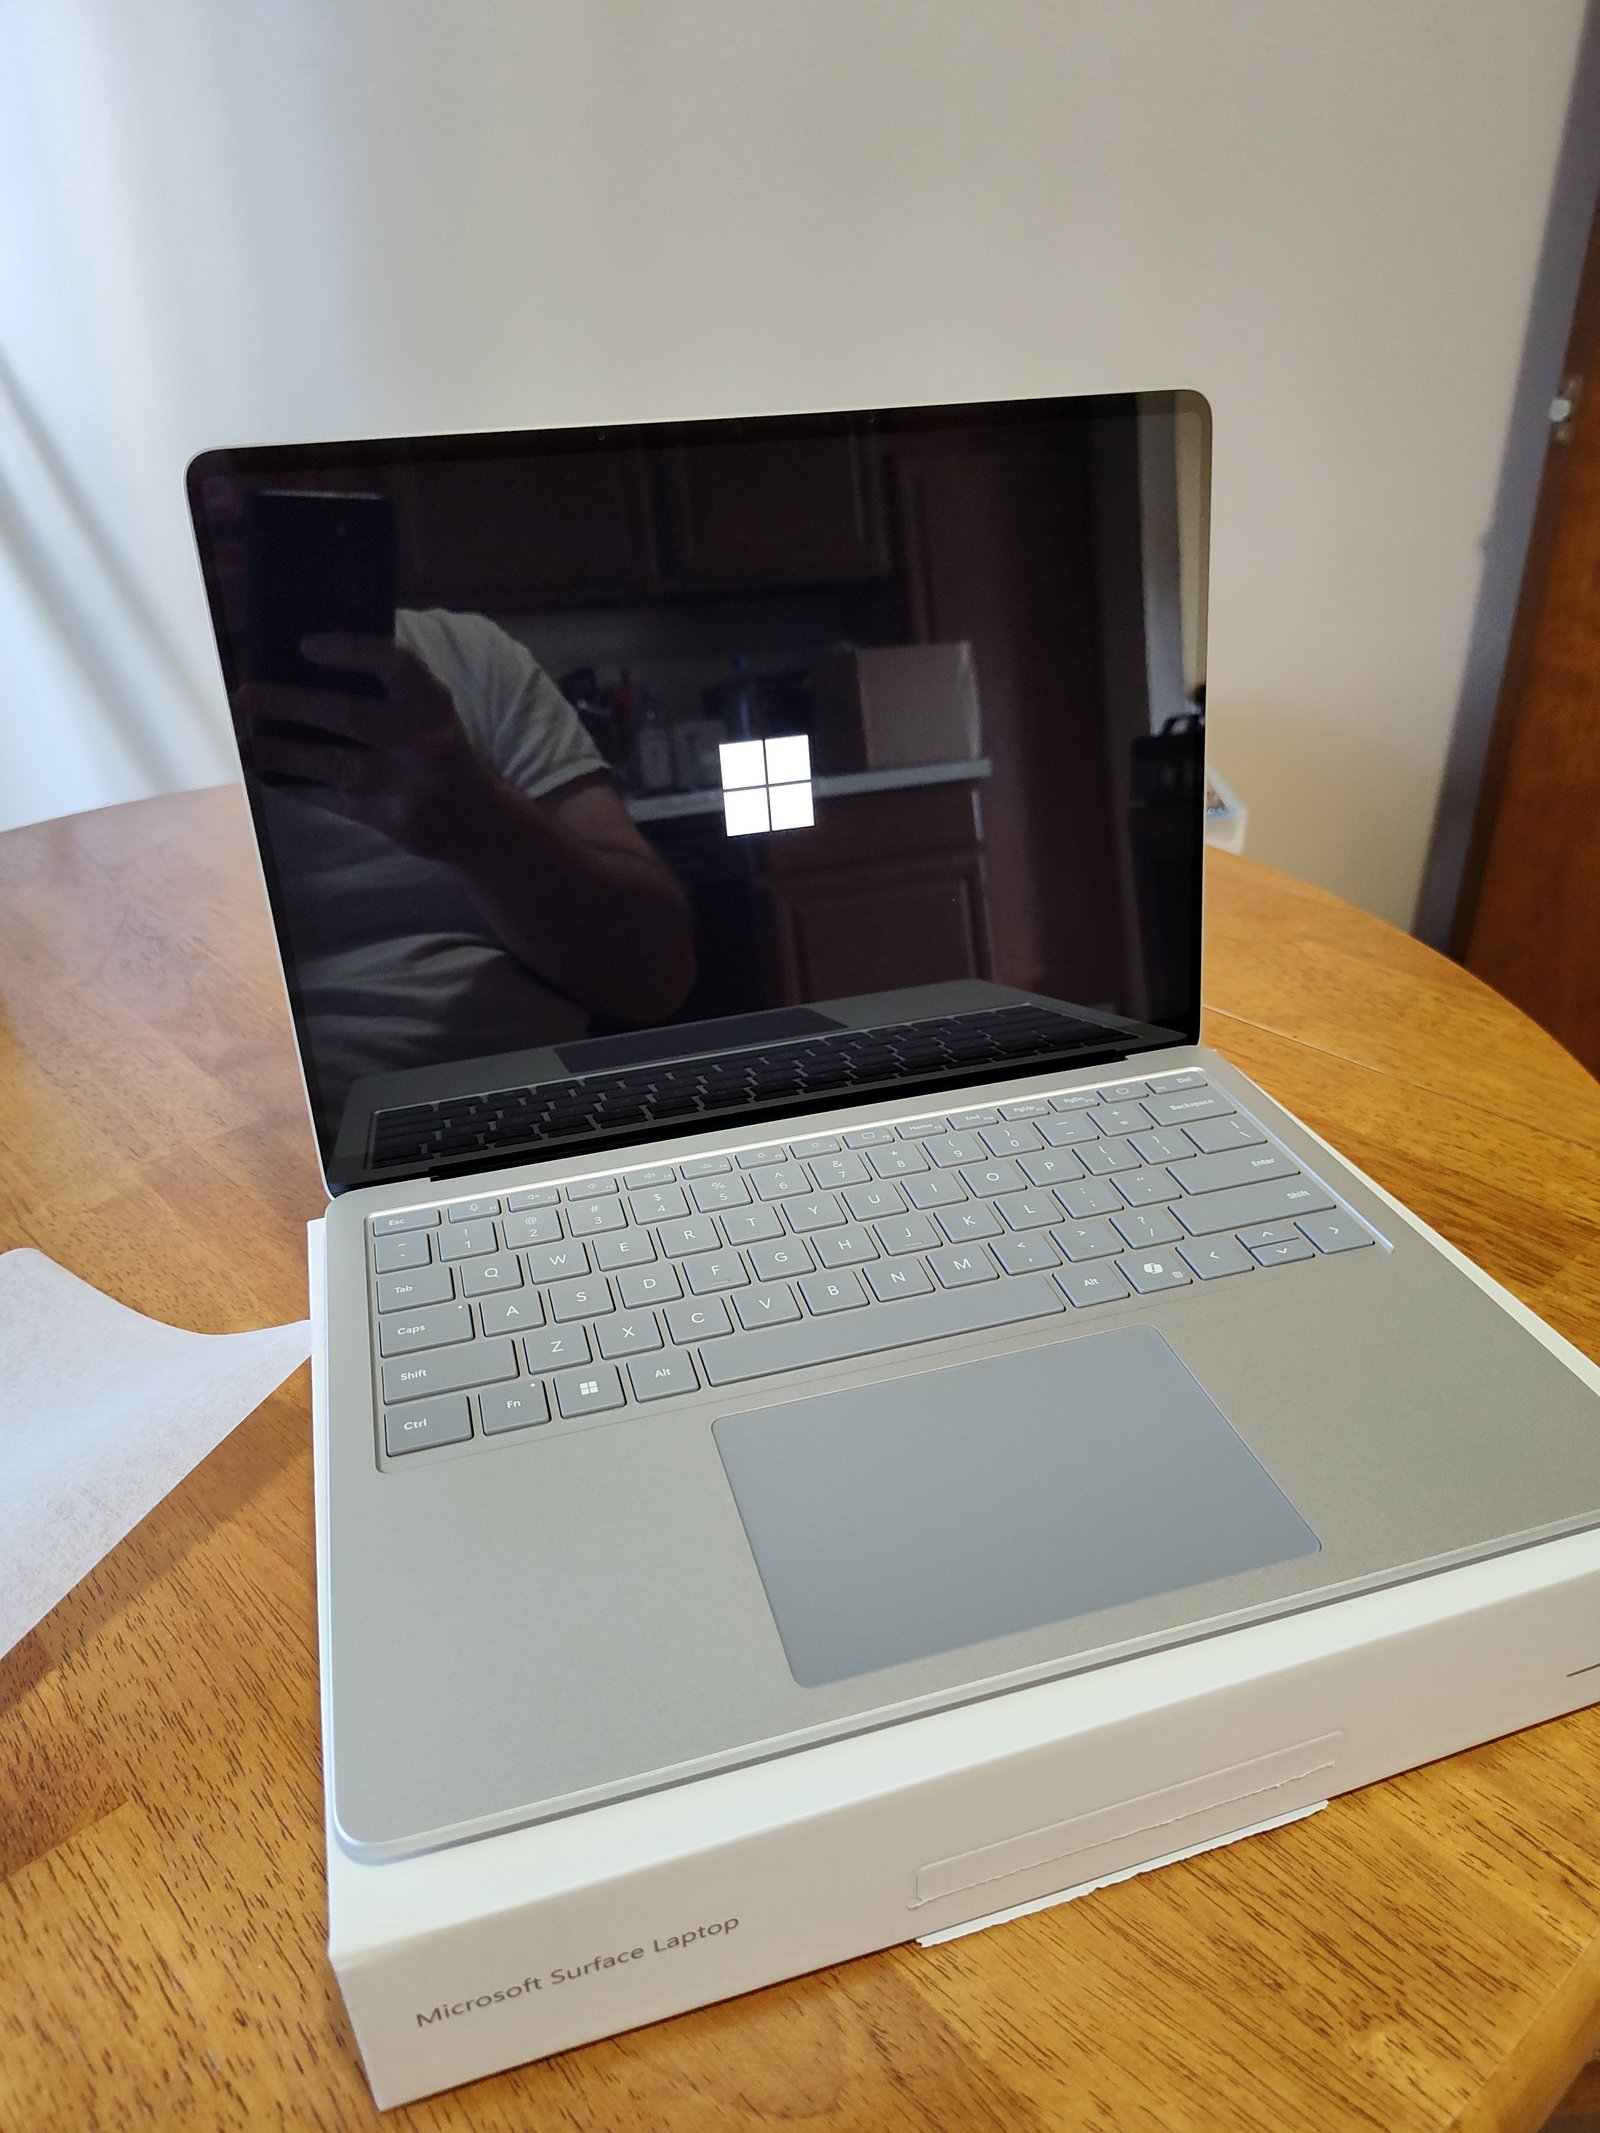
    Laptop security setup for protecting password manager accounts
  • Cloud Storage vs Backup: How to Protect Your Files Without Losing Them

    Cloud Storage vs Backup: How to Protect Your Files Without Losing Them

    Saving a file in the cloud feels like a backup, but the two are not always the same thing. If a synced file is deleted, corrupted, encrypted by ransomware, or overwritten, that change can sometimes sync to every connected device. Cloud storage is useful, but relying on one synced folder as your only protection can leave you exposed.

    A safer system combines convenient cloud access with independent backups. This guide explains cloud storage vs backup in plain English, how syncing differs from backup, when external drives still matter, and how to build a practical file-protection plan without turning your home or office into a data center.

    What cloud storage is designed to do

    Cloud storage keeps files on remote servers and makes them available across devices. Services such as Google Drive, Microsoft OneDrive, iCloud, and Dropbox are built around access, synchronization, sharing, and collaboration.

    That makes cloud storage excellent for documents you edit on several devices, files you share with coworkers, and photos you want available from anywhere.

    Sync is the key word

    When a folder is synchronized, changes on one device can be copied to the cloud and then to other devices. If you rename a file, the new name appears elsewhere. If you edit the file, the edited version may replace the old one. If you delete it, the deletion may also sync.

    This behavior is convenient, but it explains why sync alone is not the same as a separate backup.

    What a backup is designed to do

    A backup creates another copy of your data so you can recover after something goes wrong. A good backup system keeps copies separate enough that one mistake or failure does not destroy every version at once.

    Backups are useful after hardware failure, accidental deletion, malware, theft, file corruption, failed software updates, and human error.

    Version history is a major advantage

    Many backup systems keep older versions. If a spreadsheet becomes corrupted today, you may be able to restore yesterday’s copy. Cloud-storage services also offer version history and trash recovery in many cases, but the rules and retention periods vary.

    Do not assume a service keeps deleted or older files forever. Check its official policy.

    Why one cloud account is not enough protection

    Imagine your laptop automatically syncs its Documents folder to a cloud service. One day, malware encrypts the local files. If the encrypted versions sync, the cloud copy may also be affected. Version history could save you, but only if the service retained a clean version and you know how to restore it.

    Another risk is account loss. If you lose access to the cloud account because of a compromised email address, failed recovery, or an account policy issue, your only copy may become difficult to reach.

    Use independent failure paths

    The goal is to avoid a situation where one password, one device, one sync action, or one provider controls every copy of an important file.

    Understand the 3-2-1 backup strategy

    A widely used backup principle is called 3-2-1. Keep three copies of important data, on two different types of storage, with one copy stored separately from the main location.

    For a home user, that could mean the working copy on a laptop, a backup on an external drive, and another protected copy in a cloud backup service. For a small business, it could mean local production data, a network or external backup, and an off-site backup.

    You do not need three expensive systems

    The idea is resilience, not complexity. A simple external drive plus a reputable cloud backup can provide far more protection than keeping every file only on a laptop and one sync folder.

    Decide which files are truly important

    Backing up everything may be unnecessary. Start with files that would be difficult, expensive, or impossible to replace.

    High-priority personal files

    Family photos and videos, tax records, identity documents, school work, creative projects, important email archives, password recovery information, and personal financial records are common priorities.

    High-priority work files

    Client documents, contracts, accounting records, source files, project assets, website backups, customer data where legally allowed, internal procedures, and original research may need stronger protection and access controls.

    Keep confidential material encrypted and follow your organization’s retention and privacy requirements.

    Separate working files from archive files

    Working files change often. Archive files change rarely but may need to be kept for years. Treating both the same can waste storage and make recovery harder.

    For example, a video editor may keep current project files on fast local storage with frequent backup, while finished projects are moved to lower-cost archival storage with additional copies.

    Use cloud sync for convenience

    Cloud sync is ideal when you want the same documents on a phone, laptop, and desktop. It also supports easy collaboration.

    Best uses for sync

    Current documents, shared team folders, travel files, notes, presentations, and files that need frequent access are good candidates.

    Before sharing folders, check permissions. A link set to “anyone with the link” is very different from access limited to specific people.

    Use a true backup system for recovery

    A dedicated backup tool normally runs on a schedule and copies selected data to another destination. It may keep historical versions and allow full-device recovery.

    On Windows, Microsoft Support documents built-in recovery and backup features. Apple provides Time Machine for Mac backups. Third-party backup services can add off-site protection.

    Automate the routine

    A backup that depends on remembering to drag folders onto a drive every Friday will eventually be forgotten. Schedule automatic backups wherever possible.

    External drives still have an important role

    External SSDs and hard drives provide fast local recovery and do not require internet access. They can also be cost-effective for large photo and video libraries.

    Do not leave the only backup drive connected forever

    If ransomware can access an always-connected drive, the backup may also be damaged. Consider rotating drives or disconnecting a backup drive after a completed backup if your workflow allows it.

    For critical data, one local backup and one off-site backup are stronger than two drives sitting next to the same computer.

    Choose SSD or hard drive based on the job

    SSDs are fast, quiet, and resistant to mechanical shock. Traditional hard drives can provide more capacity per unit of cost for large archives.

    For a frequently carried portable backup, an SSD may be convenient. For a large stationary archive, a hard drive can be practical. Either type can fail, which is why a single external drive should never be the only copy of irreplaceable data.

    Protect backups with encryption

    A backup can contain more sensitive data than your normal working folders because it may include years of documents. Encrypt portable drives and cloud backups when supported.

    Protect the encryption recovery key

    Encryption is only useful if you can recover access. Store recovery keys in a secure place separate from the encrypted device. Do not rely on memory alone.

    Use strong account security for cloud services

    Cloud storage depends on account security. Use a unique password or passkey, enable multi-factor authentication, and protect the email account used for recovery.

    Review active sessions and connected devices periodically. Remove devices you no longer own.

    Do not confuse “available offline” with “backed up”

    Some cloud apps let you mark files for offline access. This creates a local cached copy, but it is still part of the sync system. Changes may propagate between copies.

    An independent backup should be recoverable even if the sync state becomes wrong.

    Understand cloud version history

    Version history can rescue a document after an accidental edit or overwrite. Different services keep versions for different periods and may apply limits based on plan type.

    Test version recovery before you need it

    Create a test document, edit it several times, and practice restoring an older version. Also check how deleted files are recovered from trash.

    Knowing the process in advance is far easier than learning it during an emergency.

    Back up your smartphone photos deliberately

    Phones often contain the only copy of important family photos. Enable a trusted photo-backup or sync service, but understand whether deleting a photo from one device deletes it everywhere.

    Create a second photo archive for irreplaceable media

    For important photos and videos, periodically export a copy to a computer or external drive. This protects against account problems and accidental bulk deletion.

    Do not forget messaging and app data

    Not every app stores data in the same cloud folder. Messaging history, authentication apps, notes, game saves, and app-specific databases may need separate backup settings.

    Before replacing or resetting a phone, review the backup instructions for apps that contain important data.

    Back up websites before major changes

    Website owners should back up both files and databases before plugin updates, theme changes, migrations, or major edits.

    A complete website backup includes more than images

    For a WordPress site, a useful recovery copy normally includes the database, uploads, themes, plugins, and configuration. A backup stored only on the same hosting account may not protect against a hosting failure or account compromise.

    Use separate credentials for backup administration where practical

    In a business environment, an attacker who gains one administrator account should not automatically gain the ability to delete every backup.

    Where supported, separate backup administration from normal user access and enable alerts for suspicious backup deletion or account changes.

    Ransomware changes what “good backup” means

    Ransomware can encrypt files and sometimes target connected backups. A resilient system should keep at least one copy that cannot be immediately altered by the compromised computer.

    Consider immutable or protected backups for critical business data

    Some business backup platforms offer retention locks or immutable storage. These features can prevent normal accounts from immediately changing or deleting backup data. They are more important for organizations than for a typical home user, but the principle is useful: one clean copy should be isolated from the incident.

    Test restore, not just backup

    A backup is valuable only if you can restore from it. Failed backup jobs, missing folders, expired credentials, and corrupted archives can go unnoticed for months.

    Run a small restore test

    Every few months, restore a sample folder to a temporary location. Open several files. Confirm that dates, file names, and permissions look correct.

    For a business, document the restore process and identify who is responsible during an incident.

    Watch storage limits and failed jobs

    Backups can silently stop when an external drive fills up, a cloud subscription expires, a password changes, or software loses permission to a folder.

    Enable notifications for backup failures. Check status occasionally instead of assuming automation is working.

    Use a practical home backup setup

    External hard drive used in a practical home backup setup

    A simple home setup can be effective. Keep active files on the computer. Sync current documents and photos to a trusted cloud service. Run an automatic backup to an external drive. Keep another off-site copy for irreplaceable files.

    Example: family photo library

    Suppose your family photos are on a laptop and phone. Enable photo syncing to a cloud account, back up the laptop to an external drive each week, and keep another copy of the full photo archive on a second drive stored elsewhere. If the laptop fails, you have local recovery. If the house is affected by theft or fire, the off-site copy still exists.

    Use a practical small-business setup

    A small business may use Microsoft 365 or Google Workspace for collaboration, but it should still decide how business-critical data is backed up and retained.

    Map where data lives: user laptops, shared cloud drives, accounting platforms, websites, customer systems, and email. Then document which system protects each location and how long versions are kept.

    Assign responsibility

    Someone should own backup checks. If everyone assumes the cloud provider handles everything, gaps can remain unnoticed.

    What not to do

    Do not keep the only backup on the same computer. Do not assume sync is permanent history. Do not store every copy under one account with weak security. Do not leave confidential backups unencrypted on portable drives. Do not wait for a hard drive failure before testing recovery.

    A monthly backup checklist

    Check that scheduled jobs completed. Confirm the backup destination has free space. Review cloud-account security. Test one restore. Verify that new important folders are included. Check whether any old device still has access. Review retention settings after plan changes.

    How to decide what deserves more protection

    Ask two questions: how difficult would this file be to recreate, and how harmful would its loss be? A downloaded movie can be replaced. Ten years of family photos may not be replaceable. A public brochure is low risk. A customer database may require both protection and strict privacy controls.

    Spend the most backup effort on data with the highest replacement cost or business impact.

    Conclusion

    Cloud storage and backup solve related but different problems. Cloud storage gives you convenient access, sync, and collaboration. Backup gives you a recovery path when a device fails, a file is deleted, malware strikes, or a synced change goes wrong.

    Use both when the files matter. Keep more than one copy, use different storage locations, protect cloud accounts with strong authentication, encrypt sensitive backups, automate the process, and test restores.

    You do not need a complicated system. You need independent copies that still exist when the most convenient copy disappears.

  • VPN vs Proxy vs Private DNS: What Each Tool Changes and Which One You Actually Need

    VPN vs Proxy vs Private DNS: What Each Tool Changes and Which One You Actually Need

    VPNs, proxies, and private DNS are often grouped together as privacy tools, but they work at different layers. A VPN can route most device traffic through another network. A proxy usually handles traffic for a specific app or protocol. Private DNS changes how domain names are resolved and can add encryption or filtering, but it does not replace a VPN.

    Security controls illustrating the encryption and privacy differences between VPNs proxies and private DNS
    A VPN can protect traffic between your device and the VPN service, while a proxy usually handles selected application traffic and private DNS changes only DNS resolution. Match the tool to the problem instead of assuming all three provide the same privacy boundary.

    This guide explains the differences in plain English. The goal is to help you choose the right tool for normal privacy, travel, public Wi-Fi, content filtering, testing, and network troubleshooting without assuming one tool solves every problem.

    Start with the question you are trying to answer

    Before choosing a tool, decide what you actually want to change. Do you want to encrypt traffic on public Wi-Fi? Route one browser through another IP address? Block known malicious domains? Keep DNS queries away from an untrusted network? Access a company network from home?

    Each goal points to a different solution.

    Do not buy a privacy label

    Choose based on behavior. Marketing terms such as secure, private, anonymous, or protected can hide important technical differences.

    What a VPN does

    A virtual private network creates an encrypted tunnel between your device and a VPN server. Traffic that uses the tunnel exits to the internet from the VPN server.

    This can hide your normal public IP address from websites and protect traffic from local network observers, depending on the protocol and setup.

    The VPN provider becomes part of the trust model

    Your internet provider sees a connection to the VPN. The VPN provider may be able to observe metadata and, for unencrypted traffic, potentially more. Choose a provider carefully.

    What a proxy does

    A proxy sits between an application and the destination service. The application sends traffic to the proxy, and the proxy sends it onward.

    HTTP proxies handle web-style traffic. SOCKS proxies can handle a broader range of application traffic.

    Proxy scope is often narrower

    A browser can use a proxy while other apps continue using the normal connection.

    What private DNS does

    DNS converts domain names such as example.com into IP addresses. Traditional DNS queries may be visible to the local network or internet provider.

    Encrypted DNS technologies such as DNS over HTTPS and DNS over TLS can protect the DNS lookup from simple local observation.

    Private DNS does not route all traffic

    After the DNS lookup, your device still connects to the destination normally unless another tool changes the route.

    What websites can see with a normal connection

    Without a VPN or proxy, a website normally sees the public IP address used by your network.

    It may also collect cookies, account identity, browser characteristics, screen size, language, and other signals.

    IP address is only one identifier

    Changing the IP does not automatically make a logged-in account anonymous.

    What websites see with a VPN

    A website normally sees the VPN server’s public IP instead of your home or mobile public IP.

    If you log into an account, the service still knows the account identity.

    VPNs change routing, not your entire digital identity

    Cookies, browser fingerprinting, account sessions, and behavior can still link activity.

    What websites see with a proxy

    If the application is correctly configured, the destination may see the proxy server’s IP.

    Other apps that are not using the proxy continue to use the normal network route.

    What websites see with private DNS

    Private DNS usually does not change the public IP address seen by the website.

    It changes how the domain lookup is handled.

    Public Wi-Fi use case

    On a café, airport, or hotel Wi-Fi network, HTTPS already encrypts the content of most modern web traffic.

    A VPN can add another encrypted layer between your device and the VPN server, reducing what the local network can observe about destinations and traffic.

    Keep the device secure too

    A VPN does not protect against malware, fake login pages, weak passwords, or compromised accounts.

    Remote work use case

    Companies often use VPNs to connect employees to internal systems that are not exposed to the public internet.

    This is different from using a consumer VPN for general browsing.

    Follow the company configuration

    Do not replace a business VPN with a random consumer provider if the company requires a specific client or security policy.

    Travel use case

    A VPN can provide a consistent network route when moving between hotels, airports, and mobile networks.

    It can also help protect traffic on untrusted local networks.

    Local laws and service rules still apply

    Network tools do not override legal restrictions or provider terms.

    Browser testing use case

    Web developers and site owners sometimes use proxies to test how a site behaves from a different network path or with a separate session.

    A proxy is useful because only the test browser may need the alternate route.

    Use authorized testing

    Testing should target systems you own or are permitted to assess.

    App-specific routing

    A proxy can be useful when one application needs a different route but the rest of the device should stay unchanged.

    Some VPN clients also offer split tunneling, which provides a similar control at a different layer.

    Split tunneling

    Split tunneling lets selected apps or destinations bypass the VPN or use the VPN while others use the normal connection.

    This can improve speed and compatibility.

    Split tunneling reduces full-device coverage

    Make sure sensitive apps are not accidentally excluded.

    DNS filtering

    Private DNS providers can block known malicious, tracking, or adult domains depending on the service.

    This is useful for families, schools, or basic security filtering.

    DNS blocking is not perfect

    Apps can use hard-coded IP addresses, their own DNS, or encrypted connections that bypass simple filtering.

    Malware protection limits

    A VPN can encrypt traffic but cannot guarantee that a downloaded file is safe.

    A proxy can route traffic but does not replace antivirus or operating-system security.

    DNS filtering can block known bad domains but cannot inspect every file.

    Encryption differences

    A VPN encrypts the tunnel between your device and the VPN server. HTTPS encrypts web traffic between the browser and website. Encrypted DNS protects DNS lookups between the device and DNS resolver.

    These protections can exist at the same time.

    Layers can complement each other

    Using HTTPS over a VPN is normal. The website still receives an HTTPS connection after traffic leaves the VPN server.

    Free VPN risks

    Running VPN infrastructure costs money. A free service needs another business model.

    Review limits, advertising, data policies, ownership, security history, and paid upgrade model.

    Free is not automatically unsafe

    Some reputable companies offer limited free tiers, but the trust question still matters.

    Free proxy risks

    Public proxies can be unstable, slow, misconfigured, or operated by unknown parties.

    Do not send sensitive unencrypted traffic through an untrusted proxy.

    Unknown infrastructure deserves low trust

    For business, banking, or private accounts, use trusted networks and encrypted protocols.

    Choose VPN protocols carefully

    Modern VPN services may use WireGuard, OpenVPN, IKEv2, or proprietary protocols.

    Look for current security documentation and broad platform support.

    Do not choose only by protocol name

    Implementation, key handling, client security, and provider operations matter too.

    VPN logging policies

    Providers may describe no-logs, minimal logs, connection logs, diagnostics, or analytics.

    Read the actual privacy policy and independent audit information where available.

    Marketing summaries are not the full policy

    Look for retention periods and which metadata is collected.

    DNS provider trust

    Changing DNS moves trust from the default resolver to another provider.

    Providers such as Cloudflare and Google Public DNS publish technical and privacy information.

    Review policies before switching

    Private DNS can improve transport privacy, but the resolver still processes your DNS queries.

    VPN speed

    VPNs add encryption and another network hop. Speed can be lower than the direct connection.

    Distance to the server, protocol, server load, local network quality, and ISP routing all matter.

    Test more than download speed

    Check latency, video calls, uploads, gaming, and app reliability.

    Proxy speed

    Proxy performance depends heavily on server quality and distance.

    Public proxies can disappear without warning.

    DNS speed

    A fast DNS resolver can reduce lookup delay slightly, but it does not increase the bandwidth of the internet connection.

    DNS is only one small part of page loading

    Server response time, images, scripts, and network latency usually matter more.

    VPN and streaming

    Streaming services may use region licensing and detect or restrict certain VPN routes.

    Availability changes frequently.

    Check service terms

    Do not assume a VPN guarantees access to content from another region.

    VPN and banking

    Banks may flag unusual IP locations as suspicious.

    If login problems occur, use a normal trusted connection or a consistent VPN server.

    Security alerts can be legitimate

    A new network path can trigger fraud systems even when the user is genuine.

    Proxy authentication

    Private proxies may use username-password authentication or IP allowlists.

    Protect proxy credentials like other service credentials.

    DNS on phones

    Android supports system-level private DNS in many versions. iOS can use encrypted DNS through profiles or supported apps.

    The exact setup depends on the operating system.

    DNS in browsers

    Browsers may have their own secure DNS setting.

    This can create a different resolver choice from the operating system.

    Know which layer controls the request

    Troubleshooting becomes easier when you know whether DNS is configured in the browser, device, router, or VPN client.

    Router-level configuration

    A router can provide VPN or DNS settings for many devices.

    This is useful for smart TVs and other devices that do not support custom networking tools.

    Router performance can be a limit

    Older routers may not handle VPN encryption at full connection speed.

    Kill switch feature

    A VPN kill switch can block network traffic if the VPN tunnel fails.

    This is useful when you do not want traffic to fall back to the normal connection.

    Test the feature

    Disconnect the VPN and confirm the expected behavior before relying on it.

    DNS leak tests

    A VPN may intend to use its own DNS resolver. Misconfiguration can send DNS requests elsewhere.

    Use reputable diagnostic tools if DNS routing matters to your privacy model.

    IPv6 considerations

    A VPN or proxy setup must handle IPv6 correctly if the network uses it.

    Incomplete support can create unexpected routing.

    Modern clients should manage both protocols

    Use up-to-date software and test your connection.

    WebRTC and browsers

    Browser real-time communication features can expose network information in some configurations.

    Modern browsers and VPN clients have improved handling, but privacy-sensitive users should keep software current.

    Do not stack tools without a reason

    Using a VPN plus multiple proxies plus custom DNS can make troubleshooting difficult and may not improve privacy.

    Each extra layer adds a new service to trust.

    Simple is easier to verify

    Use the fewest tools needed for the actual goal.

    Which tool for public Wi-Fi?

    Use HTTPS and a trusted VPN if you want additional protection from the local network.

    Keep the device firewall, browser, and operating system updated.

    Which tool for one browser only?

    A trusted proxy can route only that browser. A separate browser profile can keep sessions distinct.

    Which tool for DNS privacy and filtering?

    Encrypted private DNS is the simplest option when your goal is domain lookup privacy or category filtering.

    Which tool for company resources?

    Use the employer’s approved VPN or zero-trust access solution.

    Which tool for full-device IP routing?

    A VPN is usually the general-purpose choice.

    Common mistakes

    Thinking private DNS changes your public IP, assuming a proxy encrypts all traffic, trusting unknown free infrastructure, forgetting split-tunnel exclusions, and treating a VPN as complete anonymity are common mistakes.

    Practical checklist

    Define the goal. Choose the correct layer. Use trusted providers. Keep software updated. Use HTTPS. Protect credentials. Review logging policies. Test routing and kill switch behavior. Keep the setup simple. Do not assume IP changes remove cookies or account identity.

    Conclusion

    A VPN, proxy, and private DNS solve different network problems. A VPN changes the route for broad device traffic and adds an encrypted tunnel. A proxy usually routes selected application traffic. Private DNS protects or changes domain-name resolution.

    Choose based on the problem instead of the label. For public Wi-Fi and full-device routing, a VPN can be useful. For one app, a proxy may be simpler. For DNS privacy or filtering, private DNS may be enough.

    None of these tools replaces secure accounts, updated software, HTTPS, careful permissions, or good judgment.

    Laptop used to verify VPN proxy and DNS provider settings
    Check the provider’s protocol support, privacy policy, logging statements, account security, and platform documentation before installing network software.
    Comparison notes used to choose between a VPN proxy and private DNS
    Write down whether you need IP masking, encrypted transport, application-specific routing, content filtering, or only safer DNS resolution. The answer usually makes the right tool obvious.
    Smartphone using mobile network privacy and DNS settings
    On mobile devices, test the setup on both Wi-Fi and cellular data so you know which connections are actually covered.
  • How to Evaluate Open-Source Software Before You Install It: Security, Maintenance, License, and Trust

    How to Evaluate Open-Source Software Before You Install It: Security, Maintenance, License, and Trust

    Open-source software can be excellent. It powers operating systems, browsers, servers, developer tools, databases, creative apps, and thousands of everyday utilities. The source code is available for inspection, but that does not automatically mean every open-source project is safe, actively maintained, or suitable for important work.

    Security review used before installing open-source software
    Start with the project’s own repository and release history. Check whether releases are recent, whether maintainers respond to security reports, and whether issues receive useful answers. A large star count or download number can show popularity, but it does not prove active maintenance. The stronger signal is a project that publishes fixes, documents changes, and gives users a clear path for reporting vulnerabilities.

    This guide explains how to evaluate an open-source app before you install it. You do not need to be a programmer. Most of the useful checks involve project activity, release history, security practices, documentation, license, download source, and community signals.

    Start with the exact problem you need to solve

    Do not install a tool because it is popular or because a social post says it is “better than everything else.” Define the job first.

    You may need a PDF editor, media player, password manager, note app, backup tool, image editor, or command-line utility. The clearer the requirement, the easier it is to avoid unnecessary software.

    Prefer the smallest tool that meets the need

    A simple image resizer does not need a large application with dozens of plugins and background services.

    Find the official project page

    Open-source tools may be distributed through a project website, GitHub, GitLab, package manager, app store, or Linux repository.

    Start from the official project source. Avoid download mirrors that add installers, ads, wrappers, or bundled software.

    Verify the project identity

    Popular projects can have copycats with similar names. Check the maintainer name, official domain, repository links, and documentation.

    Look at recent releases

    A healthy project usually shows some evidence of maintenance. That does not mean it needs a release every week.

    Check the date of the latest stable release, release notes, and whether serious bugs are being fixed.

    Old software is not automatically unsafe

    A mature utility may be stable and require few updates. The concern is whether the project still responds when security or compatibility problems appear.

    Check commit activity carefully

    Repository activity can show whether development continues.

    Do not judge only by the number of commits. One meaningful monthly update can matter more than hundreds of automated changes.

    Look for human maintenance

    Read recent commits, pull requests, and issue responses. A project maintained only by bots may still be active, but you want evidence that people are reviewing important changes.

    Review open issues

    Every active project has bugs. A large issue count is not automatically bad.

    Look at whether maintainers respond, label reports, close duplicates, and explain known limitations.

    Read a few recent issue threads

    They reveal how the team handles crashes, security reports, compatibility problems, and user questions.

    Check how the project handles security

    Responsible projects often publish a SECURITY file, security contact, disclosure process, or advisory history.

    Look for instructions that tell researchers where to report vulnerabilities privately.

    No security page is not automatic proof of danger

    Small projects may have limited resources, but security-sensitive software deserves stronger expectations.

    Search for known vulnerabilities

    Search the project name with terms such as vulnerability, CVE, advisory, breach, malware, or security issue.

    Then check the context. A vulnerability that was fixed quickly is different from one ignored for years.

    Security history can be a positive signal

    A transparent advisory with a clear fix shows that the project has a process for handling problems.

    Review the release source

    Prefer downloads linked from the official repository or project domain.

    For Linux, established distribution repositories and trusted package managers can provide an additional review layer.

    Be careful with third-party builds

    A package compiled by someone else may not match the official source.

    Check digital signatures or hashes

    Some projects publish checksums or signed releases.

    A checksum lets you verify that the downloaded file matches the expected file. A digital signature can also help confirm publisher authenticity.

    Verification matters most for high-risk tools

    Operating-system images, security tools, wallets, backup software, and administrative utilities deserve extra care.

    Read installation instructions first

    A trustworthy project should explain how to install, update, and remove the software.

    Be cautious if the instructions require running a long shell command from an unknown website without explanation.

    Understand commands before running them

    A one-line installer can download and execute additional scripts with your user permissions.

    Check requested privileges

    Ask whether the app really needs administrator or root access.

    A system backup tool may need broad file access. A simple note editor usually does not.

    Least privilege applies to open source too

    Source availability does not make broad permissions harmless.

    Review dependencies

    Modern software depends on libraries and frameworks maintained by other projects.

    A small application can indirectly include hundreds of packages.

    Dependency risk is part of project risk

    Look for lockfiles, automated update tools, security scans, and active dependency maintenance.

    Be cautious with abandoned dependencies

    A main project may look active while relying on old libraries with known issues.

    Security-sensitive software should keep its dependency chain current.

    Check the license

    Open source is not one license. Common licenses include MIT, Apache License 2.0, GPL, LGPL, BSD, MPL, and others.

    The license affects how you may use, modify, distribute, or combine the software.

    Business use deserves legal review when needed

    If you plan to redistribute software inside a commercial product, check license obligations carefully.

    Check whether the license file matches the repository

    A clear project should include a license file and consistent licensing information.

    If the repository claims to be open source but provides no license, legal reuse may be unclear.

    Review documentation quality

    Good documentation is a practical trust signal.

    Look for installation instructions, configuration examples, troubleshooting, upgrade notes, and known limitations.

    Poor documentation increases operational risk

    A technically strong app can still be a bad choice for a team if nobody understands how to maintain it.

    Check supported operating systems

    Make sure the current release supports your Windows, macOS, Linux, Android, or other platform version.

    Old compatibility information can lead to crashes or insecure workarounds.

    Review the update mechanism

    Does the app update automatically? Does it notify you? Do you update through a package manager? Must you manually download every release?

    A secure app that never gets updated on your device eventually becomes a problem.

    Check data storage

    Find out where the app stores settings, documents, databases, caches, and logs.

    This matters for backup, privacy, migration, and uninstallation.

    Local does not always mean private

    An open-source desktop app may still connect to cloud services, analytics, update servers, or third-party APIs.

    Review network behavior

    If privacy matters, read the documentation for telemetry and external connections.

    Advanced users can inspect network requests, but ordinary users can still review settings and privacy documentation.

    Look at funding and governance

    Projects can be maintained by volunteers, companies, foundations, universities, or mixed communities.

    None of these models is automatically better. You want to understand who makes decisions and whether the project has enough resources to continue.

    Sustainability matters for business use

    A critical tool maintained by one exhausted volunteer creates a different risk from a project with several active maintainers.

    Check the bus factor

    The bus factor is an informal measure of how dependent a project is on one person.

    If only one maintainer understands everything, future support may be fragile.

    Look for a code of conduct and contribution guide

    These documents are not security guarantees, but they show that the project has thought about community participation.

    Clear contribution rules can improve review quality.

    Review pull requests

    Look at whether code changes receive review before merging.

    A project where one person directly pushes every change can still be legitimate, but peer review provides another layer.

    Check automated testing

    Continuous integration badges, test workflows, and release checks show that the project tests changes automatically.

    Tests do not prove the absence of bugs, but they reduce accidental breakage.

    Look at release notes

    Release notes should explain bug fixes, security changes, new features, and breaking changes.

    This helps users decide when and how to update.

    Test in a safe environment

    For unfamiliar software, start on a non-critical device, virtual machine, test account, or backup copy of your data.

    Do not make a new utility the only tool holding important files on day one.

    Use a sample dataset

    If you are testing a backup or conversion tool, use copies first.

    Scan downloads

    Use your operating system’s security tools and trusted malware scanning.

    Be cautious when antivirus engines disagree, and investigate before bypassing warnings.

    Check application reputation

    Search for independent reviews and community discussions.

    Community reports can reveal bugs, confusing updates, or installation problems not obvious from the official site.

    Separate opinion from evidence

    One angry review does not prove malware. Look for repeated, technically specific reports.

    Use established alternatives when the risk is high

    If two tools do the same job and one has a long track record, active maintainers, strong documentation, and signed releases, it may be the safer choice.

    Novelty is not a benefit by itself.

    Do not confuse stars with security

    Repository stars measure attention, not code quality.

    A popular project can still have security problems. A small project can be excellent.

    Be careful with forks

    A fork can be a healthy continuation of an abandoned project or an untrusted modified copy.

    Understand why the fork exists and who maintains it.

    Check project ownership changes

    A trusted package can become risky after being sold or transferred to a new maintainer.

    Review major ownership announcements and unexpected release behavior.

    Watch for typo-squatting

    Package registries sometimes contain malicious packages with names similar to popular libraries.

    Copy package names from official documentation instead of typing them from memory.

    Open source and privacy

    Source availability lets experts inspect behavior, but most users will not audit the code themselves.

    You still depend on maintainers, build systems, package distribution, and update security.

    Open source and transparency

    One major advantage is that project discussions, issues, commits, and security fixes are often public.

    Use that transparency. Do not stop at the download button.

    Example: evaluating a password manager

    Expect strong security documentation, independent audits, clear cryptography design, signed releases, active vulnerability handling, reproducible or well-documented builds, and a sustainable team.

    Example: evaluating a media player

    Focus on official downloads, codec handling, update history, platform support, security fixes, and whether the app bundles unwanted software.

    Example: evaluating a small developer utility

    Check repository activity, open issues, dependencies, license, test coverage, release process, and whether it needs unnecessary privileges.

    Open-source evaluation checklist

    Find the official project. Check recent releases. Read a few issues. Review security reporting. Search for advisories. Use official downloads. Verify signatures or hashes when provided. Check permissions. Review dependencies. Read the license. Evaluate documentation. Test on non-critical data. Review network behavior. Confirm update process.

    Conclusion

    Open-source software can provide excellent value, flexibility, transparency, and control. The useful question is not “Is open source safe?” It is “Is this project trustworthy enough for this job?”

    Look beyond popularity. Check maintenance, security process, dependencies, license, documentation, download source, and requested privileges.

    For important software, test first and keep backups. Good open-source projects make trust easier by showing how they are maintained.

    Checklist used to compare open-source software maintenance and licensing
    Write down the requirements that matter before installing anything: supported operating systems, license, update method, required permissions, export format, and any server or cloud dependency. This prevents you from choosing software only because the interface looks good. It also makes comparison easier when two projects solve the same problem but differ in long-term maintenance, documentation, or data portability.
    Network access considered when reviewing an open-source application
    Network behavior deserves attention. A desktop tool that should work locally may still contact analytics, update, plugin, or cloud services. Review documentation and firewall activity if the software handles sensitive files. When the project offers optional telemetry, decide whether you need it. For server software, also check exposed ports, default credentials, supported TLS settings, and whether the application is intended to face the public internet.
    Maintenance concept illustrating long-term support for open-source software
    Plan the exit before the installation. Confirm that your files can be exported to a common format and that configuration can be backed up. If a project becomes inactive next year, you should be able to move without rebuilding everything manually. This is especially important for note apps, password tools, photo libraries, business databases, and other software that may hold years of important personal or company data.
  • App Permissions Explained: How to Review Camera, Microphone, Location, Files, and Background Access

    App Permissions Explained: How to Review Camera, Microphone, Location, Files, and Background Access

    Apps ask for permissions because they need access to parts of your device that are normally protected. A maps app may need location. A video-call app needs the camera and microphone. A photo editor may need access to selected images. The problem starts when an app receives more access than its job requires.

    Smartphone camera illustrating camera and photo permissions requested by apps
    Camera and photo access should match the feature you are using. A scanning app may need the camera while you scan a document, but it may not need unrestricted access to your entire photo library. Where the operating system offers selected-photo access, choose only the images required for the task and expand permission later if the app proves it genuinely needs more.

    This guide explains common app permissions in plain English, how to decide whether a request makes sense, how to review old permissions, and how to reduce unnecessary access without breaking useful features.

    Think of permissions as doors

    Each permission opens a door to a part of your device. Camera access opens the camera. Microphone access opens audio input. Location access reveals where the device is. Contacts access exposes an address book.

    The safest approach is not to deny everything. It is to open only the doors a feature actually needs.

    Permission should match the action

    If a flashlight app asks for contacts, the request is hard to justify. If a navigation app asks for location while giving directions, the request makes sense.

    Review permissions at the moment of request

    Do not tap Allow automatically. Read what the app is asking for and what you were trying to do at that moment.

    If you just pressed “scan document,” camera access is expected. If you opened a calculator and it suddenly asks for microphone access, pause.

    Context is a useful test

    The closer the permission request is to a feature you intentionally started, the easier it is to evaluate.

    Camera permission

    Camera access lets an app capture photos or video. Messaging apps, video-call apps, document scanners, QR-code readers, and social media apps commonly use it.

    Many operating systems let you grant camera access only while using the app.

    Disable camera access for apps that no longer need it

    If you used a banking app once to scan a check but no longer use that feature, you can often revoke access and grant it again later if needed.

    Microphone permission

    Microphone access supports calls, voice messages, speech recognition, recording, and some accessibility features.

    Because audio can contain sensitive conversations, review which apps have this permission.

    Watch the system microphone indicator

    Modern Android, iOS, Windows, and macOS versions show indicators when the microphone is active. Learn what the indicator looks like on your device.

    Location permission

    Location can come from GPS, Wi-Fi, Bluetooth, cellular networks, and other signals.

    Maps, weather, ride-hailing, fitness, delivery, and nearby-device apps may need it.

    Choose approximate location when exact location is unnecessary

    A weather app may only need your general area. A turn-by-turn navigation app needs more precision.

    “While using the app” versus “always”

    Background location allows an app to receive location even when you are not actively looking at it.

    This can be useful for workout tracking, family safety features, automation, or delivery services, but it is more sensitive than foreground access.

    Grant always-on location only with a clear reason

    If the feature works with “while using,” use the narrower option.

    Contacts permission

    Contacts access can expose names, phone numbers, email addresses, birthdays, and notes stored in your address book.

    Messaging and calling apps may use it to identify people you know.

    Your contacts contain other people’s data

    Granting this permission affects more than you. Avoid giving the full address book to apps that can work without it.

    Photos and media permission

    Older systems often gave an app access to the entire photo library. Newer systems may let you select individual photos.

    Use selected-photo access when an app only needs a few images.

    Photo libraries can contain sensitive information

    Screenshots, IDs, documents, tickets, personal photos, and location clues may all exist in one library.

    Files and storage permission

    File access may let an app read or write documents beyond its own private storage.

    File managers, backup tools, editors, and office apps may need broad access. A simple game probably does not.

    Prefer folder-level access where available

    If the app only needs one project folder, do not grant an entire drive.

    Notification permission

    Notifications are lower risk than camera or contacts, but they affect attention and privacy.

    A lock-screen notification can reveal message text, verification codes, transaction alerts, or names.

    Adjust notification previews

    For sensitive apps, hide message contents until the device is unlocked.

    Bluetooth and nearby-device access

    Bluetooth permission can support headphones, watches, trackers, keyboards, cars, and smart-home accessories.

    Nearby-device permissions may also reveal information about devices around you.

    Grant it to apps that manage real hardware

    A wearable app needs Bluetooth. A calculator usually does not.

    Local network permission

    Some operating systems ask whether an app can discover devices on your local Wi-Fi network.

    This is useful for printers, smart TVs, speakers, media servers, and home-automation tools.

    Deny local-network access to unrelated apps

    You can usually grant it later if a feature stops working.

    Calendar permission

    Calendar access may include event names, attendees, times, locations, and notes.

    Scheduling and meeting apps may need it.

    Use add-only permission when available

    If an app only needs to add events, it may not need to read your entire calendar.

    Reminders and tasks

    Task and productivity apps may request access to system reminders.

    Review whether they need read, write, or both.

    Phone and call permissions

    Android and other platforms may expose permissions related to calls, call logs, or phone state.

    Dialer, spam protection, and carrier apps may need them.

    Call logs are sensitive

    Do not grant them to apps without a clear communications function.

    SMS permission

    SMS access can expose personal conversations and verification codes.

    Default messaging apps and certain backup or device-transfer tools may need it.

    Be cautious with authentication codes

    An app that can read SMS may see one-time login codes sent by text.

    Accessibility permission

    Accessibility services can be extremely powerful. They may read screen content, observe interactions, or control parts of the interface.

    Legitimate assistive tools need this access, but malware also abuses it.

    Grant accessibility access only to trusted apps

    Read the system warning carefully and verify the developer.

    Screen recording and screen capture

    Screen-sharing apps, meeting software, support tools, and recording utilities may request permission to capture the screen.

    Your screen can contain passwords, private messages, customer data, or browser tabs.

    Stop sharing when the task ends

    Do not leave screen-capture permissions active unnecessarily.

    Background app refresh

    Background activity lets apps update data when they are not open.

    This can improve notifications and syncing but may use battery and data.

    Disable background activity for rarely used apps

    You can often keep notifications for important services while reducing background work elsewhere.

    Startup permission

    Desktop apps may launch automatically when the computer starts.

    Too many startup apps slow login and increase background activity.

    Keep security and essential sync tools

    Disable convenience apps you do not need running all day.

    Full disk access on desktop systems

    Some backup, security, search, or migration tools request broad access to files.

    This is a high-impact permission.

    Review the developer before granting it

    Use official software and remove access after uninstalling or replacing the tool.

    Administrator permission

    Administrator access lets software make system-level changes.

    Installers, drivers, security tools, and system utilities may require it.

    Do not approve admin prompts you do not understand

    Unexpected elevation requests can be a malware warning sign.

    Browser permissions

    Websites can request camera, microphone, location, notifications, clipboard, and other capabilities through the browser.

    Browser site permissions are separate from operating-system app permissions.

    Review site permissions periodically

    A website you used for one video call last year may still have camera permission.

    Browser extension permissions

    Extensions can request permission to read and change data on websites.

    Some extensions need broad access to perform their function, but that access can expose browsing content.

    Remove extensions you no longer use

    Fewer extensions reduce attack surface and permission complexity.

    Why apps ask for permissions before they need them

    Some apps request everything during setup because it is easier for the developer.

    You do not have to grant every request immediately.

    Use just-in-time permission

    Grant access when you reach the feature that needs it.

    What happens when you deny a permission

    The app may disable one feature while the rest continues to work.

    For example, a social app can often work without contacts. You may simply need to search for people manually.

    Review permissions monthly

    Open the privacy settings on your phone or computer and scan camera, microphone, location, contacts, photos, files, accessibility, and full-disk access.

    Revoke permissions from apps you no longer use.

    Unused apps deserve special attention

    If you have not opened an app for months, uninstalling it may be better than maintaining its access.

    Review after major app updates

    A redesigned app can add new features and request new permissions.

    Read the request instead of assuming it is necessary because the app was already trusted.

    Review after changing phones or computers

    Device migration can restore apps with different permission states.

    Take a few minutes to review the new device instead of assuming every restored setting is ideal.

    Check privacy dashboards

    Android and iOS provide privacy views that show recent access to camera, microphone, and location. Desktop systems provide similar settings.

    Use these tools to see which apps actually used sensitive permissions.

    Watch battery and data use

    Unexpected background battery or mobile data use can reveal an app that is more active than expected.

    This is not proof of wrongdoing, but it is a useful reason to investigate.

    Use official app stores where possible

    Official stores are not perfect, but they add review, update, and publisher information.

    For desktop software, use the vendor’s official site when a trusted store is not available.

    Read the developer name

    Popular apps often have copycats with similar icons and names.

    Verify the publisher before granting sensitive permissions.

    Example: photo editing app

    Grant selected-photo access first. Deny contacts and location unless a feature needs them. Allow camera only if you capture photos inside the app. Review cloud-upload settings before editing private images.

    Example: navigation app

    Allow precise location while using the app. Consider background location only if you need live trip sharing or another feature that requires it. Deny contacts unless you want contact-based destination search.

    Example: video meeting app

    Allow camera and microphone. Allow screen recording only when you need to share. Review calendar access separately. Disable automatic startup if you do not want the app running constantly.

    Common permission mistakes

    Allowing everything during setup, granting always-on location unnecessarily, giving full photo access for one upload, ignoring accessibility warnings, keeping old browser permissions, and leaving unused extensions installed are common mistakes.

    Permission review checklist

    Match access to the feature. Prefer while-using over always. Prefer selected photos over full library. Review camera and microphone indicators. Limit contacts and files. Remove old browser permissions. Check accessibility and full-disk access carefully. Uninstall unused apps. Review after major updates and device migrations.

    Conclusion

    App permissions are not something to fear. They are a control system.

    Grant access when a feature clearly needs it. Choose the narrowest option that works. Review old permissions because an app that once needed access may not need it forever.

    A few minutes of permission maintenance can reduce privacy exposure, background activity, and accidental data sharing without making your device harder to use.

    Wireless network illustrating network and nearby-device permissions
    Nearby-device, Bluetooth, and local-network permissions can expose information about the devices around you. Grant them to apps that control speakers, smart-home hardware, wearables, or local network tools, but question them in unrelated apps. If a feature still works after the permission is removed, leave it off and reduce the amount of background access the app can use.
    Laptop used to check why an application requests a sensitive permission
    When a permission request seems unusual, check the developer’s official help page and the app-store description before accepting it. Look for a clear explanation tied to a real feature. Avoid granting sensitive access merely because a pop-up blocks progress; sometimes the better choice is to use a different app that performs the same task with narrower permissions.
    Smartphone maintenance illustrating a regular app permission review
    Make permission review part of normal device maintenance. Every few months, check location, camera, microphone, contacts, photos, files, notifications, and background access. Remove permissions from apps you no longer use and uninstall abandoned apps. This reduces privacy exposure and can also cut unnecessary background activity, battery use, and notifications without affecting the apps you actually depend on.
  • Email Inbox Organization That Actually Works: Rules, Labels, Search, Archives, and a Weekly Reset

    Email Inbox Organization That Actually Works: Rules, Labels, Search, Archives, and a Weekly Reset

    A messy inbox creates two different problems. The first is obvious: important messages get buried. The second is less visible: people spend too much time organizing email instead of doing the work the email represents.

    Weekly planning notes used to organize email priorities and follow-up tasks
    Start by deciding what the inbox is for. Keep messages there only when they still need a reply, decision, or action. Archive completed conversations and move real work into a task system when it takes more than a few minutes. Use a Waiting label for replies you expect from other people and add a follow-up date. This separates communication from project management, so a long email thread does not become the only place where an important deadline exists.

    The goal of a good inbox system is not to reach zero messages every night. The goal is to make urgent items visible, routine messages easy to process, and old information easy to find. This guide shows how to build a simple system with labels, folders, rules, search, archives, and a short weekly reset.

    Stop treating the inbox as permanent storage

    Your inbox works best as a temporary queue. A message arrives, you decide what it means, and then you take the next action.

    That action may be reply, delegate, schedule, save, archive, unsubscribe, or delete.

    An inbox is not a filing cabinet

    If thousands of old messages remain mixed with current work, every new email has to compete for attention.

    Define what deserves inbox visibility

    Keep messages that still require a decision or action. Move completed conversations to archive or another folder.

    You do not need to organize every message perfectly. Search is often faster than creating dozens of folders.

    Use a simple rule

    If the message still needs something from you, keep it visible. If the work is done, archive it.

    Use archive instead of delete for useful history

    Archiving removes a message from the main inbox while keeping it searchable.

    Services such as Gmail and Microsoft Outlook provide different interfaces, but the idea is similar.

    Delete low-value mail

    Promotions, expired notifications, duplicate alerts, and obvious junk do not need permanent storage.

    Create fewer folders than you think you need

    Too many folders turn email management into another job.

    Most people can work with a small set such as Action, Waiting, Receipts, Travel, Projects, and Archive.

    Search can replace detailed filing

    If you remember the sender, project name, date, or keyword, modern search can often find the message faster than browsing nested folders.

    Use labels for overlapping categories

    A folder usually puts a message in one place. Labels can let one message belong to several categories.

    A client invoice might be labeled Client A, Finance, and Waiting.

    Do not label every email

    Labels should help retrieval or workflow. If a label does not change what you do with the message, it may be unnecessary.

    Build an Action label

    An Action label or folder is useful for messages that require work but cannot be completed immediately.

    Move the email there and add the actual task to your task manager if the work takes more than a few minutes.

    Email should not replace a task system

    A long-term project hidden inside an email thread is easy to forget. Put deadlines and next actions in a calendar or task app.

    Build a Waiting label

    Use Waiting for messages where someone else owes you a reply, approval, file, payment, or decision.

    Review this label during your weekly reset.

    Add a follow-up date

    If the email service supports snooze or reminders, use them. Otherwise, create a task with a date.

    Use rules for predictable mail

    Rules and filters can automatically label, move, mark, forward, or archive messages based on sender, subject, keywords, or other conditions.

    Automation works best for messages that behave the same way every time.

    Good rule candidates

    Receipts, software notifications, newsletters, automated reports, calendar alerts, monitoring emails, and system status messages are common examples.

    Do not auto-archive messages you might need urgently

    A rule that moves important client or security messages out of sight can create more problems than it solves.

    Start by applying a label. After a few weeks, decide whether automatic archiving is safe.

    Test rules with a narrow condition

    A rule for “invoice” may catch unrelated messages. A rule for a known billing sender is safer.

    Create a VIP or priority list carefully

    Some email systems can highlight messages from selected people.

    Use this for a small number of contacts whose messages genuinely require fast attention.

    Too many VIPs defeats the purpose

    If half your address book is marked important, priority loses meaning.

    Unsubscribe aggressively from low-value mail

    Reducing incoming volume is more effective than improving filing.

    If you consistently delete a newsletter without reading it, unsubscribe.

    Be careful with suspicious spam

    Do not click unsubscribe links in obvious scam messages. Mark them as spam instead.

    Separate newsletters from conversations

    Create a Reading label or use a dedicated newsletter address if you subscribe to many publications.

    This lets you read them when you choose instead of allowing them to interrupt work.

    Use search operators

    Search can find mail by sender, date, attachment, subject, recipient, or keyword.

    Learn the search syntax of your email provider.

    Create saved searches where available

    Useful examples include messages with attachments from a client, unread messages older than seven days, or emails from a billing address.

    Search by attachment type

    If you are looking for a PDF, spreadsheet, or image, combine file-type or attachment filters with sender and date.

    This is faster than opening every message in a long thread.

    Search by time window

    Dates are useful when you remember roughly when a conversation happened.

    Search only the relevant month or year instead of the entire mailbox.

    Use clear subject lines when you start a thread

    A good subject makes later search easier.

    “Q4 Website Migration Approval – Due Friday” is more useful than “Quick question.”

    Change the subject when the topic changes

    Do not let one email thread become a five-topic project archive.

    Keep one topic per thread when practical

    This makes search, forwarding, and responsibility clearer.

    If the conversation moves from design feedback to billing, start a new thread.

    Use snooze for messages that matter later

    Snooze temporarily removes a message and returns it at a chosen date.

    This is useful for check-in messages, travel details, renewal notices, and tasks that cannot be handled today.

    Do not snooze forever

    A constantly postponed email is often a task that needs a clear decision.

    Use templates for repeated replies

    If you send the same structure every week, create a template.

    Examples include meeting follow-ups, document requests, support acknowledgments, and scheduling replies.

    Personalize before sending

    A template saves typing. It should not make the recipient feel like the message was never read.

    Turn off unnecessary notifications

    Not every email needs an immediate alert.

    Keep notifications for important accounts or people, and check the rest at planned times.

    Batching reduces context switching

    Checking email three or four focused times can be more productive than reacting every few minutes.

    Use separate addresses or aliases for different purposes

    You may use one address for important personal communication, another alias for shopping, and a work address for business.

    This can simplify filtering and reduce exposure of the primary address.

    Protect the email account itself

    Email often controls password recovery for other services.

    Use a unique password or passkey, enable multi-factor authentication, and review signed-in devices.

    Security messages should stay visible

    Do not bury login alerts, password-reset notices, and security warnings in an auto-archived folder.

    Watch automatic forwarding

    Forwarding rules can send mail to another account without you noticing.

    Review forwarding settings if you suspect compromise or after an employee leaves a business.

    Review connected apps

    Third-party apps can have permission to read or send email.

    Remove old integrations that are no longer needed.

    Clean large attachments if storage is full

    Search for messages with large attachments before buying more storage.

    Save important files to an approved storage location, then delete truly unnecessary messages if appropriate.

    Do not delete records required by policy

    Businesses may have retention requirements. Follow company rules before removing mail.

    Create a weekly email reset

    Set aside 20 to 30 minutes once a week.

    Review Action, Waiting, snoozed items, old unread messages, and important threads.

    Use the reset to improve rules

    If you notice the same low-value sender every week, create a filter or unsubscribe.

    Monthly maintenance

    Review filters, forwarding, connected apps, large attachments, old labels, and blocked senders.

    Remove rules that no longer match your workflow.

    A practical daily workflow

    Open the inbox. Delete spam and obvious junk. Reply to messages that take less than a few minutes. Move longer work into Action and your task system. Put delegated work into Waiting. Archive completed conversations.

    Stop when the queue is clear enough

    You do not need to process every newsletter to finish the session.

    Example: freelancer inbox

    Create labels for Leads, Active Clients, Finance, Waiting, and Reading. Filter receipts into Finance. Keep new client messages in the inbox. Use Waiting after sending proposals. Archive finished project threads.

    Example: small business owner

    Use separate aliases for support, billing, and general inquiries. Create rules that label each address. Keep security and payment alerts visible. Send team notifications to a low-priority folder. Review Waiting twice a week.

    Example: personal inbox

    Filter shopping receipts, travel bookings, newsletters, and account alerts. Unsubscribe from unused promotions. Keep family and important services in the main inbox.

    Common mistakes

    Creating dozens of folders, auto-archiving important mail, using email as a task manager, keeping every notification unread, marking too many people as VIP, and checking mail constantly are common problems.

    Simple inbox checklist

    Keep active messages visible. Archive completed work. Use a small folder set. Create rules for predictable mail. Unsubscribe from low-value content. Use Action and Waiting. Put deadlines in a task system. Learn search operators. Protect the account. Review filters and forwarding. Run a weekly reset.

    Conclusion

    A good email system should reduce decisions, not create more of them. The most useful setup is usually simple: inbox for active items, archive for completed mail, a few workflow labels, and rules for predictable noise.

    Search replaces detailed filing. Snooze handles future items. A task manager handles real work. Security settings protect the account that protects many of your other accounts.

    Instead of trying to organize every old email, improve what happens to the next one. Within a few weeks, the inbox becomes easier to trust.

    Email account security controls used during an inbox cleanup
    Protect the account before automating it. Use a unique password or passkey, enable strong multi-factor authentication, and review signed-in devices. Check forwarding rules and connected apps because attackers sometimes create hidden rules that continue sending mail after a password change. Keep login alerts and password-reset messages visible instead of auto-archiving them. For a primary email account used for banking or account recovery, security rules should always take priority over inbox-cleanup convenience.
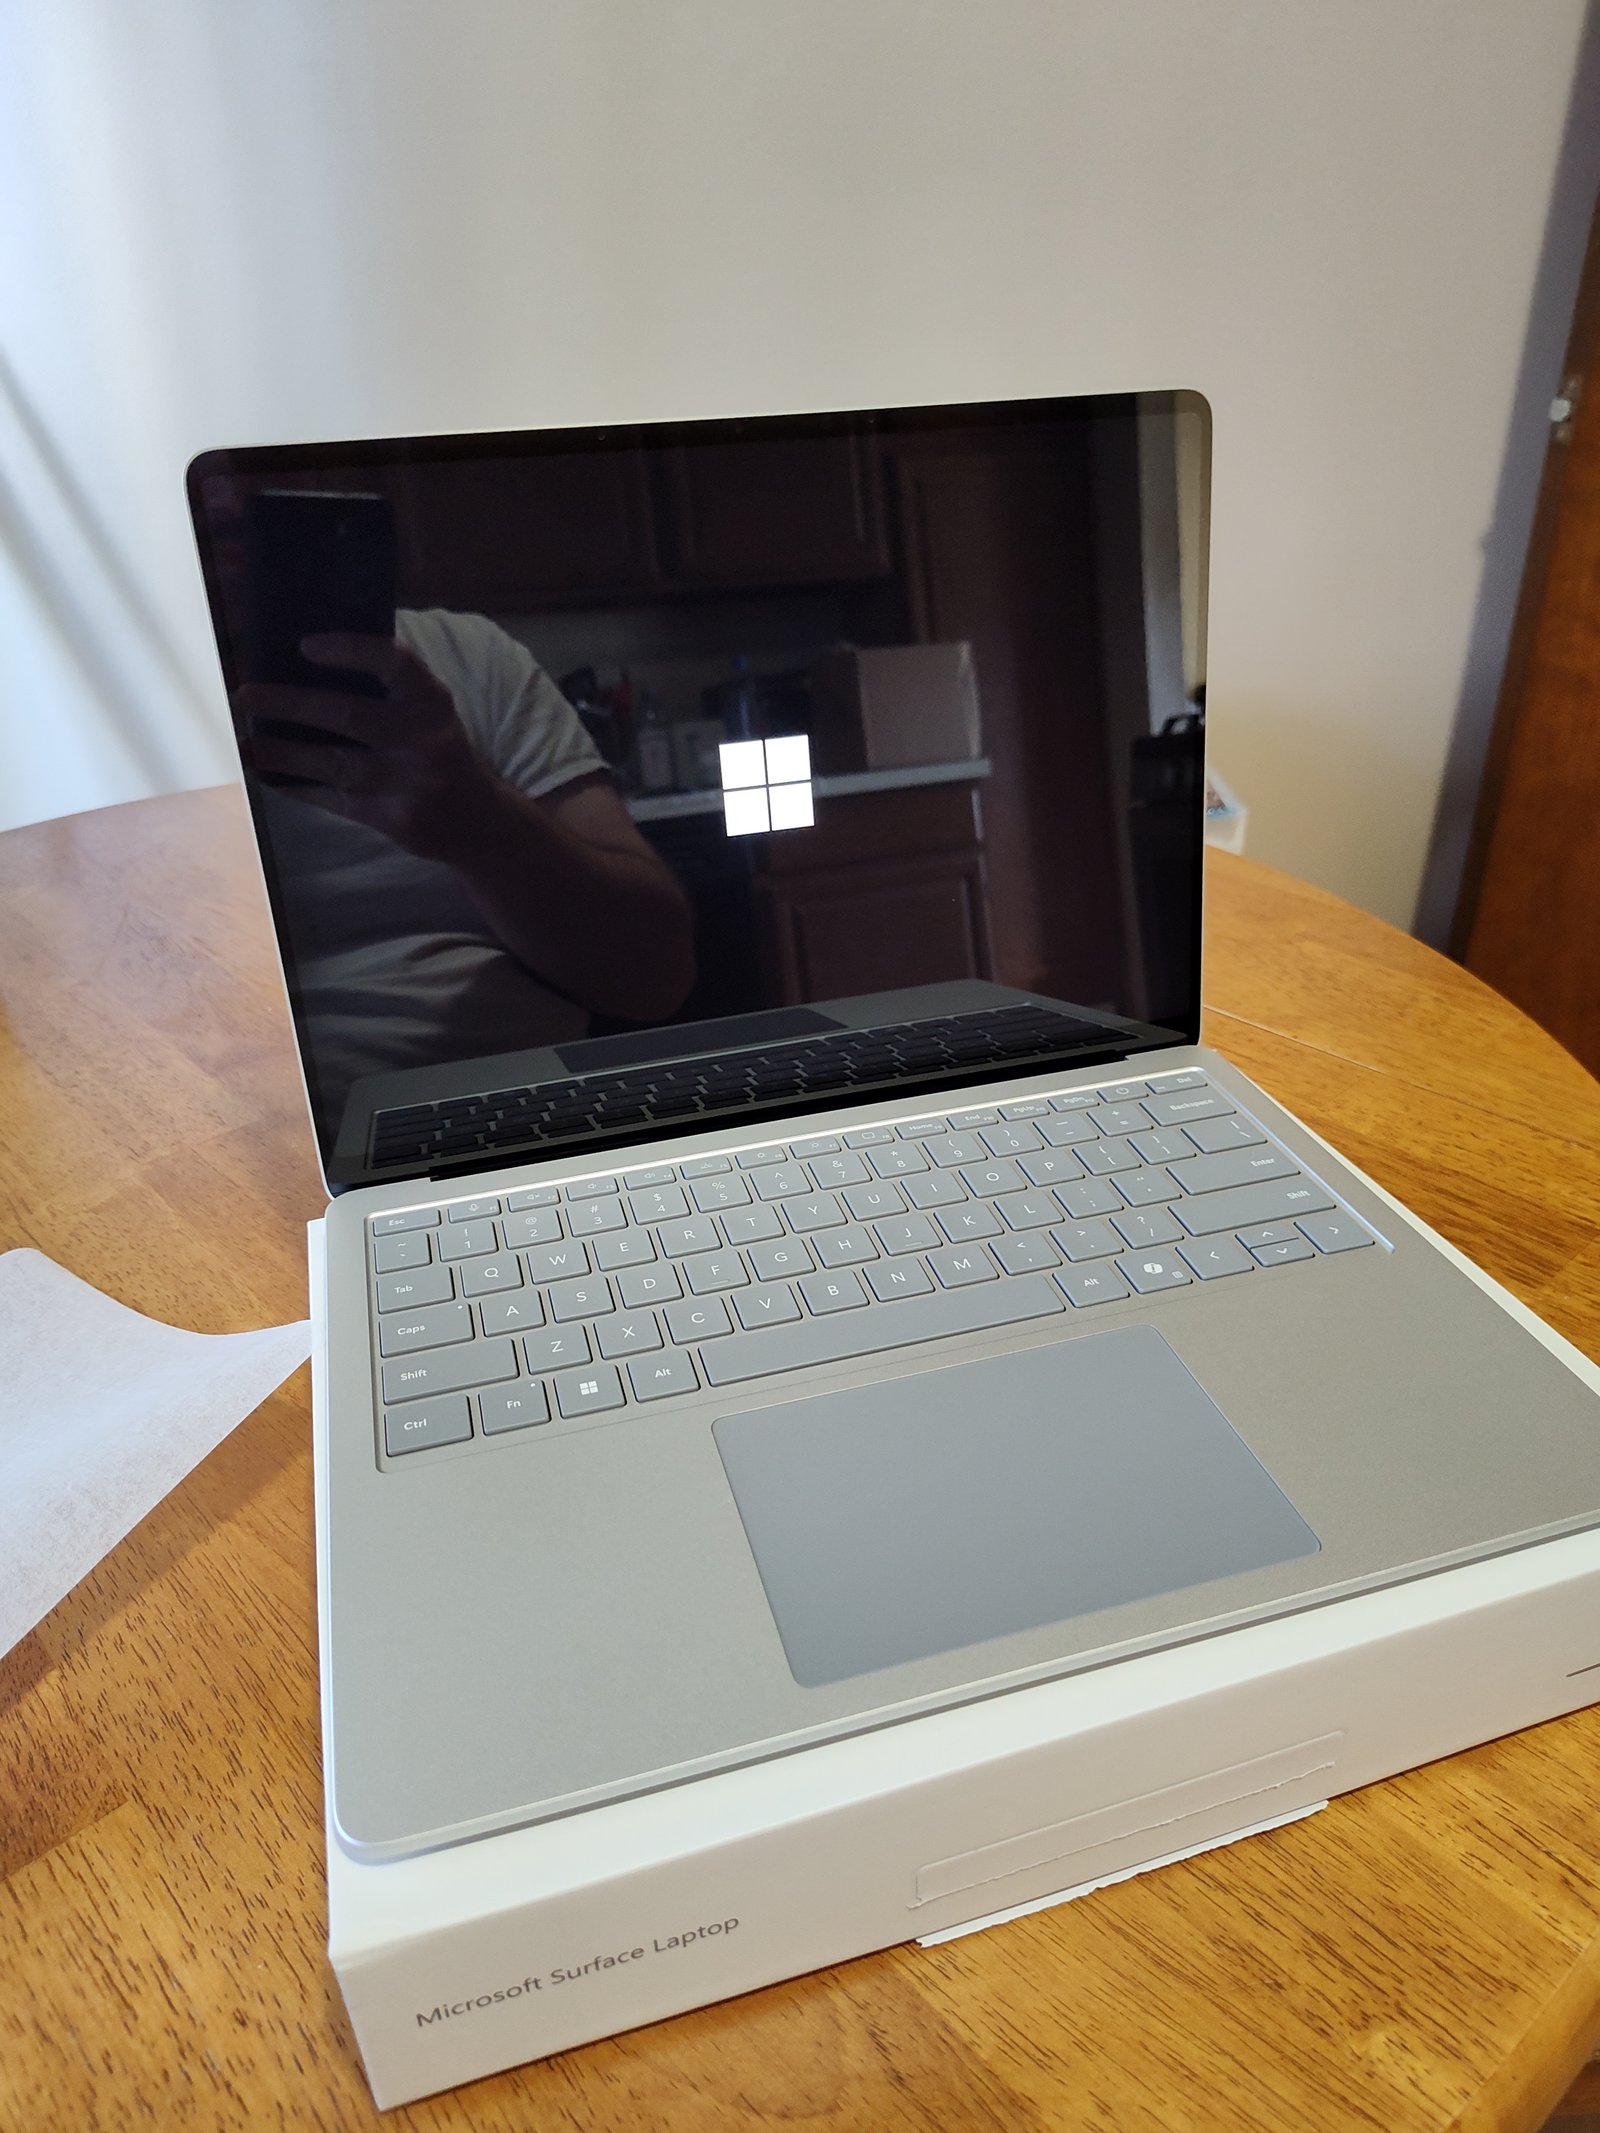
    Network connection used to sync email folders labels and archives across devices
    Make sure the system behaves the same on every device. Open the account on your phone and computer, then check the inbox, sent mail, archives, labels or folders, and search. Avoid local-only folders unless you deliberately want mail stored on one device. If a rule works on the web version but not in a desktop client, confirm where that rule is actually executed. A dependable workflow should survive a phone replacement or computer change without losing the organization you built.
    Laptop used for a weekly email inbox reset and filter review
    Use a short weekly reset to keep the system healthy. Review Action and Waiting, clear tasks that were completed elsewhere, check old unread messages, and scan spam for false positives. Review new filters created during the week and confirm that none are hiding an important sender. If the inbox still feels noisy, reduce incoming volume before creating more folders: unsubscribe from unused newsletters, change app notification settings, and route routine system reports to a separate label or address. A simpler flow is easier to trust. Once a month, also review storage use, large attachments, blocked senders, auto-forwarding, recovery addresses, and third-party apps with mailbox access. Remove rules that no longer match your workflow. If you share a business mailbox, document the few important rules so another person can understand why a message moves or receives a label. This prevents useful automation from becoming invisible behavior that nobody knows how to maintain. Keep one simple measure of success: important mail should be easy to notice and old information should be easy to find. If a new label or rule does not improve either outcome, remove it rather than adding more complexity.
  • How to Move Between Note-Taking Apps Without Losing Notes, Links, Attachments, or Structure

    How to Move Between Note-Taking Apps Without Losing Notes, Links, Attachments, or Structure

    Changing note-taking apps sounds simple until you discover that your notes are more than plain text. They may contain folders, tags, backlinks, attachments, scanned documents, tables, checklists, code blocks, dates, reminders, and links between pages. A careless migration can leave you with hundreds of files but no useful structure.

    Laptop used to verify export and import options for note-taking applications
    Before moving the full library, compare the official export options of the old app with the import options of the new one. Test a sample that includes plain notes, long notes, images, PDFs, checklists, tables, tags, and internal links. If any of those items change format, decide whether you can accept the change or need a conversion step. A small pilot is easier to fix than a complete migration of thousands of notes.

    This guide shows how to move from one notes app to another without losing the organization that made your notes useful. The process applies whether you are leaving a cloud notebook, moving to a local Markdown system, switching between productivity suites, or simply creating a long-term archive.

    Decide why you are moving

    Start with the problem you want the new app to solve. You may need better offline access, stronger privacy, easier collaboration, lower cost, better search, Markdown files, more reliable export, or a simpler mobile experience.

    If you do not define the reason, you may spend days migrating only to discover that the new app creates a different problem.

    Write three non-negotiable requirements

    For example: full offline access, easy PDF attachment support, and export to open formats. Use those requirements to judge the destination before moving everything.

    Inventory what you actually have

    Count notebooks, folders, tags, total notes, attachments, large files, shared notebooks, encrypted notes, templates, and special content types.

    A small personal collection of 200 text notes is very different from a business knowledge base with 20,000 pages and hundreds of files.

    Find unusual content before export

    Look for handwritten notes, audio, embedded spreadsheets, drawings, databases, web clips, formulas, and reminders. These are the items most likely to convert poorly.

    Check the export options in the current app

    Use the official export feature whenever possible. Common formats include Markdown, HTML, PDF, plain text, JSON, CSV, and proprietary archives.

    Read the documentation from your current provider. For example, Microsoft OneNote, Apple Notes, Evernote, and other tools have different export capabilities.

    Prefer formats that preserve structure

    PDF is useful for reading but poor for future editing. Markdown or HTML often preserves editable text better. A native archive may preserve the most features if the destination can import it.

    Check what the new app can import

    Do not assume that because the old app can export Markdown, the new app will import every Markdown feature correctly.

    Test the destination importer with a small sample first.

    Importers change over time

    Use current official instructions. A migration guide from three years ago may describe a feature that has since changed.

    Create a full backup before touching anything

    Export the original collection and keep it unchanged. If the app offers a full archive, save that too.

    Store one backup outside the device performing the migration.

    Do not make the migration your only copy

    If the import fails halfway through, the original export should still be available.

    Run a pilot with 20 to 50 notes

    Choose a representative sample: short notes, long notes, attachments, tables, tags, links, images, lists, and old notes.

    Import only that sample into the new app.

    Compare side by side

    Open the same note in both systems. Check title, body, line breaks, images, file attachments, links, dates, and tags.

    Test internal links

    Many note systems support links from one note to another. These links may use proprietary IDs that do not survive export.

    If your knowledge system depends on backlinks, test them carefully.

    Broken links are easy to miss

    A migration can look successful because all pages exist, while thousands of cross-links silently point nowhere.

    Understand backlinks and graph features

    Apps such as Obsidian make links and backlinks central to the workflow. Other apps treat links as simple URLs.

    If you move into a Markdown-based system, you may need to convert old note identifiers into filenames or wiki-style links.

    Preserve note titles carefully

    Some systems allow duplicate titles. File-based systems may not.

    If two notes are both called “Meeting Notes,” the export process may rename files automatically.

    Use unique naming where practical

    Adding a project name or date can prevent collisions.

    Watch filename restrictions

    Characters allowed in a note title may not be allowed in Windows, macOS, Linux, or cloud filenames.

    Migration tools may replace slashes, colons, question marks, or other symbols.

    Preserve creation and modification dates

    Dates can be important for journals, research, legal notes, project history, and archives.

    Some export formats keep these values in metadata. Others turn every note into a newly created file.

    Decide which date matters

    You may need original creation date, last modified date, imported date, or all three.

    Plan your folder structure

    Do not automatically recreate every old folder if the old system was messy.

    A migration is a good time to simplify.

    Use fewer top-level folders

    For example: Work, Personal, Reference, Archive. Use tags or links for secondary organization.

    Map tags before import

    Export tools may convert tags into plain text, folders, metadata fields, or filenames.

    Write a simple mapping plan before a large migration.

    Clean obvious duplicate tags

    “project,” “projects,” and “Project” may become three different tags in the new app.

    Decide what to do with attachments

    Attachments can be stored inside the app database, in a media folder, or as cloud links.

    Check whether exported notes contain actual files or only references to the old service.

    Test offline access

    Disconnect from the internet and open several migrated attachments. This reveals hidden cloud dependencies.

    Check image quality

    Some note apps compress images or export previews instead of originals.

    If photos, scans, or diagrams matter, compare file dimensions and quality.

    Handle PDFs and scans separately

    A note may include a PDF with OCR, annotations, or search indexing.

    The new app may preserve the file but lose searchable text or annotations.

    Keep original PDFs

    Do not rely only on extracted text if the document itself has legal or visual value.

    Review tables

    Complex tables are one of the most fragile content types. A rich table may become plain text, HTML, Markdown, or an image.

    Check merged cells, checkboxes, formulas, column width, and links.

    Review task lists and reminders

    A checkbox can migrate as a checkbox, a bullet, or a simple character.

    Reminders and notifications may not migrate at all.

    Move active tasks into a task manager if needed

    If a reminder is business-critical, recreate it deliberately rather than assuming import will preserve it.

    Check shared notes

    Collaboration permissions rarely migrate automatically between unrelated services.

    After import, recreate the sharing structure in the new system.

    Do not accidentally expose private notebooks

    A shared destination workspace may have broader default permissions than your personal account.

    Export web clips carefully

    Web clips may contain simplified articles, screenshots, local images, or links to the original page.

    Some exports keep only HTML, while others lose layout.

    Keep the source URL

    The original page link is valuable even if the clip format changes.

    Check code blocks and technical notes

    Developers should test syntax formatting, indentation, special characters, inline code, and fenced code blocks.

    Plain text migration can damage spacing that matters in code examples.

    Plan for encryption

    If the old app supports encrypted notes, exported content may be decrypted during export.

    Understand where the temporary export files are stored and delete them securely after the migration is verified.

    Do not upload sensitive exports to random converters

    Use trusted local conversion tools for private notes.

    Use open formats for long-term portability

    Plain text, Markdown, standard image files, PDFs, and widely supported metadata are easier to move than proprietary database formats.

    This does not mean you must avoid rich apps. It means you should know how to leave.

    Exit options are part of choosing software

    Before committing years of notes to a service, test its export once.

    Run the full export

    Once the pilot looks correct, export the complete collection.

    Record the date, app version, export format, and any settings you used.

    Import in batches

    For a large collection, import one notebook or folder at a time.

    This makes troubleshooting easier than importing 20,000 notes in one step.

    Keep a simple migration log

    Record which folders were completed and any errors.

    Count before and after

    If the old system has 4,812 notes and the new system has 4,706, investigate.

    Counts may differ for valid reasons, but the difference should be understood.

    Search for known phrases

    Pick several unique phrases from old notes and search for them in the new system.

    This tests indexing and confirms the content is discoverable.

    Test on every device you use

    Open the new system on desktop, phone, tablet, and browser if those devices matter.

    Check sync, offline access, attachment loading, and editing.

    Keep the old app read-only for a transition period

    Do not delete the old account on migration day.

    Use the new app for active work while keeping the old system available for reference for several weeks.

    Avoid editing both systems

    Choose a cutover date. New notes should go into the new app after that date.

    Remove old sharing links

    When the migration is complete, old public links may still expose content.

    Review shared notebooks and external links in the old service.

    Download one final archive

    Before canceling a paid subscription or deleting an account, create a final export and store it safely.

    Example: moving to a Markdown-based app

    Export notes as Markdown or HTML. Test filename conversion. Copy attachments into a media folder. Convert internal links. Review tags in front matter. Open the folder in the new app. Check backlinks and search. Keep the original archive separately.

    Example: moving from a local app to a cloud app

    Export a sample. Import it into a private test workspace. Check what data syncs to the provider. Review encryption and sharing settings. Then upload the full collection in batches.

    Example: moving a team knowledge base

    Inventory owners, permissions, templates, databases, and shared pages. Migrate the content first. Recreate access groups. Test key pages with team members. Set the old workspace read-only. Keep a rollback export.

    Common migration mistakes

    Skipping the backup, testing only simple notes, forgetting attachments, ignoring internal links, editing both apps after cutover, trusting note counts without spot checks, and deleting the old account too early are common mistakes.

    Migration checklist

    Define requirements. Inventory content. Export a backup. Test 20 to 50 notes. Check titles, dates, tags, links, attachments, tables, tasks, and search. Import in batches. Count before and after. Test every device. Set a cutover date. Keep the old system read-only. Remove stale shares. Save a final archive.

    Conclusion

    A successful note migration is not just a file transfer. It is a transfer of structure, history, and trust.

    Test the difficult content first. Preserve an untouched backup. Use open formats when practical. Check links, attachments, tags, and dates instead of assuming the importer handled them correctly.

    Once the new app works across your normal devices and you can find old information reliably, the migration is complete. Until then, keep the original archive.

    Data security reminder for protecting note exports during migration
    Treat the export as sensitive data. Notes can contain addresses, account details, work records, private ideas, scans, and attachments that were never meant to be public. Keep the migration files in a protected folder, avoid unknown online converters, and delete temporary copies after verification. If the old app stores encrypted notes, check whether export removes that encryption. The safest migration keeps one untouched backup while the working copy is imported and tested.
    Network connection used to sync notes across devices after migration
    Cloud sync can make an import look complete before every attachment has uploaded. After the first sync, open the new note library on a second device and search for several old notes. Download attachments, follow internal links, and test offline access if you rely on it. This confirms that the content is actually stored and indexed by the new system rather than sitting only in a local cache on the computer that performed the import.
    Laptop used to perform a final recovery test after moving notes
    Finish with a recovery test. Export a small sample from the new app, open those files outside the app, and confirm that text and attachments remain usable. Then keep the old service read-only for a short transition period instead of deleting it immediately. Use only the new app for new notes after the cutover date. Once search, sync, links, and attachments have stayed reliable across your normal devices, archive the original backup and remove duplicate working copies.
  • Secure File Sharing Guide: Permissions, Expiring Links, Passwords, and Access Control Explained

    Secure File Sharing Guide: Permissions, Expiring Links, Passwords, and Access Control Explained

    Sharing a file is easy. Sharing it with the right person, for the right amount of time, with the right permissions is where problems begin. A document meant for one client can become accessible to anyone with the link. A former contractor can keep access to a project folder. A confidential PDF can sit in a shared drive long after the project ends.

    User planning file sharing permissions and access levels
    Practical permission check: before you send a file, decide who needs to read it, who needs to edit it, and how long access should last. Avoid broad team or public access when only one client or colleague needs the document. Review the sharing panel after sending so you can confirm that the final permission matches your original intent.

    This guide explains how to share files safely using practical permission choices, expiring links, passwords, download settings, folder structure, and access reviews. The goal is not to make sharing difficult. It is to make access intentional.

    Start with the person, not the platform

    Before creating a link, identify who actually needs the file. Is it one person, a small team, an entire company, or the public?

    The permission should match the audience. A private contract should not use the same sharing method as a public brochure.

    Ask what the recipient needs to do

    They may only need to view the file. They may need to comment. They may need to edit. They may need to download a copy. Do not give edit permission when view access is enough.

    Understand the main sharing modes

    Most cloud storage tools offer several access types. Common options include private, specific people, organization only, anyone with the link, and public.

    Services such as Google Drive, Microsoft OneDrive, and Dropbox use different names, but the principles are similar.

    Specific people is usually the safest external option

    When the platform supports it, invite the recipient’s account directly. This gives you a clear access list and often makes revocation easier.

    “Anyone with the link” is not private

    A link that works for anyone can be forwarded, copied into a chat, stored in browser history, posted accidentally, or indexed if placed on a public page.

    It may still be difficult to guess, but secrecy of the URL should not be treated as strong access control.

    Use link sharing for low-risk content

    Public brochures, event materials, non-sensitive downloads, and simple collaboration files are better candidates than contracts, payroll records, identity documents, or customer data.

    Use view-only when editing is unnecessary

    Edit access lets a recipient change content and may allow deletion, renaming, or resharing depending on the platform.

    For approvals, audits, invoices, final documents, and reference material, view-only access is often enough.

    Comment permission can be a useful middle ground

    Reviewers can give feedback without changing the source directly. This can reduce accidental edits.

    Use expiration dates for temporary access

    Many files are needed only during a project, application, review, or negotiation. If the service supports expiration, set one.

    An expiring link reduces the chance that a forgotten share remains usable for months or years.

    Match expiration to the real workflow

    If a proposal is valid for 14 days, access may not need to remain open for six months.

    Use passwords when a link must travel broadly

    Some sharing services allow a password on the link. This adds another layer if the URL is forwarded.

    Use a strong, unique password. Do not use the recipient’s name, company name, or an obvious date.

    Send the password separately

    If the link and password are in the same email, anyone who gains access to that message gets both. Use a separate approved channel when practical.

    Understand download controls

    Some platforms let you disable downloading for view-only recipients. This can reduce casual copying, but it is not perfect protection.

    A recipient may still take screenshots, photograph the screen, or copy information manually.

    Download blocking is a friction tool

    Use it to reduce accidental redistribution, not as a guarantee that content cannot be copied.

    Think before enabling resharing

    Editors may be able to invite other people. If the file is sensitive, restrict whether recipients can change permissions or add new users.

    This keeps the owner responsible for the access list.

    Use folders carefully

    Sharing one folder can expose every current and future file inside it. This is convenient for a project team but risky if the folder mixes unrelated material.

    Create purpose-specific folders

    Instead of sharing a broad “Clients” folder, create a separate folder for each client or project. Keep internal files outside the shared area.

    Understand inherited permissions

    A file inside a shared folder may inherit the folder’s access rules. Moving a file into another folder can change who can see it.

    Before placing a confidential file into a shared location, check inherited access.

    Separate internal and external folders

    A strong project structure often has one internal folder and one external client folder.

    The internal folder can contain notes, drafts, budgets, and discussion documents. The external folder contains only approved material.

    This reduces accidental oversharing

    You no longer need to inspect every file before giving a client access because the external folder is designed for sharing.

    Review access after team changes

    When an employee, contractor, vendor, or agency leaves a project, remove access promptly.

    Do not wait for an annual review when the person no longer needs the data.

    Offboarding should include cloud files

    Account deactivation, shared-drive access, external links, team chat, project tools, and password vaults should be part of one exit checklist.

    Use group permissions for teams

    In a company, it is often easier to share with a managed group rather than adding people one by one.

    When someone joins or leaves the group, access updates automatically.

    Keep group membership accurate

    A group is only useful if outdated members are removed.

    Be careful with personal accounts

    Business files stored in an employee’s personal cloud account can create ownership and access problems.

    Use company-managed accounts and shared drives for important business data where possible.

    Do not share from temporary email accounts

    If the owner account is lost, suspended, or abandoned, managing access later may become difficult.

    Important files should have a stable organization-owned owner.

    Use meaningful filenames

    A file called final.pdf tells the recipient almost nothing. Clear names reduce the chance of sending the wrong document.

    Use project, document type, version, and date where appropriate.

    Do not put secrets in filenames

    File names may appear in email subjects, activity logs, browser history, and notifications. Avoid putting passwords, full identity numbers, or confidential descriptions in the name.

    Share the minimum necessary file

    If someone needs page 4 of a report, consider extracting that page instead of sending the whole report.

    If a partner needs one spreadsheet tab, export the relevant data rather than sharing an entire workbook with hidden sheets.

    Data minimization makes access easier to control

    The safest file is often the file that contains only what the recipient needs.

    Review hidden content before sharing

    Office documents can contain comments, tracked changes, hidden sheets, hidden columns, notes, previous authors, and metadata.

    PDFs can contain annotations and embedded attachments. Images may contain location metadata.

    Export a clean final copy

    For external distribution, create a final version that removes internal review material.

    Use cloud links instead of large email attachments

    Links can be revoked. Email attachments usually cannot.

    When the document is sensitive or likely to change, a controlled link gives the owner more options.

    Links also reduce version confusion

    Everyone can access the current file instead of keeping several outdated copies in different inboxes.

    Know when an attachment is still appropriate

    Small public files, finalized receipts, simple forms, and information that does not need revocation may be fine as attachments.

    Choose based on risk and workflow, not one universal rule.

    Use encryption for highly sensitive transfers

    If a file must be downloaded and transferred outside normal cloud systems, consider encrypted archives or secure file-transfer tools approved by your organization.

    Protect the decryption password through a separate channel.

    Do not rely on weak ZIP passwords

    Use modern encryption and strong passwords where confidentiality matters.

    Check recipient identity

    Before sharing sensitive information, confirm that you have the correct email address or account.

    Autofill can insert a similarly named contact. A one-character mistake can send the link to the wrong person.

    Slow down for external sharing

    For high-risk files, read the full recipient address before sending.

    Use domain restrictions when available

    Some business platforms let you restrict sharing to approved domains or block external sharing by default.

    This can reduce accidental exposure while still allowing controlled exceptions.

    Review notification emails

    Sharing a file may send an automatic email with the file name, comments, or preview text.

    If the filename itself is sensitive, this can expose information even before the recipient opens the file.

    Check access from a logged-out browser

    A quick way to test a public-style link is to open it in a private browser window where you are not signed in.

    If the file opens immediately, anyone with the link may have similar access.

    Test before distributing widely

    This catches incorrect permission settings early.

    Use activity logs for important folders

    Business cloud services may show who viewed, edited, downloaded, or shared a file.

    Logs can help investigate unexpected access or confirm project activity.

    Set ownership clearly

    Every important shared folder should have an owner responsible for permissions and cleanup.

    If nobody owns access, old shares tend to remain forever.

    Create a sharing policy for teams

    A short policy can define which platforms are approved, when external sharing is allowed, which data requires encryption, and how long links should remain active.

    Keep rules practical

    Employees will bypass a process that takes twenty steps for every harmless file. Use stronger controls for higher-risk data.

    Example: sharing a client proposal

    Export a clean PDF. Store it in the client’s external folder. Share it with the client’s named email account. Give view-only access. Set an expiration date if supported. Verify the link. Remove access when the proposal is no longer active.

    Example: sharing raw project files with a contractor

    Create a dedicated contractor folder. Include only the files required for the assignment. Give edit permission only where necessary. Keep internal notes and credentials elsewhere. Remove access on the final day.

    Example: sharing family documents

    For travel documents, school forms, or important household records, use a trusted family folder with named users. Avoid public links. Keep highly sensitive identity documents in a more restricted location.

    Common sharing mistakes

    Using anyone-with-link for confidential files, granting edit permission by default, sharing broad folders, forgetting old contractors, using personal accounts for business data, emailing passwords with encrypted files, and assuming download blocking prevents copying are common mistakes.

    Monthly access review checklist

    Check external users. Remove old links. Review shared folders. Confirm group membership. Look for public files. Check high-risk documents. Remove unused collaboration accounts. Verify that business files are owned by the organization.

    Conclusion

    Secure file sharing is mostly about deliberate permissions. The technology is already available in common cloud tools, but the safest setting is rarely the fastest default.

    Share with specific people when possible. Use view-only access unless editing is necessary. Set expiration dates. Keep external folders separate from internal work. Review access after projects and staff changes.

    The goal is not to stop collaboration. It is to make sure a file remains available only to the people who still need it.

    Laptop used to review cloud file sharing settings and link controls
    For external sharing, test the link in a private browser window before relying on it. This simple check shows whether the file opens without authentication, whether download is allowed, and whether an unexpected folder is exposed. If the recipient should sign in, a logged-out test should stop access instead of displaying the document immediately.
    Network connection used to transfer shared files securely
    Network security still matters after permissions are configured. Use current browsers, HTTPS services, trusted networks, and strong account authentication. When a file contains customer, financial, legal, or identity information, prefer a controlled cloud workspace over sending permanent attachments that cannot be revoked after they reach an inbox or another device.
    Mobile device used to open and manage shared files
    Mobile access deserves its own review. Check whether the sharing service shows sensitive previews on the lock screen, stores offline copies automatically, or keeps files available after an account is removed. For temporary projects, remove old collaborators and expired devices during the same weekly or monthly access review instead of leaving permissions open indefinitely.
  • How to Edit, Merge, Sign, and Share PDFs Safely Without Exposing Sensitive Files

    How to Edit, Merge, Sign, and Share PDFs Safely Without Exposing Sensitive Files

    PDF files are everywhere: contracts, invoices, forms, manuals, resumes, reports, scans, and official records. The format is useful because it usually preserves layout across devices. The problem begins when you need to edit, merge, sign, compress, redact, or share a PDF and the first solution you find is an unknown online tool asking you to upload the file.

    Data protection controls for handling sensitive PDF files

    For harmless documents, that may be fine. For private or business documents, it can create unnecessary risk. This guide explains how to work with PDFs safely, when to use desktop software, when an online service is reasonable, how digital signatures differ from typed signatures, and how to prevent accidental data exposure.

    Start by classifying the PDF

    Before choosing a tool, decide how sensitive the document is. A public brochure and a payroll report should not be handled the same way.

    Low-risk files include public manuals, blank forms, school handouts, and marketing documents. Medium-risk files may include resumes, invoices, internal reports, and business proposals. High-risk files include identity documents, medical records, tax forms, banking data, legal agreements, employee records, customer information, and confidential contracts.

    The tool should match the sensitivity

    The more sensitive the file, the stronger the reason to process it locally with trusted software instead of uploading it to an unknown website.

    Understand what “edit PDF” means

    PDF editing can mean several different things. You may only need to add text to a form. You may need to rearrange pages. You may need to change text already embedded in the file. You may need to add a signature or redact private information.

    Choose the smallest tool for the job. A simple form fill does not require a full PDF editor.

    Editing scanned PDFs is different

    A scanned PDF may contain images of pages rather than selectable text. Editing the words often requires OCR, or optical character recognition. OCR can make mistakes, especially with small text, tables, handwriting, or poor scans.

    Use built-in tools when they are enough

    Modern operating systems and browsers can handle many basic PDF tasks. You may be able to open a file, print to PDF, add notes, fill forms, or sign without installing another application.

    On macOS, Apple Preview includes useful PDF features. Windows users can view and annotate PDFs in Microsoft Edge, while other built-in and third-party options handle more advanced editing.

    Built-in software reduces extra data sharing

    If the document never leaves your computer, you avoid one entire privacy risk: uploading the file to another company.

    When a desktop PDF editor makes sense

    A trusted desktop editor is useful when you regularly change text, reorder pages, create forms, apply redaction, compare documents, or manage signatures.

    Adobe Acrobat is a widely used commercial option. Other reputable editors exist, including open-source and platform-specific tools.

    Download from the official source

    PDF utilities are a common target for bundled software and fake downloads. Use the official vendor website or a trusted app store. Avoid random “free PDF editor” installers from download mirrors.

    Online PDF tools can be convenient

    Online services are useful when you are on a device without installed software or need a one-time conversion. The file is uploaded to a server, processed, and then downloaded.

    That workflow is convenient, but it means the service temporarily receives the document.

    Check the privacy policy before uploading sensitive data

    Look for information about encryption, retention time, deletion, geographic processing, account requirements, and whether uploaded content is used for training or analytics.

    Use local processing for confidential PDFs

    If the file contains personal, legal, financial, health, or customer data, local processing is usually the safer default.

    For a business, use company-approved software that meets internal security and compliance requirements.

    Do not assume a familiar-looking website is trustworthy

    A polished design and HTTPS padlock only show that the connection is encrypted. They do not tell you how the company stores or uses the uploaded file.

    How to merge PDFs safely

    Merging combines several PDF files into one document. Before merging, rename the files clearly so you can place them in the correct order.

    Check each file for accidental pages, comments, hidden attachments, or personal information that should not be included.

    Review the final page order

    A common mistake is merging a signed page into the wrong version of a contract or sending an internal cover page to an external recipient.

    How to split a PDF

    Splitting is useful when you need only a few pages from a larger document. Instead of sending a 100-page report, extract the required pages.

    This also supports data minimization. If a client needs one invoice page, do not automatically send an entire monthly statement.

    Check page headers and footers

    An extracted page may still show customer names, account numbers, or document IDs in the header or footer.

    How to compress PDFs without ruining them

    Compression reduces file size for email or website upload. The best method depends on what the PDF contains.

    Text-heavy PDFs usually compress well with little visible difference. Scanned documents and image-heavy reports may lose readability if compressed too aggressively.

    Test small text after compression

    Zoom in on fine print, signatures, QR codes, barcodes, charts, and scanned text. A smaller file is not useful if important details become unreadable.

    Understand typed signatures

    Many PDF tools let you type your name in a script font, draw a signature, or place an image of a handwritten signature.

    This can be acceptable for some workflows, but it is not the same as a cryptographic digital signature.

    Legal acceptance depends on context

    Signature requirements vary by country, document type, organization, and transaction. Use the method required by the receiving party and applicable law.

    What a digital signature adds

    A digital signature uses cryptography to link a signer to a document and can help show whether the file changed after signing.

    Digital signature systems may use certificates issued by trusted authorities or enterprise systems.

    A visible signature image alone does not prove integrity

    A pasted signature picture can be copied. A cryptographic signature can provide stronger technical evidence about the signed file.

    Verify a signed PDF before trusting it

    When you receive a digitally signed document, use a trusted PDF reader to check the signature status.

    Look for warnings about invalid certificates, changed content, unknown issuers, or signatures added after modifications.

    Do not email reusable signature images casually

    A transparent image of your handwritten signature can be copied and reused.

    If you keep a signature image for convenience, store it securely and avoid sending the raw image file unless necessary.

    Redaction is not the same as drawing a black box

    This is one of the most important PDF safety lessons. Covering text with a black rectangle can leave the original text underneath. Someone may be able to select, copy, search, or remove the rectangle.

    True redaction removes the underlying content from the document.

    Use a dedicated redaction feature

    After applying redaction, save a new copy and test it. Try selecting text in the redacted area. Search for the hidden name or number. Inspect the file in another viewer.

    Remove metadata when appropriate

    PDFs can include metadata such as author name, software used, creation date, modification date, title, comments, embedded files, and document properties.

    For public or external documents, review metadata before sharing.

    Metadata can reveal internal details

    A proposal may unintentionally show an employee name, internal filename, or software version that was never meant for the recipient.

    Watch for comments and annotations

    Review comments are useful during collaboration, but they can become embarrassing or harmful if sent outside the team.

    Before final distribution, remove internal notes, sticky comments, highlighted discussions, and draft annotations unless they are intended for the recipient.

    Flatten only when you understand the result

    Flattening can turn editable form fields or annotations into fixed page content. This can make a final document harder to alter casually.

    However, flattening may also reduce accessibility or make future editing difficult.

    Keep an editable master copy

    Store the original working file separately. Send the flattened copy only when it fits the workflow.

    Protect PDFs with passwords carefully

    PDF software may allow an open password, permissions password, or restrictions on printing and editing.

    Use a strong unique password when the file contains sensitive information.

    Do not send the password in the same message

    If possible, send the file and password through separate channels. For example, email the file and send the password through an approved secure messaging method.

    Know the limits of PDF password protection

    Some permission restrictions can be bypassed by software. Password protection is useful, but it is not a replacement for secure file sharing and access controls.

    Highly sensitive documents should be protected by the storage or sharing platform as well.

    Use secure links instead of attachments when appropriate

    A cloud link can provide better control than an email attachment because you may be able to revoke access, set an expiration date, require sign-in, or restrict download.

    Services such as OneDrive, Google Drive, and Dropbox provide different sharing controls.

    Check link permissions before sending

    “Anyone with the link” is very different from “specific people only.” Use the narrowest setting that works.

    Set expiration dates for temporary sharing

    If the document is needed for only a week, an expiring link reduces long-term exposure.

    This is especially useful for proposals, review drafts, application documents, and temporary client access.

    Do not put sensitive PDFs in public folders

    A public website directory, shared team link, or misconfigured cloud folder can expose files to search engines or unintended users.

    Check the access setting from a logged-out browser window before assuming a link is private.

    Scan PDF attachments for malware

    PDFs can contain links, embedded files, scripts, or exploit content. Keep your PDF reader and operating system updated.

    Be cautious with unexpected PDF attachments, especially files that ask you to click a login link or enable additional content.

    Verify the sender through another channel when necessary

    If an invoice or legal document arrives unexpectedly and asks for urgent payment or credential entry, confirm the request independently.

    Be careful with PDF-to-Word conversion

    Conversion can help edit a document, but formatting may change. Tables, columns, headers, footnotes, images, and page breaks may shift.

    After editing, compare the converted result with the original PDF.

    Do not trust OCR numbers without checking

    A scanned invoice can turn 8 into 3 or 0 into 6. Verify amounts, dates, account numbers, and reference codes manually.

    Use OCR for accessibility and search

    OCR can make scanned documents searchable and selectable. This improves usability and can support screen-reader workflows when combined with proper document tagging.

    For important documents, review OCR output before relying on it.

    Think about accessibility

    A PDF that looks perfect may be difficult for a screen reader. Proper headings, reading order, alt text, form labels, and searchable text matter.

    Organizations publishing public documents should include accessibility checks in the workflow.

    Keep original and final versions separate

    Use clear filenames such as contract-draft-v3.pdf, contract-signed.pdf, and contract-redacted-public.pdf.

    Do not overwrite the only original when applying redaction, compression, or conversion.

    Version names reduce mistakes

    Clear naming helps prevent sending an unsigned draft instead of the approved final file.

    Back up important PDFs

    Signed contracts, tax records, business licenses, and official documents should exist in more than one protected location.

    Keep a local backup and a secure off-site or cloud backup depending on the importance of the file.

    A safe workflow for a signed contract

    Receive the document from a trusted source. Save the original. Review the full text. Verify the other party and required signature method. Sign using the approved tool. Save the signed copy separately. Verify the signature status. Share through a restricted link or approved channel. Archive the final version.

    A safe workflow for a scanned identity document

    Scan only the pages required. Crop unnecessary background. Use local tools where possible. Redact information the recipient does not need if allowed. Add a visible purpose note if appropriate. Share through a specific-person link. Remove temporary copies from shared devices.

    A safe workflow for a public PDF

    Remove internal comments. Check metadata. Verify links. Compress the file. Confirm accessibility. Open it on a phone and desktop. Upload the public version, not the editable internal source.

    PDF safety checklist

    Classify the document. Prefer local tools for sensitive files. Use official software sources. Verify OCR. Use true redaction. Check metadata and comments. Keep an original copy. Use strong passwords when needed. Send passwords separately. Prefer restricted sharing links. Verify digital signatures. Keep readers updated. Scan suspicious attachments. Confirm the final file before sending.

    Conclusion

    PDF tools are convenient, but the document often matters more than the tool. A public brochure can be handled differently from a passport scan or signed contract.

    Use built-in or trusted desktop software when possible for sensitive files. Treat online converters as data-sharing services, not just buttons. Use true redaction, verify signatures, review metadata, and share through controlled links.

    The safest PDF workflow is usually the simplest one: process the file with a trusted tool, keep the original, remove information the recipient does not need, and verify the final copy before it leaves your device.

    Laptop used to verify trusted PDF tools and official software sources
    Phone camera used to scan documents into PDF files
    Network connection used when sharing PDF files through secure cloud links
  • Browser Profiles vs Private Mode vs Containers: Which One Actually Separates Your Online Activity?

    Browser Profiles vs Private Mode vs Containers: Which One Actually Separates Your Online Activity?

    Modern browsers can keep work accounts, personal logins, shopping sessions, testing accounts, and private browsing sessions separate in several different ways. The confusing part is that features such as browser profiles, private mode, guest mode, and containers can look similar while solving very different problems.

    Privacy and security controls relevant to browser profile separation

    If you choose the wrong tool, you may think two accounts are isolated when they still share cookies, history, extensions, or local files. This guide explains what each separation method actually does, what it does not do, and how to build a simple browser setup for everyday work without creating unnecessary complexity.

    Start with the problem you are trying to solve

    Before choosing a browser feature, decide what kind of separation you need. You may want to keep a work Gmail account away from a personal Gmail account. You may want a clean session for testing a website. You may want to browse without keeping local history. Or you may want different extensions and bookmarks for different jobs.

    Each goal points to a different tool. Private mode is good for temporary local privacy. Profiles are good for long-term separation. Containers are useful for isolating specific sites inside one browser. A second browser can create an even clearer boundary.

    Do not treat every privacy feature as the same thing

    A browser feature can hide local history without hiding your IP address. It can separate cookies without separating downloads. It can block one tracker while still allowing account-level identification. Understanding the boundary is more useful than trusting the feature name.

    What a browser profile is

    A browser profile is a long-term user space inside a browser. It usually has its own bookmarks, history, cookies, saved passwords, extensions, autofill data, and sign-in state.

    Google Chrome, Microsoft Edge, and other major browsers support profile-style separation. The exact settings differ, but the core idea is the same: each profile behaves like a different user inside the browser.

    Profiles are useful for repeated identities

    If you use one set of accounts every day for work and another set for personal life, profiles are a practical solution. You can keep different bookmarks, extensions, and login sessions without constantly signing out.

    What private browsing actually does

    Private browsing, often called Incognito or Private Window, creates a temporary session that discards some local browsing data when you close it. The browser normally avoids saving history from that private session and removes most cookies created during it after the window closes.

    That is useful on a shared computer, for temporary sign-ins, or when you want to test a site without using your normal cookies.

    Private mode is not anonymous mode

    Your internet provider, employer network, school network, websites you visit, and services you log into may still see activity. Private mode does not automatically hide your IP address or make you invisible to a website.

    What guest mode changes

    Guest mode is designed for a temporary user who should not see your normal browser profile data. It is useful when you let another person use your computer for a short time.

    The guest session usually starts without your bookmarks, history, and existing account cookies. When the guest session ends, local browsing data from that session is generally cleared.

    Guest mode protects your profile from the guest

    It is mainly a local separation tool. It helps stop another person from opening your saved accounts or browser history. It does not provide special network anonymity.

    What browser containers do

    Container-style browsing keeps selected sites in separate cookie jars while allowing you to stay inside one main browser profile. Mozilla Firefox is well known for container-based workflows through supported extensions and account-isolation features.

    A container can keep one social account separate from another site or keep a business account from sharing the same cookies as personal browsing.

    Containers are lighter than full profiles

    They can be convenient when you want cookie separation without maintaining several full sets of bookmarks, extensions, and settings.

    Profiles and containers solve different problems

    A profile separates a large part of the browser environment. A container usually separates site storage and sign-in context inside one broader browser profile.

    If you need different extension sets, bookmarks, passwords, and browser themes for work and personal use, profiles are stronger. If you want one Firefox setup but separate cookies for two accounts, containers can be simpler.

    When a second browser is better than another profile

    Sometimes a separate browser creates a clearer boundary than another profile in the same browser. For example, you might use Firefox for personal browsing and Edge for company systems.

    This can reduce mistakes such as opening a client account in the wrong profile or allowing a work extension to run in a personal profile.

    Visual separation reduces human error

    Different browser icons, themes, and window styles can make it obvious which environment you are using. That matters when the risk is not technical isolation but clicking the wrong account.

    How cookies behave across these modes

    Cookies keep login state, preferences, shopping carts, and tracking identifiers. Normal tabs in the same profile often share cookies. Private windows share a separate temporary cookie space in many browsers. Different profiles use different cookie stores. Containers can keep cookies separated by container.

    This is why you can stay logged into two accounts from the same provider when each account is opened in a different profile or container.

    Do not rely on tabs alone

    Two normal tabs in the same browser profile are not isolated just because they are separate tabs. They normally share the same account cookies.

    How history differs

    A normal profile keeps browsing history unless you clear it or change the settings. Private mode is designed not to retain that session in normal history after you close it.

    Profiles keep separate history databases, so your work history can remain separate from your personal history.

    History can still exist elsewhere

    If you sign into a search engine or web service, that service may keep account activity even when your local browser history is empty. Local history and account history are different things.

    How extensions affect separation

    Browser extensions can read or modify web pages depending on their permissions. A work profile may need password-manager, VPN, security, or development extensions that you do not want active during personal browsing.

    Profiles are useful because they let you install different extension sets.

    Review extension permissions

    Do not install the same large collection of extensions in every profile by default. Keep only what each profile needs. An extension with broad site access increases the amount of browsing data it can potentially see.

    Saved passwords and autofill

    Profiles often keep separate password and autofill databases. That helps prevent a personal address or payment detail from appearing inside a work form.

    If you use a cloud-synced password manager, however, the manager itself may provide access to the same vault across profiles. Browser separation does not override the permissions of an external password-manager extension.

    Choose deliberate password-manager scope

    You can use separate vaults, collections, or identities where the password manager supports them. This creates a stronger workflow than relying only on browser autofill.
    Downloads are a common weak point

    Profiles may separate browser data, but downloaded files often go to the same Downloads folder unless you change the default path.

    If work and personal files must stay separate, configure different download folders or use operating-system user accounts.

    Check where files are saved

    A browser can show perfect account separation while all downloaded documents land in one shared folder. File-system separation is a different layer.

    Bookmarks and reading lists

    Profiles are ideal if you want different bookmarks for different roles. Keep company dashboards, documentation, and client tools in the work profile. Keep shopping, hobbies, and personal services in the personal profile.

    This reduces clutter and lowers the chance of opening the wrong page while screen sharing.

    What happens when browser sync is enabled

    Browser sync can copy bookmarks, passwords, history, extensions, settings, and open tabs between devices. A profile that is locally separate can still sync its data to a cloud account.

    Review which categories are enabled before signing a work profile into personal sync or a personal profile into a company-managed account.

    Sync scope matters

    If a company browser account is managed by an organization, administrators may apply policies or control extension settings. Keep that environment separate from personal browsing where appropriate.

    Use operating-system accounts for stronger local separation

    If several people share one computer, separate Windows, macOS, ChromeOS, or Linux user accounts provide stronger local boundaries than browser profiles alone.

    Operating-system accounts can separate desktop files, application settings, browser data, and permissions.

    Browser profiles are not a replacement for user accounts

    If one person should not be able to access another person’s files, use the operating system’s user separation and strong account passwords.

    A practical work and personal setup

    For many people, two browser profiles are enough. Create a Personal profile and a Work profile. Give them different colors. Install only the necessary extensions in each. Use different bookmark folders and separate cloud-sync accounts.

    Set the work profile to open company dashboards and tools. Keep personal email, social accounts, shopping, and entertainment in the personal profile.

    Add containers only when you need extra account separation

    If you must use two accounts from the same service inside one profile, a container can be useful. Otherwise, keeping the system simple is easier to maintain.

    A setup for developers and website testers

    Developers often need a clean browser state. Keep one dedicated testing profile with no personal logins. Install developer tools and testing extensions there. Use private windows inside that profile for clean temporary sessions.

    For cross-browser testing, use several browsers rather than only several profiles. Browser engines can behave differently.

    Keep production credentials away from test profiles

    A testing environment should not automatically receive every production password or administrator cookie.

    A setup for social media managers

    If you manage several brands, create one profile per major client or use containers for lower-risk accounts. Use strong visual naming and colors.

    Do not rely on remembering which tab is which. Wrong-account posting is a human-error problem that browser separation can help reduce.

    A setup for shared family computers

    Use separate operating-system user accounts first. Inside each account, users can create their own browser profiles.

    Guest mode is useful for a visitor who needs a temporary session but should not access saved family accounts.

    Private mode for shopping and price testing

    Private mode can help you view a site without your normal cookies. It can be useful for testing logged-out pages or seeing a store as a new visitor.

    Do not assume it guarantees a different price or hides your identity. Websites can use account data, IP address, location, device signals, and other information.

    Private mode for public computers

    If you must use a shared computer, private mode can reduce leftover local browser data, but it should not be your only protection.

    Avoid signing into highly sensitive accounts on an unknown computer. The device could contain malware, screen recording, or keylogging software.

    Containers for social tracking control

    Container-style isolation can reduce the ability of one logged-in service to reuse the same site cookies across unrelated browsing sessions.

    This does not stop every tracking method. Browser fingerprinting, account logins, IP addresses, and embedded content can still provide signals.

    Think of containers as one privacy layer

    Use them with normal tracking protection, careful extension choices, browser updates, and sensible account separation.

    Separate browsers for banking or sensitive administration

    Some users keep a clean browser only for banking, financial accounts, or website administration. It has very few extensions and is not used for casual browsing.

    This can reduce exposure to risky extensions and malicious websites.

    Keep the sensitive browser boring

    Do not fill it with experimental extensions, downloaded themes, and random web apps. Simplicity is part of the security benefit.

    What profiles cannot protect you from

    Profiles do not protect against malware running on the computer. They do not hide your IP address. They do not stop an operating-system administrator from accessing local data. They do not isolate downloads by default.

    They also do not create legal or organizational separation if the same person still has access to every profile.

    What private mode cannot protect you from

    Private mode does not make you anonymous to websites, employers, internet providers, schools, or network administrators. It does not delete files you download. It does not remove bookmarks you intentionally save.

    Use it for temporary local session privacy, not as a complete anonymity tool.

    How to choose the right method

    Use a profile when you need long-term separation of accounts, history, extensions, bookmarks, and passwords. Use private mode when you need a temporary clean session. Use guest mode when another person needs temporary access to your browser without seeing your data. Use containers when you want cookie isolation inside one main profile. Use a separate browser when you want a strong visual and software boundary.

    Simple security checklist

    Keep browsers updated. Use separate profiles for repeated identities. Give profiles different colors and names. Install only necessary extensions. Review sync settings. Use separate operating-system accounts on shared computers. Use a password manager. Keep downloads organized. Do not treat private mode as anonymity. Use strong account authentication for important services.

    Conclusion

    Browser profiles, private mode, guest mode, and containers are useful because they separate different layers of online activity. The key is choosing the feature that matches the problem.

    Profiles are the best general choice for long-term work and personal separation. Private mode is temporary. Guest mode protects your normal profile from short-term users. Containers isolate selected site sessions. A second browser can create an even clearer boundary.
    Keep the setup simple enough that you will actually use it. Good separation is not about running five browsers and twenty profiles. It is about creating clear boundaries where mistakes are most likely to happen.

    Network connection shared by browser profiles and private browsing sessions
    User planning separate browser profiles for work and personal accounts
    Mobile device showing that account separation also matters across browsers and devices