Tag: Device Tips

Useful tips for phones, computers, and connected devices.

  • eSIM Transfer Guide: Moving Service Between Phones, Travel Lines, Dual SIM, and Common Activation Problems

    eSIM Transfer Guide: Moving Service Between Phones, Travel Lines, Dual SIM, and Common Activation Problems

    eSIM makes it possible to activate mobile service without inserting a physical SIM card, but moving service between phones can still be confusing. Some carriers support automatic transfer. Others require a QR code, app, account login, or customer-service approval. Travel eSIMs add another layer because you may use one line for data while keeping your main number active for calls and messages.
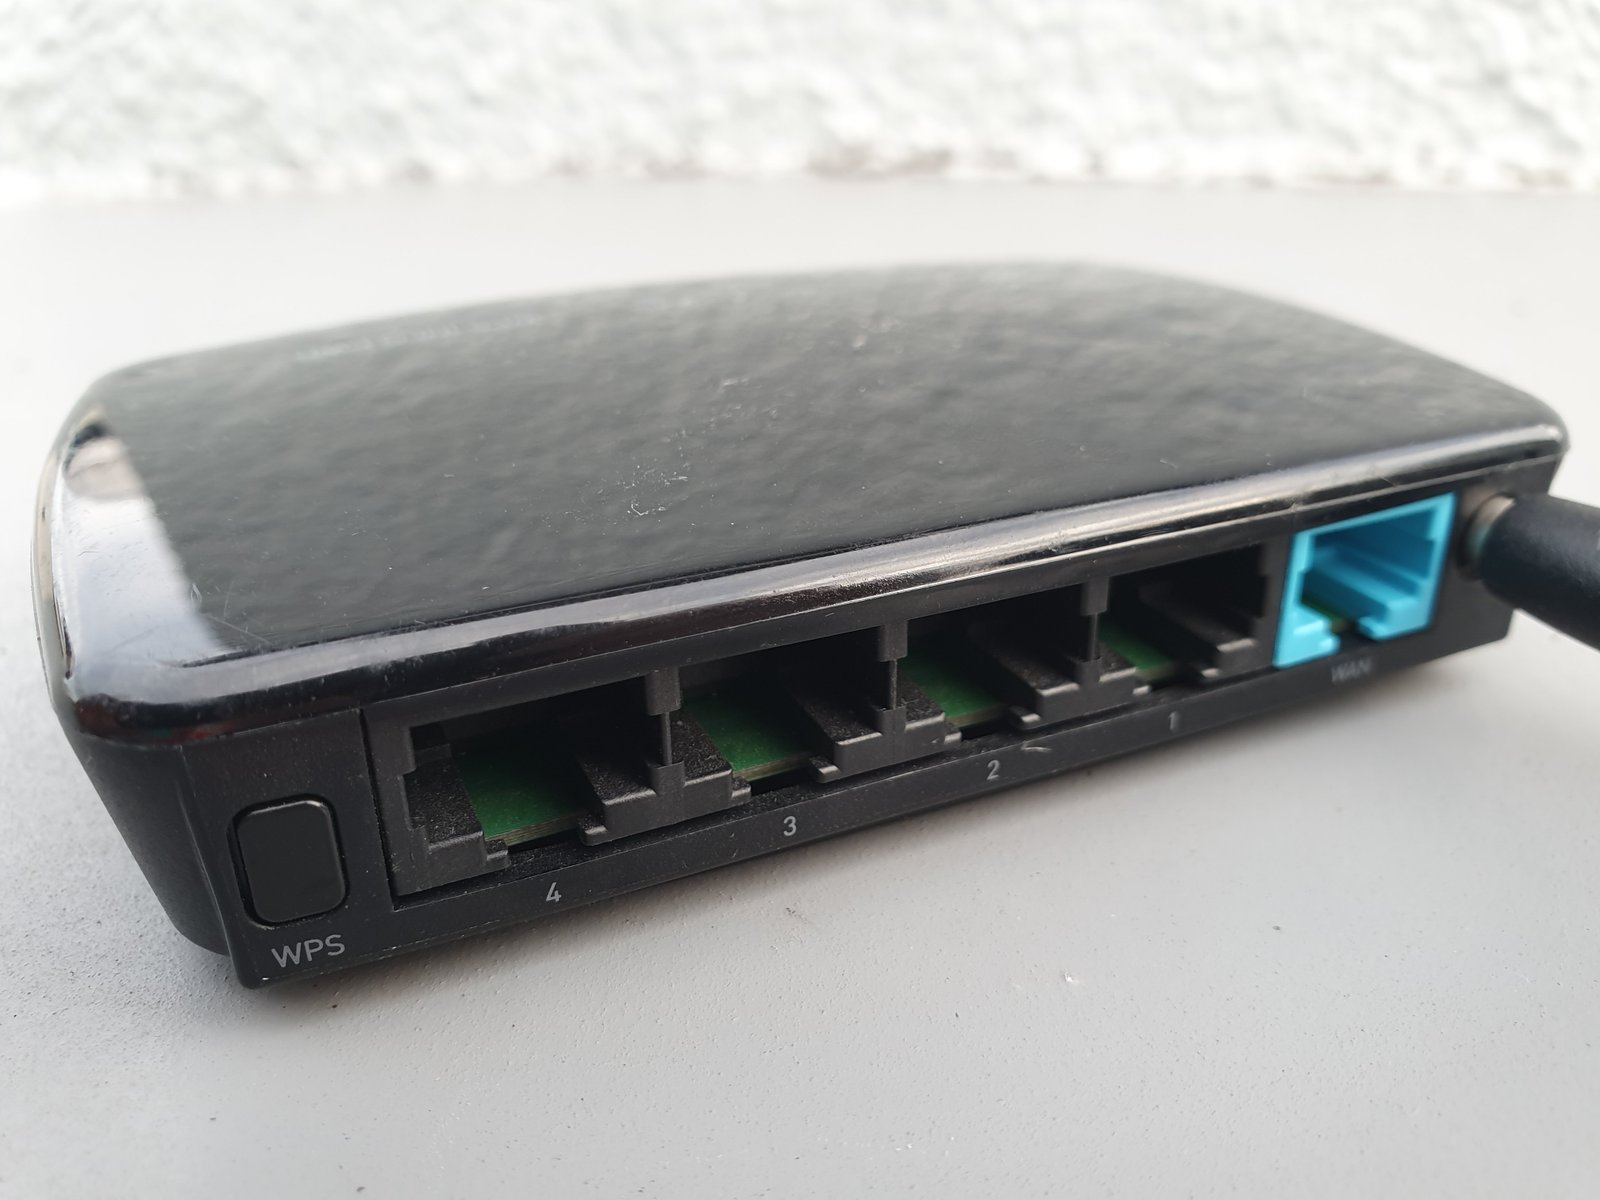
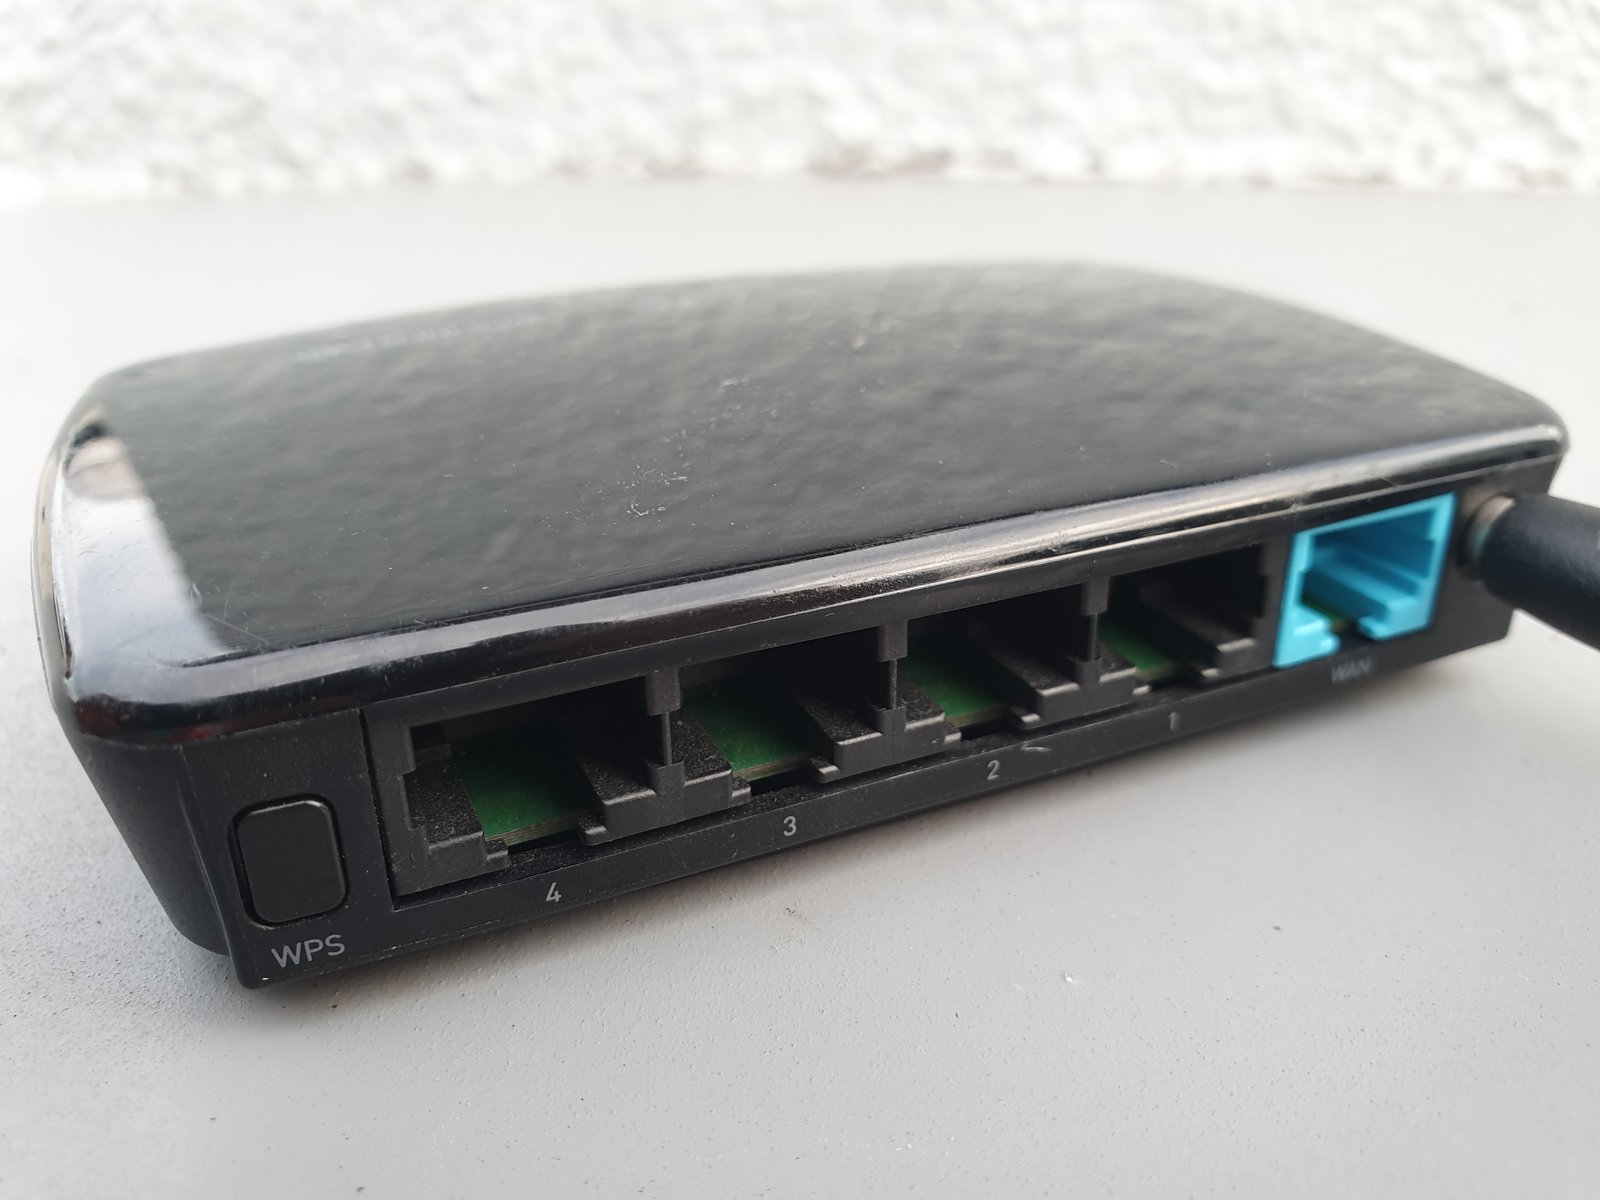
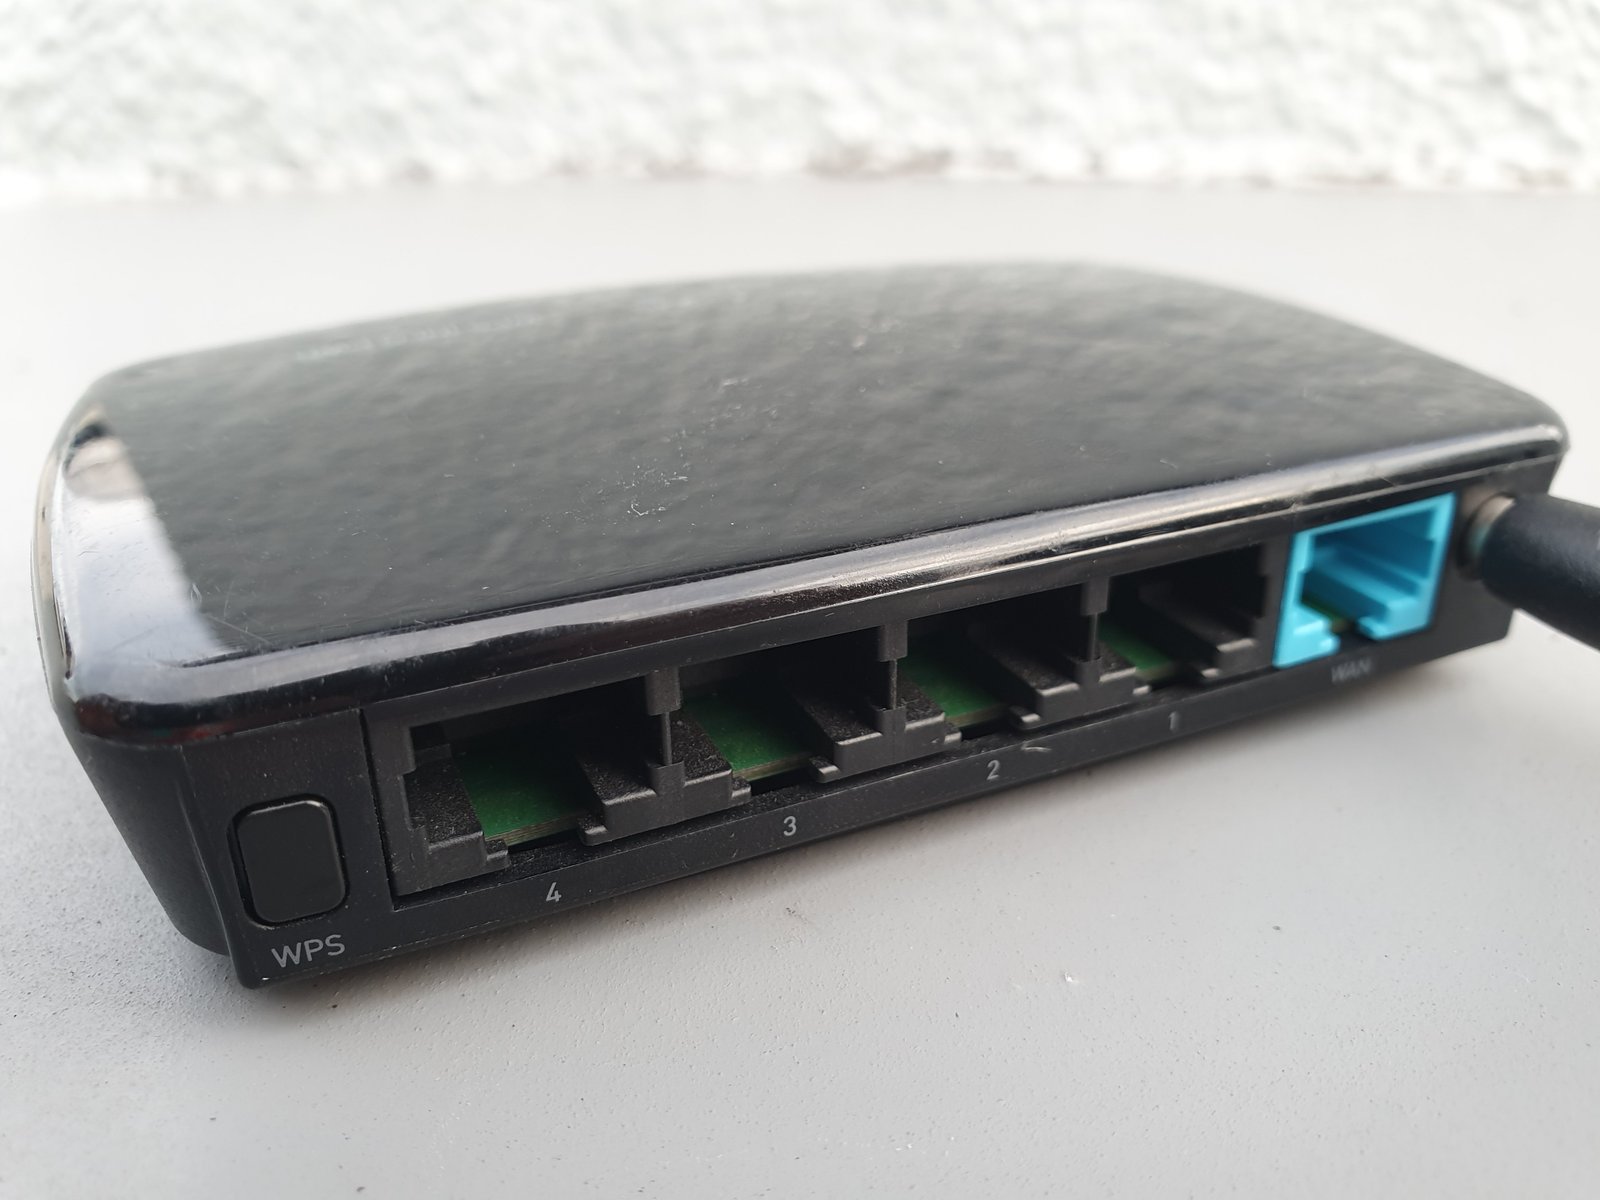
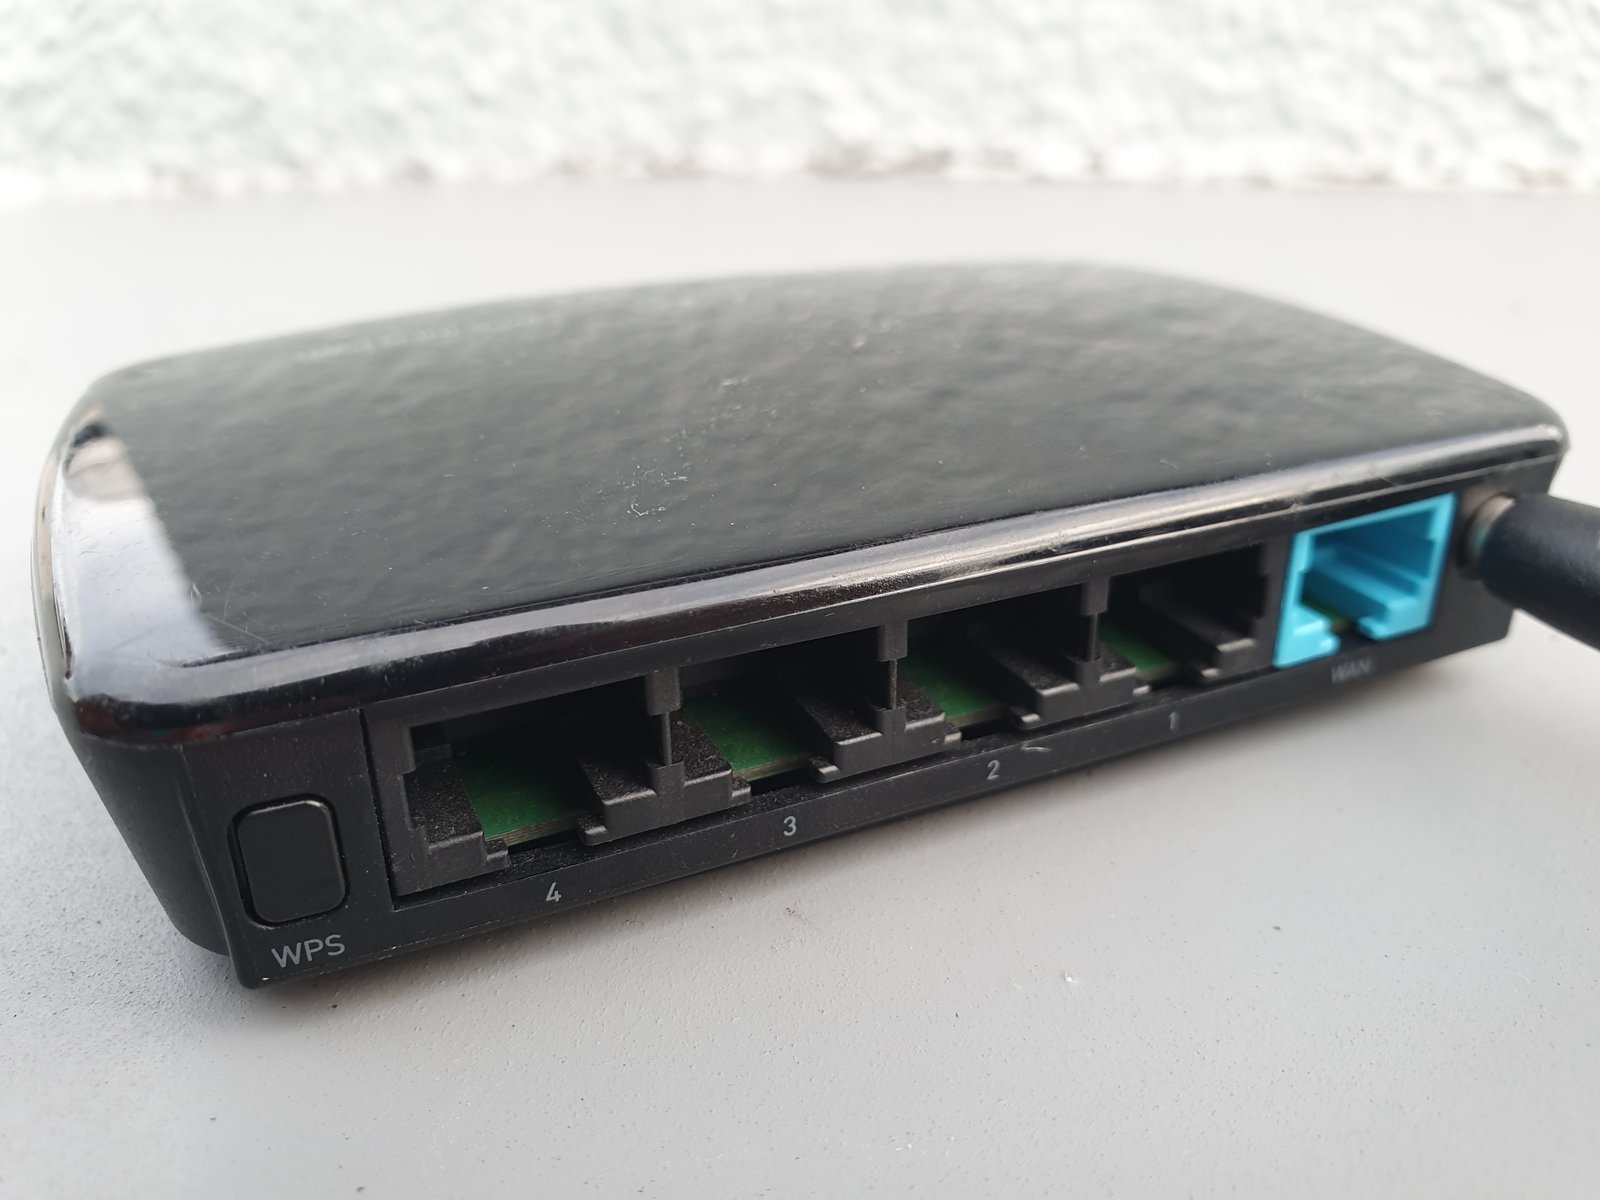
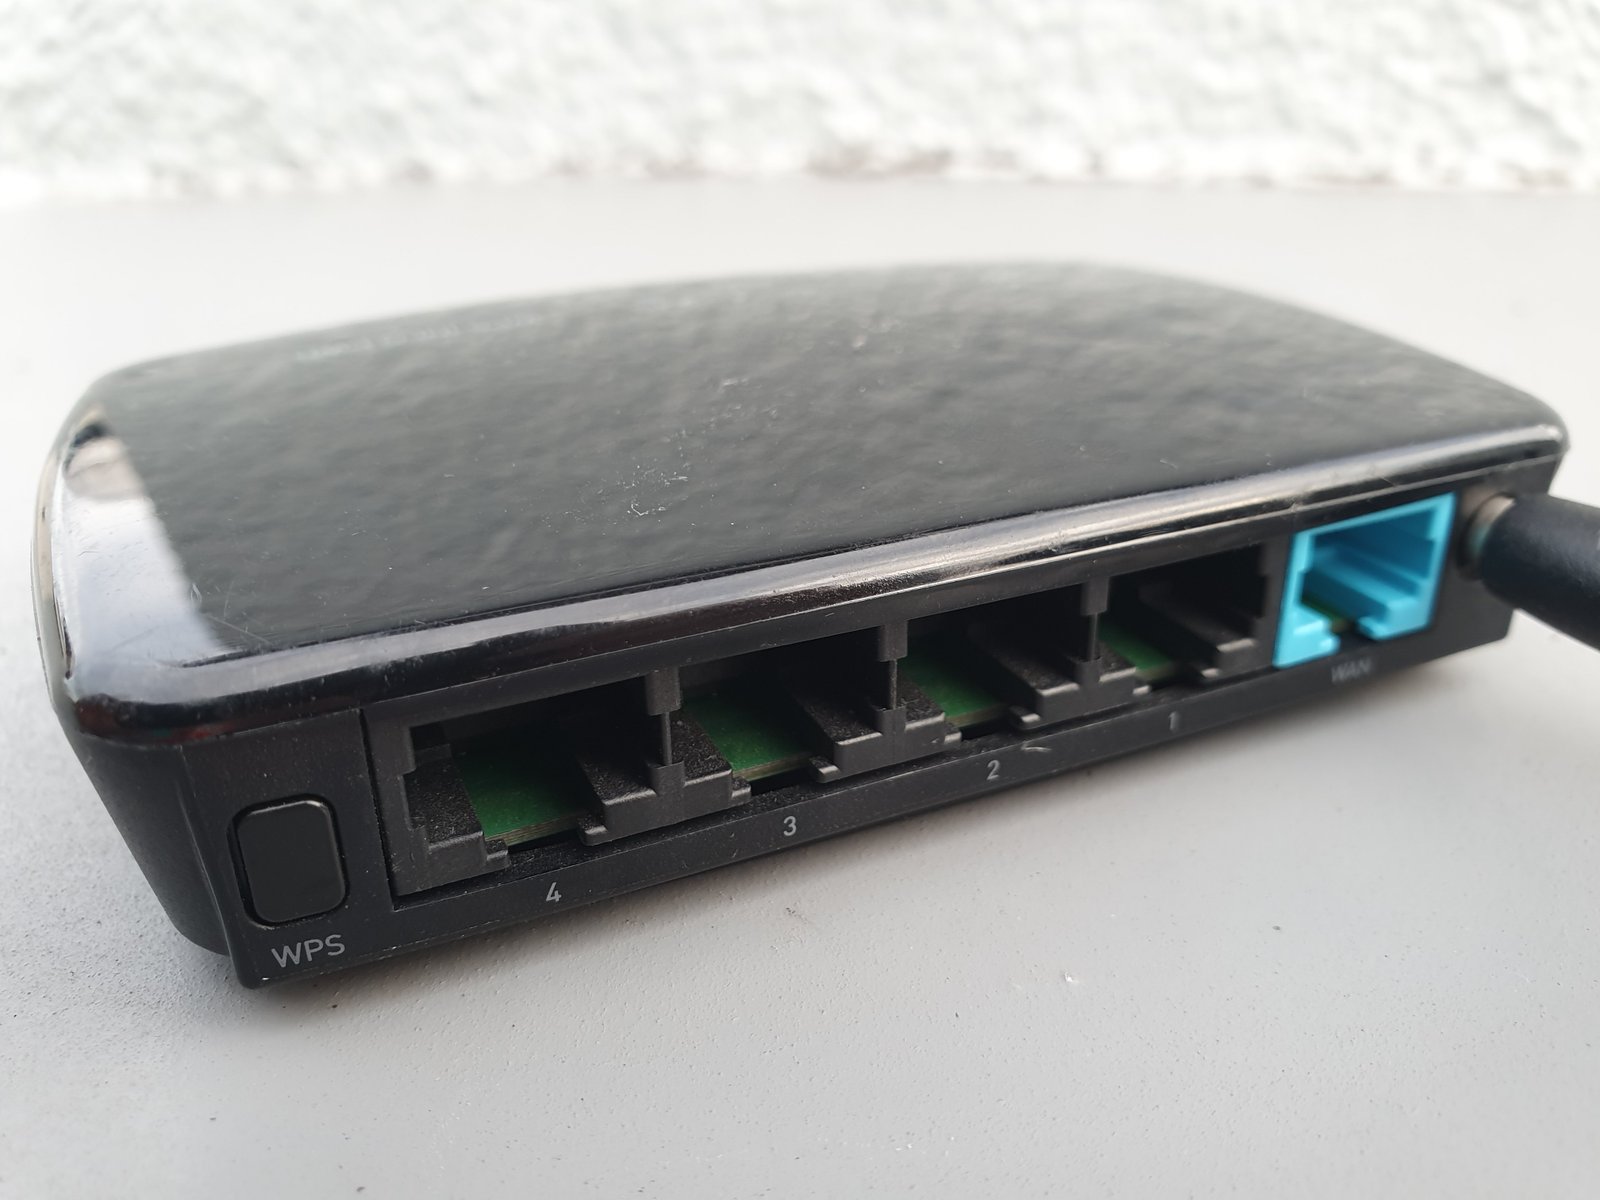
    Reliable Wi-Fi connection used during eSIM activation and phone transfer
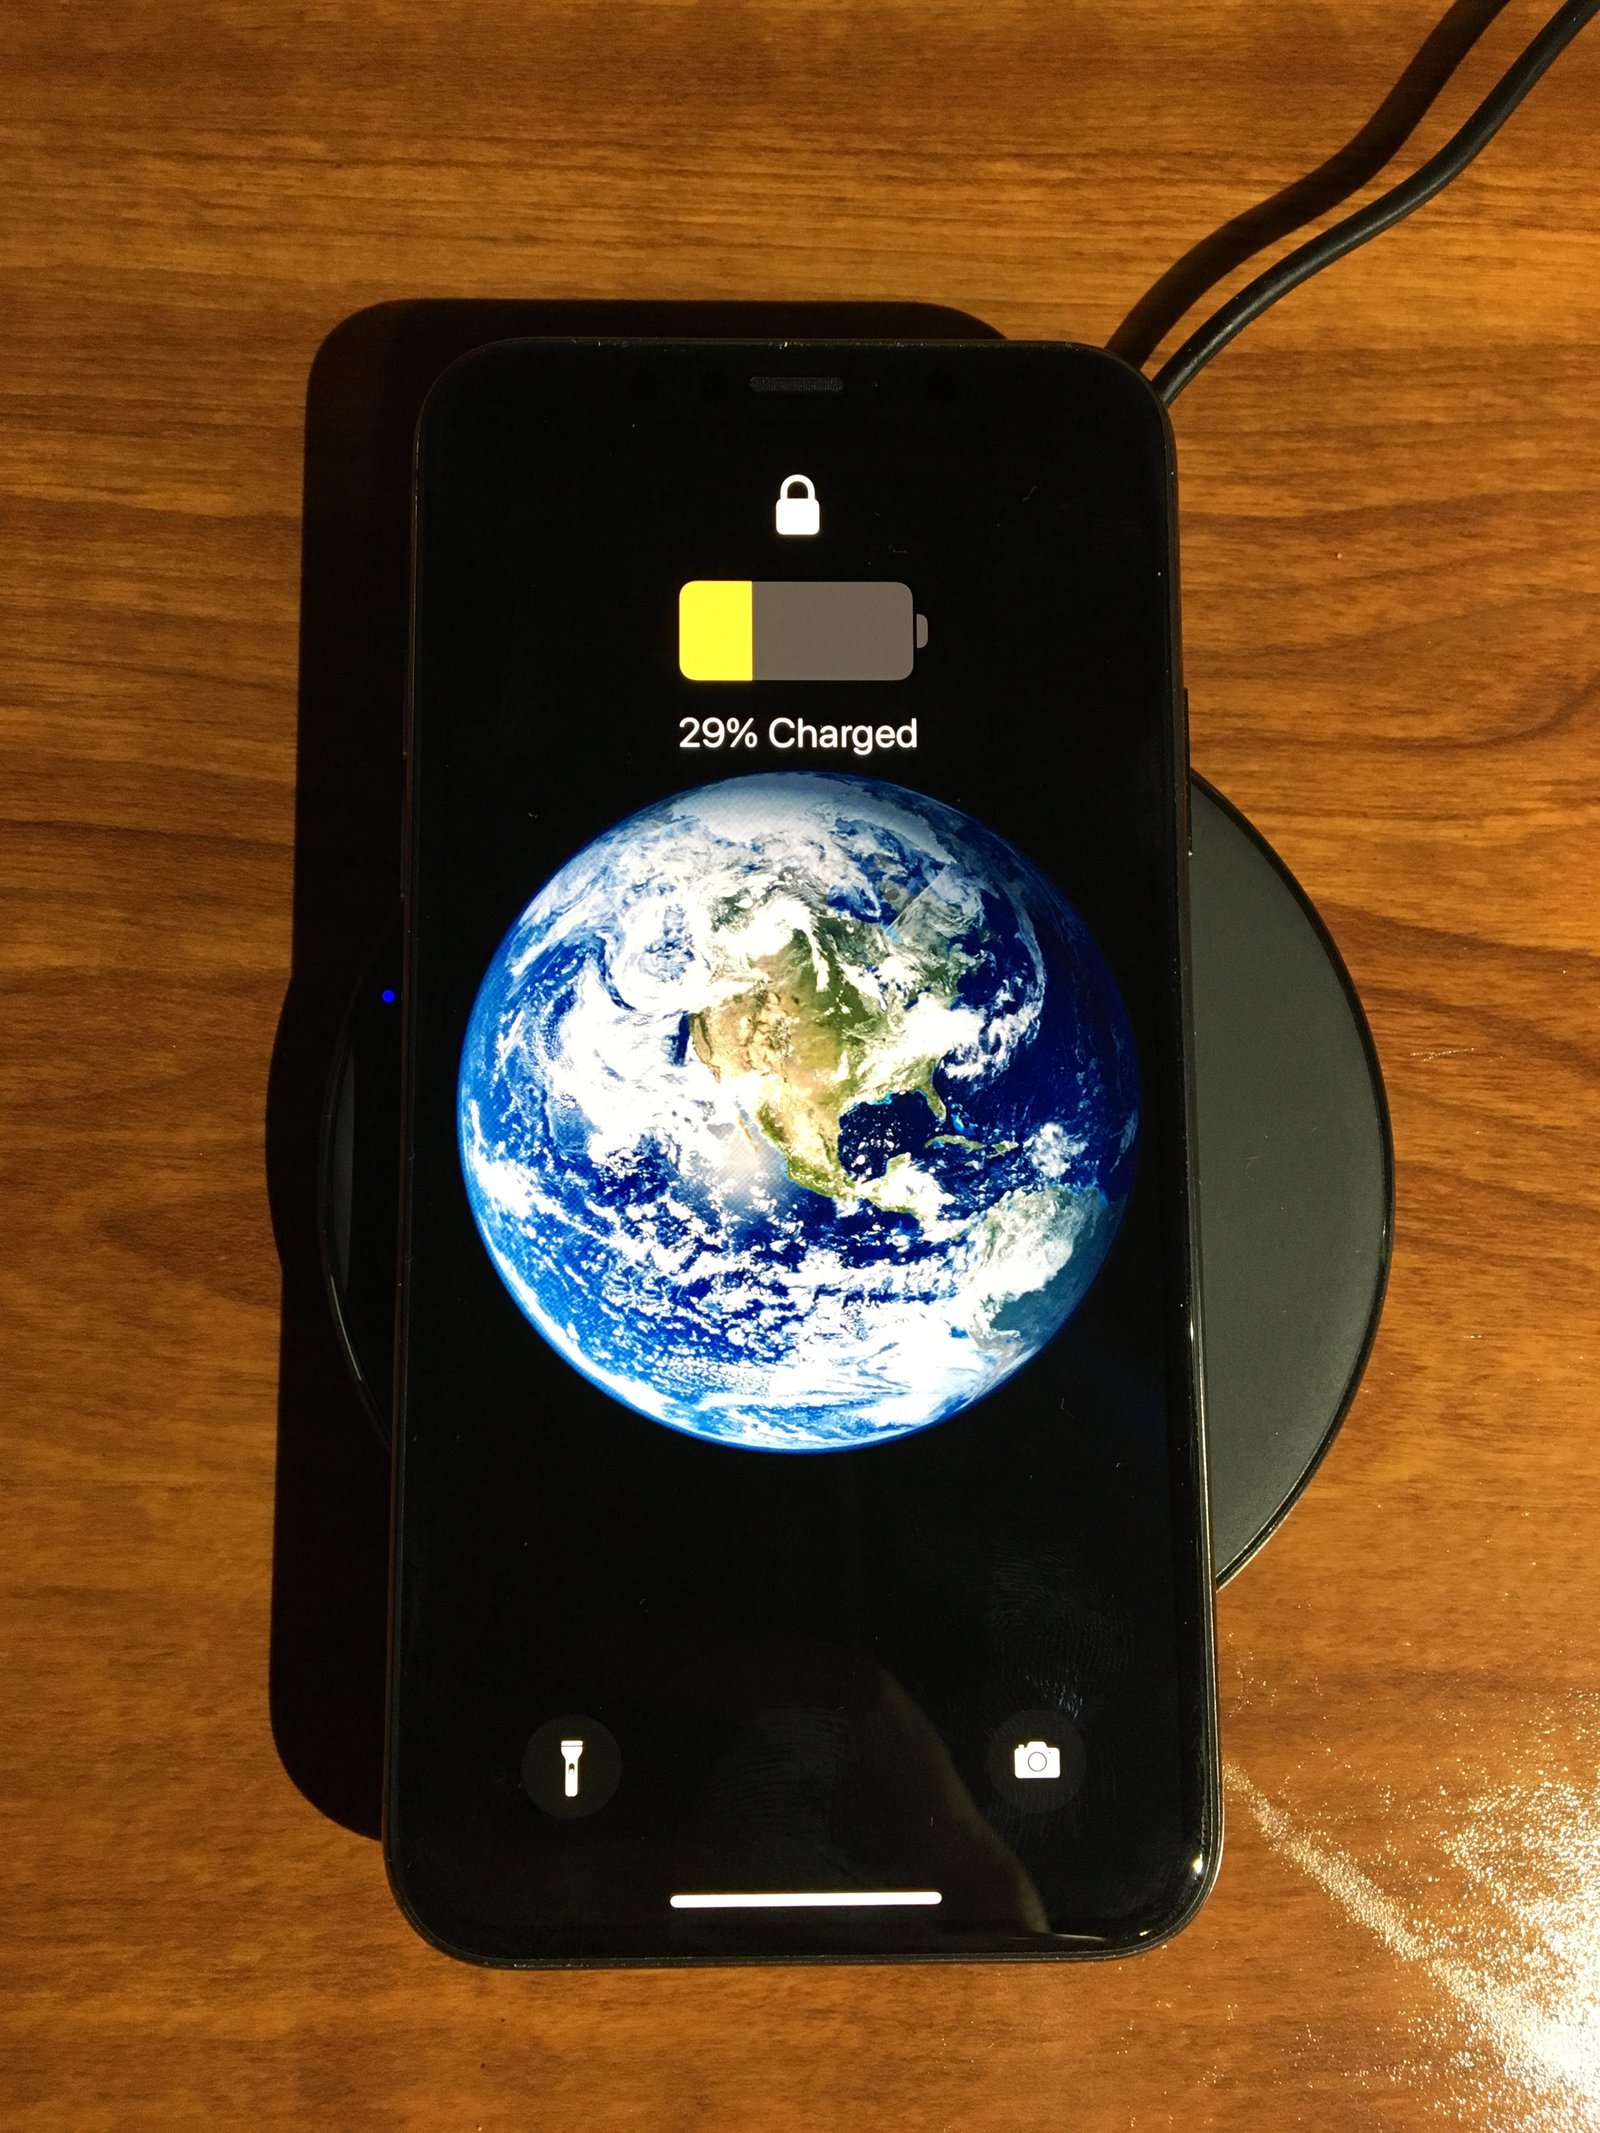
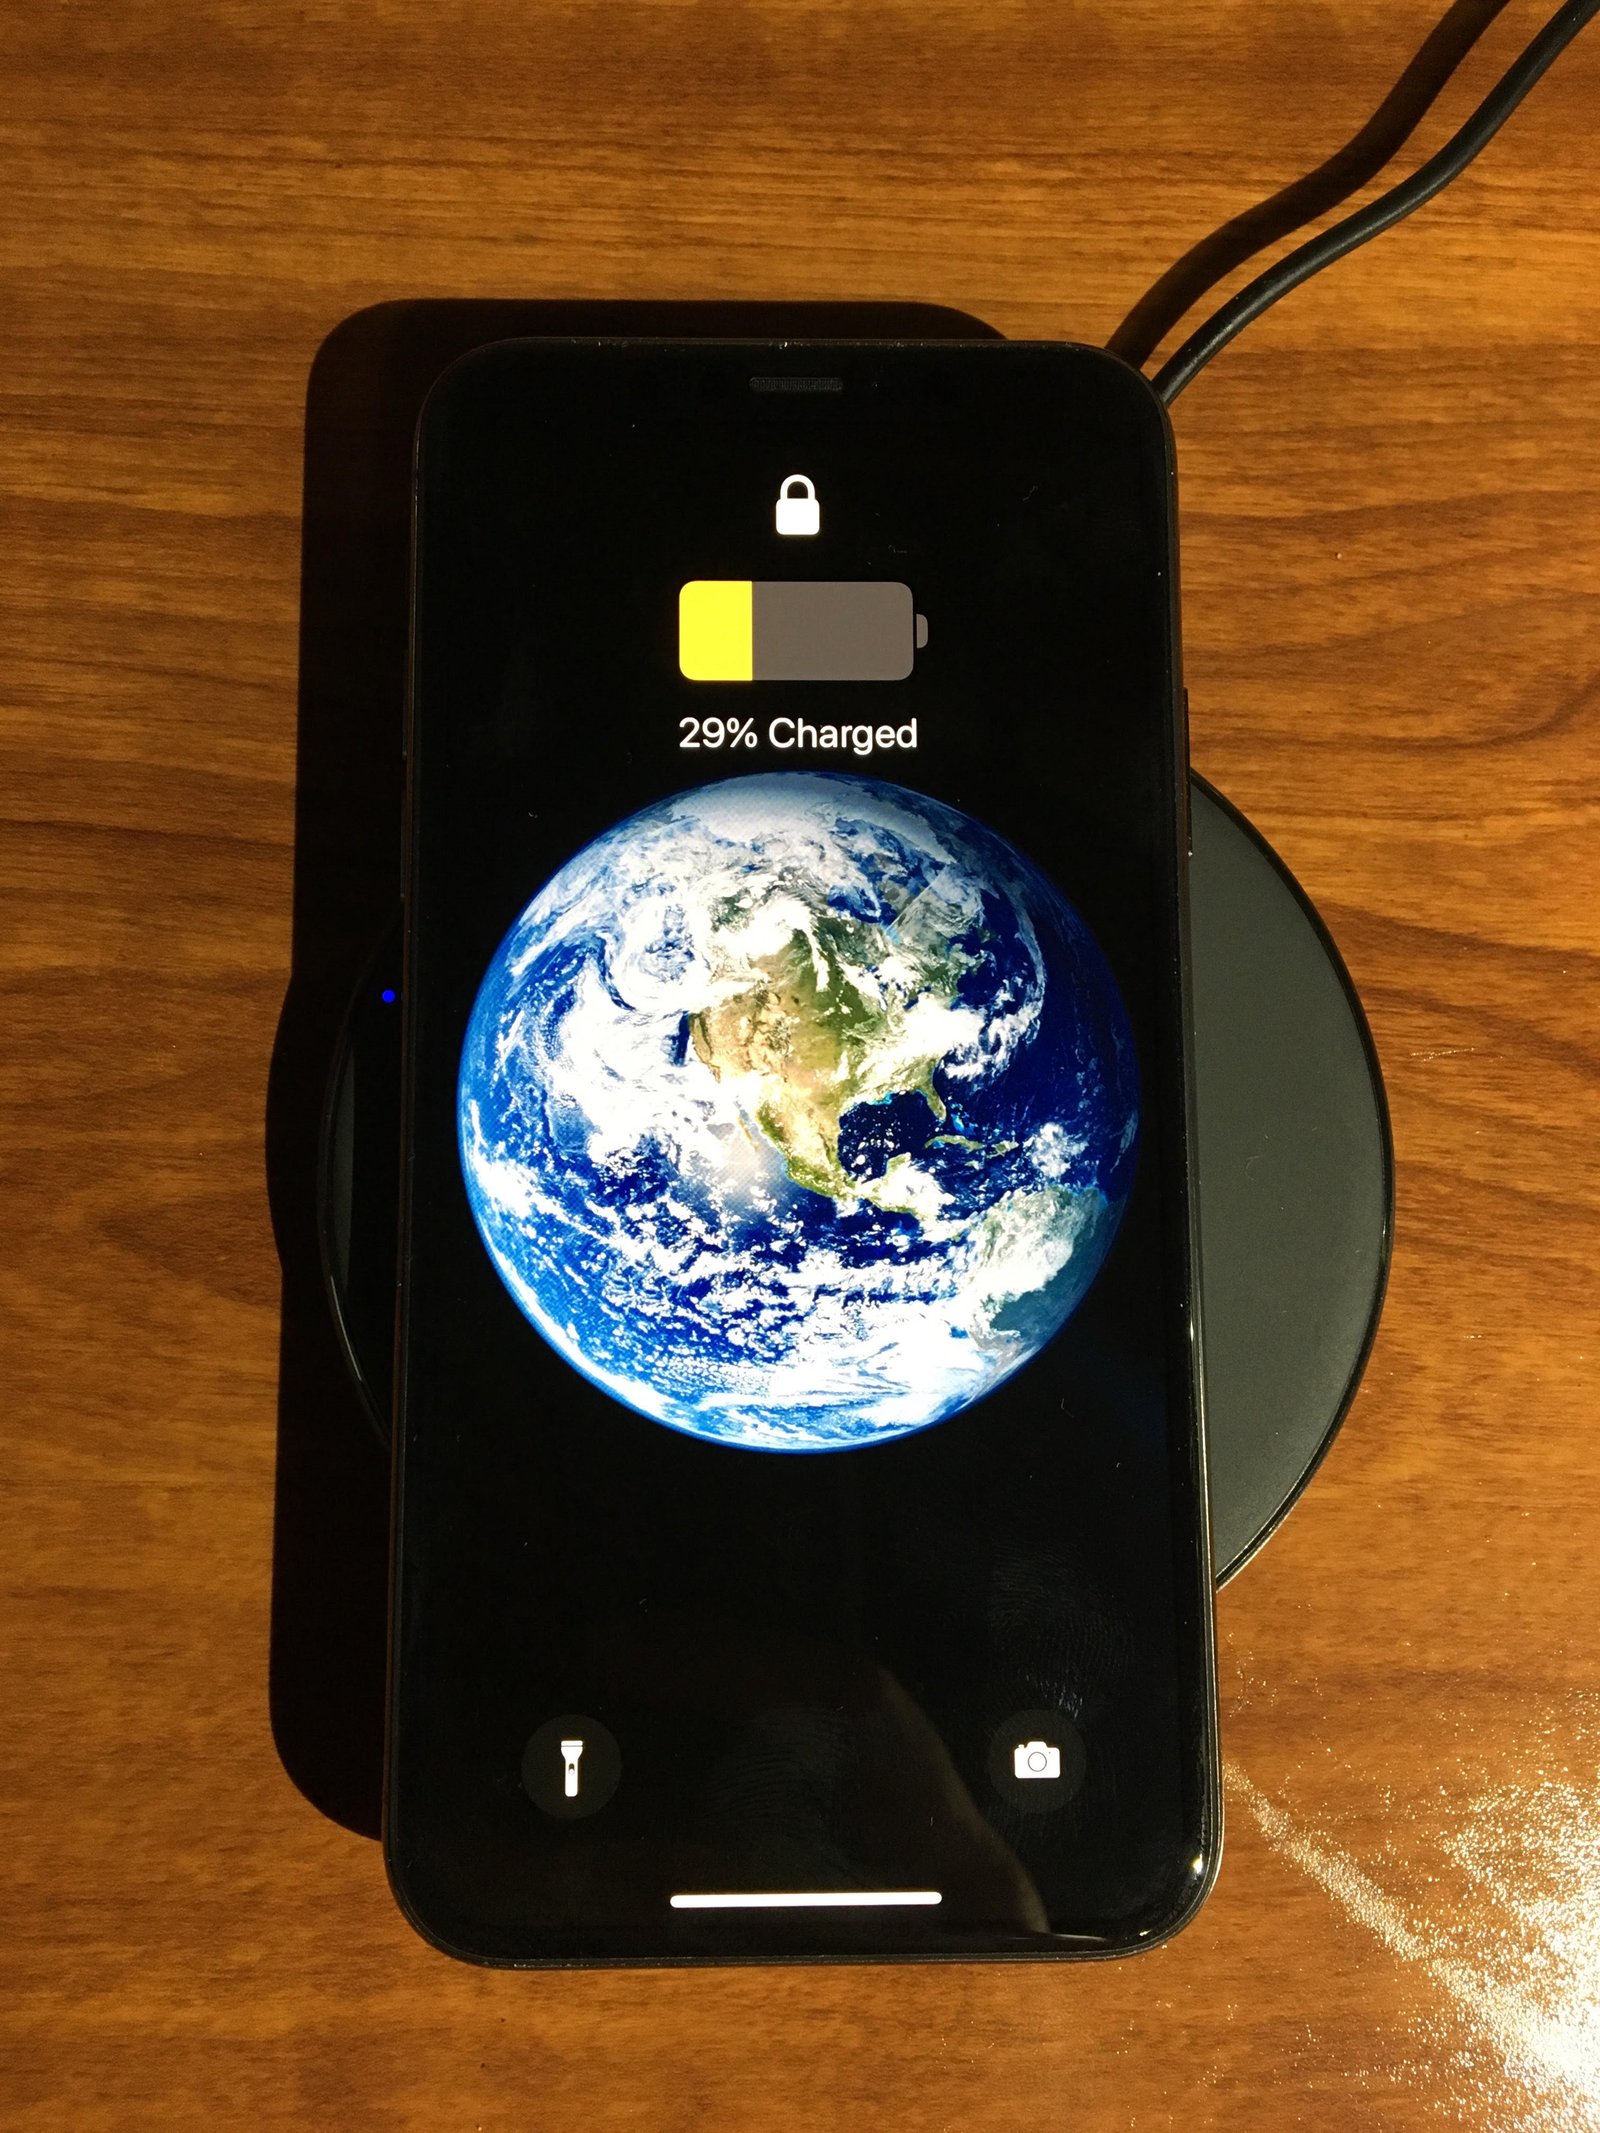
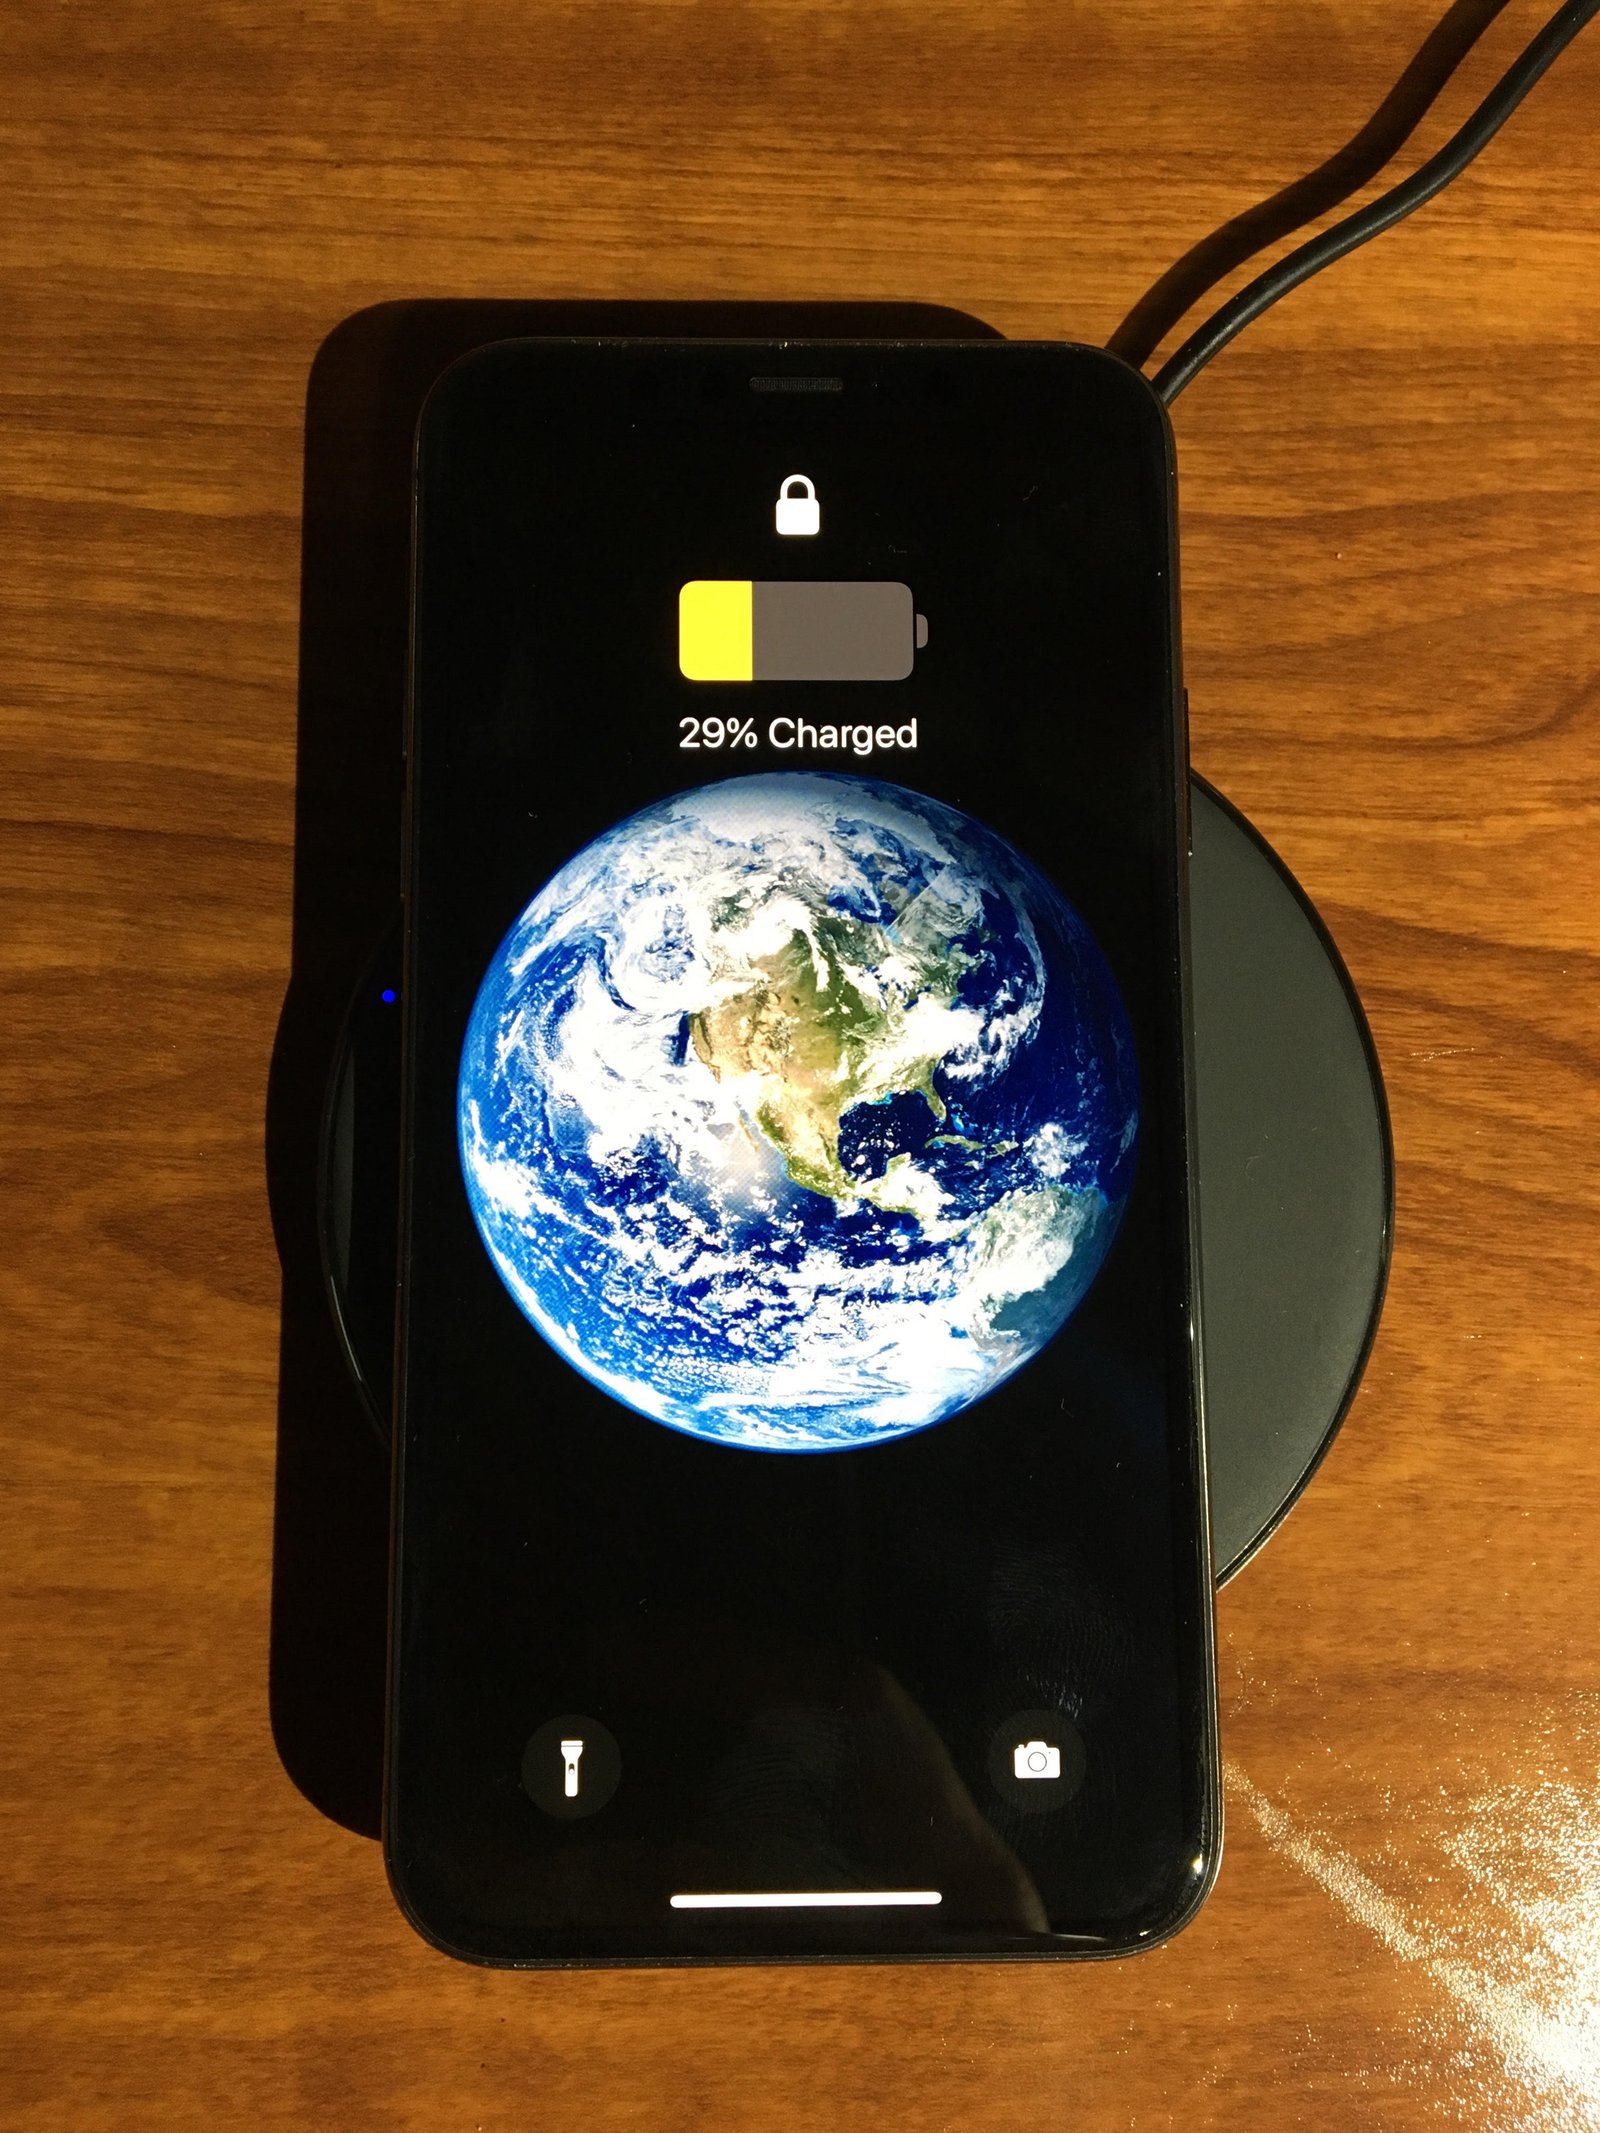
    Keep the old phone active until the new line works completely. During an eSIM move, use reliable Wi-Fi, keep both phones charged, and make sure you can sign in to the carrier account without depending on a code sent only to the line being transferred. If the carrier offers nearby transfer, QR activation, or an app workflow, follow that exact method. Do not erase the old eSIM or factory-reset the old phone simply because mobile data starts working; first verify calls, SMS, voicemail, and messaging registration.

    This guide explains how eSIM transfer works, how to prepare before changing phones, how dual-SIM setups behave, what happens to messaging and authentication, and how to avoid losing service when traveling or upgrading your device.

    What an eSIM is

    An eSIM is an embedded SIM component built into the device. Instead of inserting a removable plastic card, the phone downloads a carrier profile.

    The profile contains information that lets the network identify and authenticate the subscription.

    eSIM does not mean the phone is unlocked

    A carrier-locked phone can support eSIM while still restricting which networks can be activated.

    Check carrier support first

    Not every carrier supports the same eSIM features. One network may allow instant device-to-device transfer while another requires a new activation code.

    Use the carrier’s official support page for the exact phone model and country.

    Prepaid and business lines can differ

    Even within one carrier, eSIM rules can vary by plan type.

    Check phone compatibility

    A phone may support one active eSIM, several stored eSIMs, dual eSIM, or eSIM plus physical SIM.

    Capabilities vary by model and region.

    Do not assume two identical-looking phones have identical SIM hardware

    Regional variants can differ.

    Prepare before moving to a new phone

    Do not erase the old phone first. Keep it charged, connected to Wi-Fi, and available until the new phone has working calls, messages, and data.

    Know your carrier account password, PIN, and recovery method.

    Keep another way to access your account

    If login codes are sent to the old phone number, losing service before activation can create a lockout loop.

    Back up the old phone

    eSIM transfer and data transfer are separate processes. A phone backup protects photos, messages, apps, settings, and other data.

    Confirm the backup before starting the carrier move.

    Use built-in transfer when supported

    Modern phones may offer a “transfer from nearby phone” option during setup.

    The old device approves the transfer, and the carrier moves the subscription to the new eSIM.

    Keep Bluetooth and Wi-Fi available

    Nearby transfer workflows may depend on both.

    QR-code activation

    Some carriers provide a QR code that the phone scans to download the eSIM profile.

    The code may be single-use.

    Do not share eSIM QR codes publicly

    Treat activation codes as account credentials.

    Carrier-app activation

    Many carriers allow eSIM setup through their mobile app.

    You sign in, choose the line, select the device, and follow activation steps.

    Use the official carrier app

    Verify the publisher before entering account credentials.

    Manual activation details

    Some providers give an SM-DP+ address and activation code for manual setup.

    Enter these values exactly.

    Copy carefully

    One wrong character can cause a generic activation error.

    What happens to the old eSIM

    After a successful transfer, the carrier usually deactivates the old profile.

    The profile may remain visible on the old phone but no longer connect.

    Remove the old profile only after testing

    Do not delete it during troubleshooting unless the carrier instructs you to do so.

    Test voice calls

    Make an outgoing call and receive one.

    Confirm the correct caller ID and line.

    Test mobile data

    Turn off Wi-Fi and open a website or speed test.

    Check that the phone uses the intended cellular line.

    Test SMS

    Send and receive a normal SMS.

    This is especially important for banking and account verification.

    Test RCS or iMessage registration

    Changing eSIM can trigger re-registration of messaging services.

    Confirm that your phone number is active in the default messaging app.

    Give registration time

    Messaging activation can take longer than basic cellular service.

    Check voicemail

    Carrier voicemail settings may need to reinitialize after a transfer.

    Test it before deleting the old phone.

    Dual-SIM basics

    Dual SIM lets a phone keep two mobile lines available.

    You may use a personal and business number, home and travel line, or voice line plus data line.

    Dual standby is common

    Both lines can wait for calls, but active-call behavior varies by phone and carrier.

    Choose the default voice line

    Set which line is used for new outgoing calls.

    Many phones remember the preferred line per contact.

    Choose the default data line

    Only one line usually provides mobile data at a time.

    Set the travel eSIM as the data line if you bought it for local internet.

    Turn off data roaming on the home line

    When traveling, disable data roaming for your expensive home line unless your plan includes it.

    This helps avoid surprise charges.

    Keep the line enabled for calls and SMS if needed

    Voice roaming and SMS charges can still apply, so check your plan.

    Travel eSIMs

    Travel eSIM providers sell regional or country data packages that can be activated without visiting a local shop.

    They are convenient for short trips and multi-country travel.

    Many travel eSIMs are data-only

    You may not receive a normal local phone number.

    Install a travel eSIM before departure

    If the provider allows it, install the profile while you still have reliable home Wi-Fi.

    Do not necessarily activate the data package early if the validity period starts immediately.

    Understand when the plan starts

    Some plans start at installation. Others start when the eSIM first connects to a supported network.

    Read the provider terms.

    APN settings

    Some eSIMs configure the access point automatically. Others require manual APN settings.

    If data does not work, compare the APN with the provider’s instructions.

    Network selection

    A travel eSIM may partner with several local networks.

    Automatic selection is usually simplest, but manual selection can help if one partner has poor coverage.

    5G availability

    A phone and eSIM plan can both support 5G while the roaming partner provides only 4G in your area.

    Coverage, carrier agreements, and device bands all matter.

    Hotspot support

    Some travel plans allow tethering and others limit it.

    Check before relying on the phone as a laptop hotspot.

    Voice calls with data-only eSIMs

    Internet calling apps can use the travel eSIM’s data.

    Your home number may still receive calls through cellular roaming or Wi-Fi calling depending on the carrier.

    Wi-Fi calling with dual SIM

    Some phones and carriers allow the home line to use the other SIM’s cellular data as a path for Wi-Fi-calling-style service.

    Support varies widely.

    Test before relying on it abroad

    Do not assume your exact carrier supports this behavior.

    Receiving authentication codes abroad

    Keep the home line active if important accounts send SMS codes there.

    Receiving SMS may be free on some carriers and charged on others.

    Move important accounts away from SMS when possible

    Passkeys and authenticator apps can be more reliable during international travel.

    Phone number porting

    Porting moves a number between carriers.

    Do not cancel the old service before the port completes unless instructed.

    Keep account details accurate

    Name, account number, PIN, and billing information may need to match.

    eSIM and phone reset

    A factory reset may ask whether to keep or erase eSIMs.

    Choose carefully.

    Erase eSIM only when you are sure you can reactivate

    A reset can become much harder if the carrier requires an activation code you no longer have.

    Selling or giving away a phone

    Transfer service first. Verify the new phone. Sign out of accounts. Remove device locks. Erase eSIM profiles. Factory reset the old phone.

    Check activation lock

    Apple and Android devices have anti-theft protections that must be removed correctly before sale.

    Lost phone

    Contact the carrier to suspend or move the line.

    Use the platform’s lost-device tools to lock or erase the device.

    Stolen phone

    Treat the line and account as sensitive. Change important account passwords if necessary and review sign-in sessions.

    Carrier account security

    Protect the carrier account with a strong password and account PIN.

    SIM-swap attacks target weak carrier authentication.

    Add port-out protection if offered

    Some carriers let you set an extra transfer lock or PIN.

    Common “eSIM cannot activate” causes

    Unsupported carrier, locked phone, already-used QR code, no internet connection, wrong account details, incomplete port, outdated software, or carrier outage can all cause failure.

    Common “no service” causes

    Wrong line enabled, incorrect roaming setting, unsupported network band, network selection problem, account suspension, or failed provisioning.

    Common “data works but calls fail” causes

    Data-only plan, incomplete IMS registration, carrier voice configuration, or wrong default line.

    Common “calls work but data fails” causes

    Wrong data line, APN settings, disabled roaming, exhausted plan, or network restriction.

    Do not repeatedly delete and reinstall profiles

    A single-use activation code can become invalid.

    Follow the carrier’s troubleshooting order.

    Keep screenshots of plan details

    Save order number, provider support contact, plan validity, network partners, and APN settings before travel.

    Do not expose activation secrets in shared screenshots.

    Business eSIM management

    Companies may use device-management systems or carrier portals to deploy eSIM profiles.

    Keep employee offboarding and line reassignment documented.

    Children and family plans

    eSIM can simplify adding watches or secondary devices, but account owners should understand which device receives calls, data, and location services.

    When physical SIM is still useful

    A physical SIM can be easier to move between compatible phones without carrier activation tools.

    It can also be a useful fallback for travelers in countries where local prepaid eSIM support is limited.

    When eSIM is better

    eSIM is convenient for travel plans, dual-line use, quick remote activation, and phones without physical SIM trays.

    Upgrade-day checklist

    Back up old phone. Keep it powered on. Update both devices. Confirm carrier account access. Transfer apps and data. Transfer eSIM. Test calls, SMS, data, messaging registration, and voicemail. Only then erase the old phone.

    Travel checklist

    Confirm phone is unlocked. Install travel eSIM. Save plan instructions. Set travel line for data. Disable home data roaming. Keep home line for authentication if needed. Test connectivity. Know support contacts.

    Conclusion

    eSIM makes mobile service more flexible, especially for phone upgrades and travel, but the safest move is still a controlled move.

    Keep the old phone active until the new line works. Protect carrier credentials. Understand which line handles calls, messages, and data. Test messaging registration and account codes before traveling.

    Once you know the difference between the subscription, the eSIM profile, and the phone’s dual-SIM settings, most eSIM problems become much easier to diagnose.


    Account security controls for protecting eSIM activation and carrier credentials
    Treat carrier credentials and eSIM activation codes as sensitive account information. Do not post QR codes, activation strings, account PINs, or port-out details in public screenshots. Use a strong carrier password, enable extra transfer protection where available, and keep account recovery methods current. SIM-swap fraud often targets the carrier account rather than the phone itself. If you receive an unexpected transfer notice or suddenly lose service, contact the carrier through an official support channel and review important account sessions immediately.
    eSIM travel and transfer checklist used before changing phones
    For travel, save the eSIM provider’s installation instructions, APN, supported networks, validity rules, and support contact before departure. Label the home and travel lines clearly in phone settings. Set the intended line for mobile data and disable data roaming on the expensive line unless your plan includes it. Keep the home number enabled if you need banking or account codes, but check voice and SMS roaming charges. A short written checklist prevents accidental roaming and makes troubleshooting much easier after landing.
    Smartphone service illustrating the need to verify eSIM before resetting an old device
    Finish the transfer with a real-world test. Turn off Wi-Fi, place an outgoing call, receive one, send and receive SMS, load a website over cellular data, check voicemail, and confirm RCS or iMessage registration where relevant. If you use dual SIM, make one call and one data test from each intended line. Only after these checks should you remove the old profile or wipe the old phone. Keeping the previous device for a short overlap gives you a recovery path if activation or authentication fails.
  • Bluetooth LE Audio and Auracast Explained: Better Efficiency, Shared Audio, and What You Need to Use It

    Bluetooth LE Audio and Auracast Explained: Better Efficiency, Shared Audio, and What You Need to Use It

    Bluetooth audio is changing again. Traditional Bluetooth headphones and speakers have worked well for years, but Bluetooth LE Audio adds a newer audio architecture designed for better efficiency, more flexible audio streams, improved support for hearing devices, and broadcast audio through a feature called Auracast.

    Smartphone used as a Bluetooth LE Audio source for headphones and earbuds
    Check the exact phone model and software version before buying headphones for LE Audio. A Bluetooth version number such as 5.x does not prove that LC3, LE Audio, or Auracast is enabled. Manufacturers can support different feature sets on different models. After pairing, look at the device settings for the active audio mode, then test music, calls, video lip-sync, and battery behavior. Keep classic Bluetooth fallback available if you use older computers, TVs, cars, or other sources.

    The challenge is compatibility. A phone can support Bluetooth 5.x without supporting every LE Audio feature. Headphones may support LE Audio but not Auracast reception. A TV may advertise Bluetooth while still using only classic audio profiles. This guide explains the pieces so you can understand what actually matters when buying or troubleshooting new audio gear.

    What Bluetooth LE Audio is

    Bluetooth LE Audio is an audio system built on Bluetooth Low Energy rather than the older Bluetooth Classic audio architecture.

    It was designed by the Bluetooth SIG to improve efficiency and enable new use cases.

    LE Audio is more than a new codec

    It includes a new transport model, new audio profiles, support for multiple synchronized streams, and broadcast audio.

    What LC3 is

    LE Audio uses the Low Complexity Communication Codec, or LC3.

    LC3 is designed to provide good audio quality at lower bitrates than older baseline Bluetooth codecs.

    Lower bitrate can improve efficiency

    Less data can mean lower radio activity and better battery life, depending on the device implementation.

    Sound quality is not determined by codec name alone

    Headphone drivers, tuning, digital signal processing, amplifier design, fit, source quality, and volume level all affect the final sound.

    A well-designed older Bluetooth headphone can sound better than a poor LE Audio product.

    Do not buy only for a codec logo

    Independent audio tests still matter.

    What Auracast is

    Auracast is a Bluetooth broadcast-audio feature built on LE Audio.

    Instead of pairing one source to one headset, a source can broadcast audio that multiple compatible receivers can join.

    Think of it like a local audio broadcast

    A TV in a public space, conference screen, airport gate, fitness class, or museum could broadcast audio to many personal listening devices.

    Auracast can be public or protected

    A broadcast may be open for anyone nearby to join or protected with an access code.

    The exact user experience depends on the source and receiver.

    Why Auracast matters for public spaces

    Public televisions often run silently because sending sound through speakers would disturb the area.

    Auracast can let people hear the audio through their own compatible earbuds or hearing devices.

    It can improve accessibility

    The same infrastructure can provide clearer audio to people who need assistive listening.

    Hearing-device support is important

    LE Audio was designed with modern hearing-aid and assistive-listening use cases in mind.

    Compatible hearing devices can receive audio more efficiently and potentially connect to broader public-audio systems.

    Check certified compatibility

    Medical and hearing products have specific support requirements. Use manufacturer documentation rather than assuming every Bluetooth hearing device supports LE Audio.

    Multi-stream audio

    Traditional true wireless earbuds often use one earbud as a primary connection that relays audio to the second earbud.

    LE Audio supports more flexible synchronized streams, allowing the source to send separate channels directly where the hardware supports it.

    This can improve synchronization

    Implementation quality still determines the real result.

    Battery life potential

    Bluetooth Low Energy was designed for efficient radio use, and LC3 can deliver useful quality at lower bitrates.

    This can help manufacturers trade between battery life, product size, and audio performance.

    Battery claims still depend on the whole product

    Noise cancellation, microphone use, volume, codec mode, and radio conditions all affect runtime.

    Gaming and latency

    LE Audio can support lower-latency configurations than some traditional Bluetooth audio paths.

    That can be useful for games, calls, and video.

    Low latency is not automatic

    Phone software, game engine, headphones, and selected audio mode all contribute.

    Voice calls

    LE Audio includes updated profiles for calls and communication.

    Better efficiency and stream handling can improve device design, but microphone quality remains a product-specific issue.

    Compatibility starts with the source device

    Your phone, tablet, PC, TV, or transmitter must support the required LE Audio features.

    Bluetooth version numbers alone do not prove feature support.

    Read the feature list

    Look specifically for LE Audio, LC3, Auracast transmission, or Auracast reception.

    Headphones need matching support

    Earbuds may support classic Bluetooth audio, LE Audio, both, or a subset.

    Firmware updates can sometimes add or improve LE Audio features on capable hardware.

    Operating-system support matters

    The phone or computer operating system must expose LE Audio features to applications and settings.

    Support can vary by version, device model, and region.

    Keep devices updated

    New Bluetooth features often mature through firmware and operating-system updates.

    Android support

    Recent Android versions support LE Audio features on compatible hardware.

    Phone manufacturers may enable different functions on different models.

    Windows support

    Windows support depends on operating-system version, Bluetooth hardware, drivers, and headset capability.

    PC users should check the laptop or adapter specifications.

    Apple ecosystem support

    Apple devices support a range of modern Bluetooth and accessibility features, but users should check the exact product and software version for LE Audio or Auracast behavior.

    Apple Support provides current device documentation.

    TV support

    Auracast can be especially useful on televisions, but support is still model-specific.

    A TV with normal Bluetooth output does not automatically broadcast Auracast.

    External transmitters can help

    Compatible transmitters may add Auracast broadcast capability to devices that provide an audio output.

    Public broadcast discovery

    A compatible phone or receiver may show nearby Auracast broadcasts in a list, similar to discovering a Wi-Fi network.

    You select the desired broadcast and join it.

    QR codes can simplify joining

    Venues may display a code that helps users connect to the correct stream.

    Private shared listening

    Auracast is not only for stadiums and airports. Families can use broadcast audio to share a TV or music source with several compatible listeners.

    This is useful when people want different personal volume levels.

    Fitness classes

    A gym could broadcast instructor audio or selected music channels directly to compatible earbuds.

    This can reduce the need for loud room speakers in some environments.

    Conference use

    Events could broadcast translation, stage audio, or assistive listening channels.

    Deployment depends on venue infrastructure and receiver availability.

    Museums and tours

    Auracast can support guide audio or exhibit channels without dedicated loaner receivers.

    Venues still need a fallback for visitors without compatible devices.

    Airport and gate announcements

    In theory, public broadcast audio can make announcements easier to hear through personal devices.

    Large-scale adoption depends on infrastructure, standards support, and accessibility planning.

    Security and privacy

    Open broadcasts are intended to be discoverable. Do not treat them as private communications.

    Protected broadcasts can require an access code.

    Pairing security and broadcast security are different

    A personal paired headset connection is not the same as joining a public broadcast.

    Can other people hear your private audio?

    Normal personal LE Audio connections do not automatically become public Auracast broadcasts.

    A source must intentionally provide broadcast functionality.

    Classic Bluetooth still matters

    New headphones often retain Bluetooth Classic support for older phones, laptops, car systems, and TVs.

    This backward compatibility will remain important during the transition.

    Dual-mode products are practical

    They can use newer features where available and fall back elsewhere.

    What happens when LE Audio is unavailable

    A compatible device may use traditional Bluetooth audio profiles instead.

    You may lose Auracast or newer efficiency features but still get normal audio.

    High-resolution audio marketing

    LE Audio and LC3 should not be confused with every high-resolution Bluetooth codec claim.

    Different proprietary codecs focus on different goals.

    Use listening tests and measurements

    Codec specifications alone do not predict whether you will enjoy the headphones.

    Multipoint versus multi-stream

    Multipoint lets headphones stay connected to more than one source, such as phone and laptop.

    Multi-stream refers to how audio streams are delivered within an LE Audio connection.

    They solve different problems

    A product can support one without the other.

    Spatial audio is separate

    Spatial audio can use head tracking and multichannel processing.

    It is not automatically provided by LE Audio.

    Noise cancellation is separate

    Active noise cancellation is implemented by the headphones themselves.

    LE Audio can coexist with ANC but does not create it.

    Microphone quality is separate

    A newer Bluetooth transport can help call handling, but microphone placement and processing remain critical.

    Firmware updates

    Check the headphone or speaker app for firmware updates.

    Manufacturers may fix stability, add compatibility, or improve LE Audio behavior.

    Buying earbuds for LE Audio

    Check explicit LE Audio support, LC3, phone compatibility, firmware update policy, battery life, call quality, fit, ANC, and fallback support.

    Do not pay extra for a feature your phone cannot use

    Check both ends before buying.

    Buying a TV for Auracast

    Look for Auracast transmission support, not just Bluetooth.

    Check whether broadcast works with the apps and inputs you use.

    Buying a hearing device

    Work with qualified hearing professionals and use manufacturer compatibility information.

    Accessibility features should be evaluated for the person’s actual hearing needs.

    Troubleshooting LE Audio

    Update phone and headphones. Remove and re-pair if official guidance recommends it. Check that LE Audio is enabled. Test classic Bluetooth fallback. Restart both devices. Review model-specific support.

    Troubleshooting Auracast

    Confirm the source is broadcasting. Confirm the receiver supports Auracast reception. Move closer. Check access code. Update software. Test another broadcast if available.
    When to care about LE Audio now

    It matters if you are buying new premium earbuds, hearing devices, TVs, or long-life hardware and want better future compatibility.

    When not to upgrade

    If your current headphones sound good, have reliable battery life, and work with every device you use, there is no need to replace them solely for the new standard.

    Practical checklist

    Check explicit LE Audio support. Confirm LC3. Confirm Auracast send or receive capability if needed. Verify phone or PC support. Keep firmware updated. Test fallback. Evaluate battery, comfort, microphones, and sound quality separately.

    Conclusion

    Bluetooth LE Audio is a meaningful change because it creates a more efficient foundation for personal and broadcast audio. LC3 improves codec efficiency, multi-stream enables flexible delivery, and Auracast opens new public and shared-listening use cases.

    The transition will take time. Bluetooth version numbers are not enough to prove support, and many products will continue using classic Bluetooth alongside LE Audio.

    Buy based on confirmed features and the devices you already own. The best benefit comes when the source, operating system, and listening device all support the same capabilities.

    Security and privacy considerations for Bluetooth audio and public Auracast broadcasts
    Treat public Auracast broadcasts as discoverable local audio, not as private communication. A venue may offer an open broadcast or a protected one with an access code. Joining a public broadcast is different from a personal paired headset connection. Keep phone and headphone firmware current, review unexpected pairing prompts, and avoid sharing protected broadcast codes more widely than intended. Normal personal LE Audio does not automatically become a public broadcast; the source has to provide broadcast functionality.
    Compatibility notes used to compare Bluetooth LE Audio devices before purchase
    Make a short compatibility list before you buy. Note whether you need LE Audio, LC3, Auracast transmission, Auracast reception, multipoint, low-latency gaming, hearing-device support, or only normal stereo audio. Then verify each item on both the source and receiver. Multi-stream audio, multipoint, spatial audio, and active noise cancellation are separate features, so one label does not guarantee the others. This checklist prevents paying extra for a feature that your phone, laptop, or TV cannot use.
    Laptop used as a Bluetooth LE Audio source for compatible headphones
    If audio is unstable, update the operating system, Bluetooth drivers, and headphone firmware first. Then remove the device and pair again only if the manufacturer recommends it. Test at short range with other wireless accessories temporarily disconnected. Compare LE Audio with classic Bluetooth fallback. If one mode works and the other does not, the problem is likely feature support, firmware, or driver behavior rather than the speaker hardware itself. Testing one mode at a time makes compatibility problems much easier to isolate. Also test the same headphones with a second compatible source if possible. This helps separate a headset problem from a phone or computer problem. Note whether failures happen during calls, music, games, or after sleep because each pattern points to a different part of the audio path.
  • VPN vs Proxy vs Private DNS: What Each Tool Changes and Which One You Actually Need

    VPN vs Proxy vs Private DNS: What Each Tool Changes and Which One You Actually Need

    VPNs, proxies, and private DNS are often grouped together as privacy tools, but they work at different layers. A VPN can route most device traffic through another network. A proxy usually handles traffic for a specific app or protocol. Private DNS changes how domain names are resolved and can add encryption or filtering, but it does not replace a VPN.

    Security controls illustrating the encryption and privacy differences between VPNs proxies and private DNS
    A VPN can protect traffic between your device and the VPN service, while a proxy usually handles selected application traffic and private DNS changes only DNS resolution. Match the tool to the problem instead of assuming all three provide the same privacy boundary.

    This guide explains the differences in plain English. The goal is to help you choose the right tool for normal privacy, travel, public Wi-Fi, content filtering, testing, and network troubleshooting without assuming one tool solves every problem.

    Start with the question you are trying to answer

    Before choosing a tool, decide what you actually want to change. Do you want to encrypt traffic on public Wi-Fi? Route one browser through another IP address? Block known malicious domains? Keep DNS queries away from an untrusted network? Access a company network from home?

    Each goal points to a different solution.

    Do not buy a privacy label

    Choose based on behavior. Marketing terms such as secure, private, anonymous, or protected can hide important technical differences.

    What a VPN does

    A virtual private network creates an encrypted tunnel between your device and a VPN server. Traffic that uses the tunnel exits to the internet from the VPN server.

    This can hide your normal public IP address from websites and protect traffic from local network observers, depending on the protocol and setup.

    The VPN provider becomes part of the trust model

    Your internet provider sees a connection to the VPN. The VPN provider may be able to observe metadata and, for unencrypted traffic, potentially more. Choose a provider carefully.

    What a proxy does

    A proxy sits between an application and the destination service. The application sends traffic to the proxy, and the proxy sends it onward.

    HTTP proxies handle web-style traffic. SOCKS proxies can handle a broader range of application traffic.

    Proxy scope is often narrower

    A browser can use a proxy while other apps continue using the normal connection.

    What private DNS does

    DNS converts domain names such as example.com into IP addresses. Traditional DNS queries may be visible to the local network or internet provider.

    Encrypted DNS technologies such as DNS over HTTPS and DNS over TLS can protect the DNS lookup from simple local observation.

    Private DNS does not route all traffic

    After the DNS lookup, your device still connects to the destination normally unless another tool changes the route.

    What websites can see with a normal connection

    Without a VPN or proxy, a website normally sees the public IP address used by your network.

    It may also collect cookies, account identity, browser characteristics, screen size, language, and other signals.

    IP address is only one identifier

    Changing the IP does not automatically make a logged-in account anonymous.

    What websites see with a VPN

    A website normally sees the VPN server’s public IP instead of your home or mobile public IP.

    If you log into an account, the service still knows the account identity.

    VPNs change routing, not your entire digital identity

    Cookies, browser fingerprinting, account sessions, and behavior can still link activity.

    What websites see with a proxy

    If the application is correctly configured, the destination may see the proxy server’s IP.

    Other apps that are not using the proxy continue to use the normal network route.

    What websites see with private DNS

    Private DNS usually does not change the public IP address seen by the website.

    It changes how the domain lookup is handled.

    Public Wi-Fi use case

    On a café, airport, or hotel Wi-Fi network, HTTPS already encrypts the content of most modern web traffic.

    A VPN can add another encrypted layer between your device and the VPN server, reducing what the local network can observe about destinations and traffic.

    Keep the device secure too

    A VPN does not protect against malware, fake login pages, weak passwords, or compromised accounts.

    Remote work use case

    Companies often use VPNs to connect employees to internal systems that are not exposed to the public internet.

    This is different from using a consumer VPN for general browsing.

    Follow the company configuration

    Do not replace a business VPN with a random consumer provider if the company requires a specific client or security policy.

    Travel use case

    A VPN can provide a consistent network route when moving between hotels, airports, and mobile networks.

    It can also help protect traffic on untrusted local networks.

    Local laws and service rules still apply

    Network tools do not override legal restrictions or provider terms.

    Browser testing use case

    Web developers and site owners sometimes use proxies to test how a site behaves from a different network path or with a separate session.

    A proxy is useful because only the test browser may need the alternate route.

    Use authorized testing

    Testing should target systems you own or are permitted to assess.

    App-specific routing

    A proxy can be useful when one application needs a different route but the rest of the device should stay unchanged.

    Some VPN clients also offer split tunneling, which provides a similar control at a different layer.

    Split tunneling

    Split tunneling lets selected apps or destinations bypass the VPN or use the VPN while others use the normal connection.

    This can improve speed and compatibility.

    Split tunneling reduces full-device coverage

    Make sure sensitive apps are not accidentally excluded.

    DNS filtering

    Private DNS providers can block known malicious, tracking, or adult domains depending on the service.

    This is useful for families, schools, or basic security filtering.

    DNS blocking is not perfect

    Apps can use hard-coded IP addresses, their own DNS, or encrypted connections that bypass simple filtering.

    Malware protection limits

    A VPN can encrypt traffic but cannot guarantee that a downloaded file is safe.

    A proxy can route traffic but does not replace antivirus or operating-system security.

    DNS filtering can block known bad domains but cannot inspect every file.

    Encryption differences

    A VPN encrypts the tunnel between your device and the VPN server. HTTPS encrypts web traffic between the browser and website. Encrypted DNS protects DNS lookups between the device and DNS resolver.

    These protections can exist at the same time.

    Layers can complement each other

    Using HTTPS over a VPN is normal. The website still receives an HTTPS connection after traffic leaves the VPN server.

    Free VPN risks

    Running VPN infrastructure costs money. A free service needs another business model.

    Review limits, advertising, data policies, ownership, security history, and paid upgrade model.

    Free is not automatically unsafe

    Some reputable companies offer limited free tiers, but the trust question still matters.

    Free proxy risks

    Public proxies can be unstable, slow, misconfigured, or operated by unknown parties.

    Do not send sensitive unencrypted traffic through an untrusted proxy.

    Unknown infrastructure deserves low trust

    For business, banking, or private accounts, use trusted networks and encrypted protocols.

    Choose VPN protocols carefully

    Modern VPN services may use WireGuard, OpenVPN, IKEv2, or proprietary protocols.

    Look for current security documentation and broad platform support.

    Do not choose only by protocol name

    Implementation, key handling, client security, and provider operations matter too.

    VPN logging policies

    Providers may describe no-logs, minimal logs, connection logs, diagnostics, or analytics.

    Read the actual privacy policy and independent audit information where available.

    Marketing summaries are not the full policy

    Look for retention periods and which metadata is collected.

    DNS provider trust

    Changing DNS moves trust from the default resolver to another provider.

    Providers such as Cloudflare and Google Public DNS publish technical and privacy information.

    Review policies before switching

    Private DNS can improve transport privacy, but the resolver still processes your DNS queries.

    VPN speed

    VPNs add encryption and another network hop. Speed can be lower than the direct connection.

    Distance to the server, protocol, server load, local network quality, and ISP routing all matter.

    Test more than download speed

    Check latency, video calls, uploads, gaming, and app reliability.

    Proxy speed

    Proxy performance depends heavily on server quality and distance.

    Public proxies can disappear without warning.

    DNS speed

    A fast DNS resolver can reduce lookup delay slightly, but it does not increase the bandwidth of the internet connection.

    DNS is only one small part of page loading

    Server response time, images, scripts, and network latency usually matter more.

    VPN and streaming

    Streaming services may use region licensing and detect or restrict certain VPN routes.

    Availability changes frequently.

    Check service terms

    Do not assume a VPN guarantees access to content from another region.

    VPN and banking

    Banks may flag unusual IP locations as suspicious.

    If login problems occur, use a normal trusted connection or a consistent VPN server.

    Security alerts can be legitimate

    A new network path can trigger fraud systems even when the user is genuine.

    Proxy authentication

    Private proxies may use username-password authentication or IP allowlists.

    Protect proxy credentials like other service credentials.

    DNS on phones

    Android supports system-level private DNS in many versions. iOS can use encrypted DNS through profiles or supported apps.

    The exact setup depends on the operating system.

    DNS in browsers

    Browsers may have their own secure DNS setting.

    This can create a different resolver choice from the operating system.

    Know which layer controls the request

    Troubleshooting becomes easier when you know whether DNS is configured in the browser, device, router, or VPN client.

    Router-level configuration

    A router can provide VPN or DNS settings for many devices.

    This is useful for smart TVs and other devices that do not support custom networking tools.

    Router performance can be a limit

    Older routers may not handle VPN encryption at full connection speed.

    Kill switch feature

    A VPN kill switch can block network traffic if the VPN tunnel fails.

    This is useful when you do not want traffic to fall back to the normal connection.

    Test the feature

    Disconnect the VPN and confirm the expected behavior before relying on it.

    DNS leak tests

    A VPN may intend to use its own DNS resolver. Misconfiguration can send DNS requests elsewhere.

    Use reputable diagnostic tools if DNS routing matters to your privacy model.

    IPv6 considerations

    A VPN or proxy setup must handle IPv6 correctly if the network uses it.

    Incomplete support can create unexpected routing.

    Modern clients should manage both protocols

    Use up-to-date software and test your connection.

    WebRTC and browsers

    Browser real-time communication features can expose network information in some configurations.

    Modern browsers and VPN clients have improved handling, but privacy-sensitive users should keep software current.

    Do not stack tools without a reason

    Using a VPN plus multiple proxies plus custom DNS can make troubleshooting difficult and may not improve privacy.

    Each extra layer adds a new service to trust.

    Simple is easier to verify

    Use the fewest tools needed for the actual goal.

    Which tool for public Wi-Fi?

    Use HTTPS and a trusted VPN if you want additional protection from the local network.

    Keep the device firewall, browser, and operating system updated.

    Which tool for one browser only?

    A trusted proxy can route only that browser. A separate browser profile can keep sessions distinct.

    Which tool for DNS privacy and filtering?

    Encrypted private DNS is the simplest option when your goal is domain lookup privacy or category filtering.

    Which tool for company resources?

    Use the employer’s approved VPN or zero-trust access solution.

    Which tool for full-device IP routing?

    A VPN is usually the general-purpose choice.

    Common mistakes

    Thinking private DNS changes your public IP, assuming a proxy encrypts all traffic, trusting unknown free infrastructure, forgetting split-tunnel exclusions, and treating a VPN as complete anonymity are common mistakes.

    Practical checklist

    Define the goal. Choose the correct layer. Use trusted providers. Keep software updated. Use HTTPS. Protect credentials. Review logging policies. Test routing and kill switch behavior. Keep the setup simple. Do not assume IP changes remove cookies or account identity.

    Conclusion

    A VPN, proxy, and private DNS solve different network problems. A VPN changes the route for broad device traffic and adds an encrypted tunnel. A proxy usually routes selected application traffic. Private DNS protects or changes domain-name resolution.

    Choose based on the problem instead of the label. For public Wi-Fi and full-device routing, a VPN can be useful. For one app, a proxy may be simpler. For DNS privacy or filtering, private DNS may be enough.

    None of these tools replaces secure accounts, updated software, HTTPS, careful permissions, or good judgment.

    Laptop used to verify VPN proxy and DNS provider settings
    Check the provider’s protocol support, privacy policy, logging statements, account security, and platform documentation before installing network software.
    Comparison notes used to choose between a VPN proxy and private DNS
    Write down whether you need IP masking, encrypted transport, application-specific routing, content filtering, or only safer DNS resolution. The answer usually makes the right tool obvious.
    Smartphone using mobile network privacy and DNS settings
    On mobile devices, test the setup on both Wi-Fi and cellular data so you know which connections are actually covered.
  • How to Evaluate Open-Source Software Before You Install It: Security, Maintenance, License, and Trust

    How to Evaluate Open-Source Software Before You Install It: Security, Maintenance, License, and Trust

    Open-source software can be excellent. It powers operating systems, browsers, servers, developer tools, databases, creative apps, and thousands of everyday utilities. The source code is available for inspection, but that does not automatically mean every open-source project is safe, actively maintained, or suitable for important work.

    Security review used before installing open-source software
    Start with the project’s own repository and release history. Check whether releases are recent, whether maintainers respond to security reports, and whether issues receive useful answers. A large star count or download number can show popularity, but it does not prove active maintenance. The stronger signal is a project that publishes fixes, documents changes, and gives users a clear path for reporting vulnerabilities.

    This guide explains how to evaluate an open-source app before you install it. You do not need to be a programmer. Most of the useful checks involve project activity, release history, security practices, documentation, license, download source, and community signals.

    Start with the exact problem you need to solve

    Do not install a tool because it is popular or because a social post says it is “better than everything else.” Define the job first.

    You may need a PDF editor, media player, password manager, note app, backup tool, image editor, or command-line utility. The clearer the requirement, the easier it is to avoid unnecessary software.

    Prefer the smallest tool that meets the need

    A simple image resizer does not need a large application with dozens of plugins and background services.

    Find the official project page

    Open-source tools may be distributed through a project website, GitHub, GitLab, package manager, app store, or Linux repository.

    Start from the official project source. Avoid download mirrors that add installers, ads, wrappers, or bundled software.

    Verify the project identity

    Popular projects can have copycats with similar names. Check the maintainer name, official domain, repository links, and documentation.

    Look at recent releases

    A healthy project usually shows some evidence of maintenance. That does not mean it needs a release every week.

    Check the date of the latest stable release, release notes, and whether serious bugs are being fixed.

    Old software is not automatically unsafe

    A mature utility may be stable and require few updates. The concern is whether the project still responds when security or compatibility problems appear.

    Check commit activity carefully

    Repository activity can show whether development continues.

    Do not judge only by the number of commits. One meaningful monthly update can matter more than hundreds of automated changes.

    Look for human maintenance

    Read recent commits, pull requests, and issue responses. A project maintained only by bots may still be active, but you want evidence that people are reviewing important changes.

    Review open issues

    Every active project has bugs. A large issue count is not automatically bad.

    Look at whether maintainers respond, label reports, close duplicates, and explain known limitations.

    Read a few recent issue threads

    They reveal how the team handles crashes, security reports, compatibility problems, and user questions.

    Check how the project handles security

    Responsible projects often publish a SECURITY file, security contact, disclosure process, or advisory history.

    Look for instructions that tell researchers where to report vulnerabilities privately.

    No security page is not automatic proof of danger

    Small projects may have limited resources, but security-sensitive software deserves stronger expectations.

    Search for known vulnerabilities

    Search the project name with terms such as vulnerability, CVE, advisory, breach, malware, or security issue.

    Then check the context. A vulnerability that was fixed quickly is different from one ignored for years.

    Security history can be a positive signal

    A transparent advisory with a clear fix shows that the project has a process for handling problems.

    Review the release source

    Prefer downloads linked from the official repository or project domain.

    For Linux, established distribution repositories and trusted package managers can provide an additional review layer.

    Be careful with third-party builds

    A package compiled by someone else may not match the official source.

    Check digital signatures or hashes

    Some projects publish checksums or signed releases.

    A checksum lets you verify that the downloaded file matches the expected file. A digital signature can also help confirm publisher authenticity.

    Verification matters most for high-risk tools

    Operating-system images, security tools, wallets, backup software, and administrative utilities deserve extra care.

    Read installation instructions first

    A trustworthy project should explain how to install, update, and remove the software.

    Be cautious if the instructions require running a long shell command from an unknown website without explanation.

    Understand commands before running them

    A one-line installer can download and execute additional scripts with your user permissions.

    Check requested privileges

    Ask whether the app really needs administrator or root access.

    A system backup tool may need broad file access. A simple note editor usually does not.

    Least privilege applies to open source too

    Source availability does not make broad permissions harmless.

    Review dependencies

    Modern software depends on libraries and frameworks maintained by other projects.

    A small application can indirectly include hundreds of packages.

    Dependency risk is part of project risk

    Look for lockfiles, automated update tools, security scans, and active dependency maintenance.

    Be cautious with abandoned dependencies

    A main project may look active while relying on old libraries with known issues.

    Security-sensitive software should keep its dependency chain current.

    Check the license

    Open source is not one license. Common licenses include MIT, Apache License 2.0, GPL, LGPL, BSD, MPL, and others.

    The license affects how you may use, modify, distribute, or combine the software.

    Business use deserves legal review when needed

    If you plan to redistribute software inside a commercial product, check license obligations carefully.

    Check whether the license file matches the repository

    A clear project should include a license file and consistent licensing information.

    If the repository claims to be open source but provides no license, legal reuse may be unclear.

    Review documentation quality

    Good documentation is a practical trust signal.

    Look for installation instructions, configuration examples, troubleshooting, upgrade notes, and known limitations.

    Poor documentation increases operational risk

    A technically strong app can still be a bad choice for a team if nobody understands how to maintain it.

    Check supported operating systems

    Make sure the current release supports your Windows, macOS, Linux, Android, or other platform version.

    Old compatibility information can lead to crashes or insecure workarounds.

    Review the update mechanism

    Does the app update automatically? Does it notify you? Do you update through a package manager? Must you manually download every release?

    A secure app that never gets updated on your device eventually becomes a problem.

    Check data storage

    Find out where the app stores settings, documents, databases, caches, and logs.

    This matters for backup, privacy, migration, and uninstallation.

    Local does not always mean private

    An open-source desktop app may still connect to cloud services, analytics, update servers, or third-party APIs.

    Review network behavior

    If privacy matters, read the documentation for telemetry and external connections.

    Advanced users can inspect network requests, but ordinary users can still review settings and privacy documentation.

    Look at funding and governance

    Projects can be maintained by volunteers, companies, foundations, universities, or mixed communities.

    None of these models is automatically better. You want to understand who makes decisions and whether the project has enough resources to continue.

    Sustainability matters for business use

    A critical tool maintained by one exhausted volunteer creates a different risk from a project with several active maintainers.

    Check the bus factor

    The bus factor is an informal measure of how dependent a project is on one person.

    If only one maintainer understands everything, future support may be fragile.

    Look for a code of conduct and contribution guide

    These documents are not security guarantees, but they show that the project has thought about community participation.

    Clear contribution rules can improve review quality.

    Review pull requests

    Look at whether code changes receive review before merging.

    A project where one person directly pushes every change can still be legitimate, but peer review provides another layer.

    Check automated testing

    Continuous integration badges, test workflows, and release checks show that the project tests changes automatically.

    Tests do not prove the absence of bugs, but they reduce accidental breakage.

    Look at release notes

    Release notes should explain bug fixes, security changes, new features, and breaking changes.

    This helps users decide when and how to update.

    Test in a safe environment

    For unfamiliar software, start on a non-critical device, virtual machine, test account, or backup copy of your data.

    Do not make a new utility the only tool holding important files on day one.

    Use a sample dataset

    If you are testing a backup or conversion tool, use copies first.

    Scan downloads

    Use your operating system’s security tools and trusted malware scanning.

    Be cautious when antivirus engines disagree, and investigate before bypassing warnings.

    Check application reputation

    Search for independent reviews and community discussions.

    Community reports can reveal bugs, confusing updates, or installation problems not obvious from the official site.

    Separate opinion from evidence

    One angry review does not prove malware. Look for repeated, technically specific reports.

    Use established alternatives when the risk is high

    If two tools do the same job and one has a long track record, active maintainers, strong documentation, and signed releases, it may be the safer choice.

    Novelty is not a benefit by itself.

    Do not confuse stars with security

    Repository stars measure attention, not code quality.

    A popular project can still have security problems. A small project can be excellent.

    Be careful with forks

    A fork can be a healthy continuation of an abandoned project or an untrusted modified copy.

    Understand why the fork exists and who maintains it.

    Check project ownership changes

    A trusted package can become risky after being sold or transferred to a new maintainer.

    Review major ownership announcements and unexpected release behavior.

    Watch for typo-squatting

    Package registries sometimes contain malicious packages with names similar to popular libraries.

    Copy package names from official documentation instead of typing them from memory.

    Open source and privacy

    Source availability lets experts inspect behavior, but most users will not audit the code themselves.

    You still depend on maintainers, build systems, package distribution, and update security.

    Open source and transparency

    One major advantage is that project discussions, issues, commits, and security fixes are often public.

    Use that transparency. Do not stop at the download button.

    Example: evaluating a password manager

    Expect strong security documentation, independent audits, clear cryptography design, signed releases, active vulnerability handling, reproducible or well-documented builds, and a sustainable team.

    Example: evaluating a media player

    Focus on official downloads, codec handling, update history, platform support, security fixes, and whether the app bundles unwanted software.

    Example: evaluating a small developer utility

    Check repository activity, open issues, dependencies, license, test coverage, release process, and whether it needs unnecessary privileges.

    Open-source evaluation checklist

    Find the official project. Check recent releases. Read a few issues. Review security reporting. Search for advisories. Use official downloads. Verify signatures or hashes when provided. Check permissions. Review dependencies. Read the license. Evaluate documentation. Test on non-critical data. Review network behavior. Confirm update process.

    Conclusion

    Open-source software can provide excellent value, flexibility, transparency, and control. The useful question is not “Is open source safe?” It is “Is this project trustworthy enough for this job?”

    Look beyond popularity. Check maintenance, security process, dependencies, license, documentation, download source, and requested privileges.

    For important software, test first and keep backups. Good open-source projects make trust easier by showing how they are maintained.

    Checklist used to compare open-source software maintenance and licensing
    Write down the requirements that matter before installing anything: supported operating systems, license, update method, required permissions, export format, and any server or cloud dependency. This prevents you from choosing software only because the interface looks good. It also makes comparison easier when two projects solve the same problem but differ in long-term maintenance, documentation, or data portability.
    Network access considered when reviewing an open-source application
    Network behavior deserves attention. A desktop tool that should work locally may still contact analytics, update, plugin, or cloud services. Review documentation and firewall activity if the software handles sensitive files. When the project offers optional telemetry, decide whether you need it. For server software, also check exposed ports, default credentials, supported TLS settings, and whether the application is intended to face the public internet.
    Maintenance concept illustrating long-term support for open-source software
    Plan the exit before the installation. Confirm that your files can be exported to a common format and that configuration can be backed up. If a project becomes inactive next year, you should be able to move without rebuilding everything manually. This is especially important for note apps, password tools, photo libraries, business databases, and other software that may hold years of important personal or company data.
  • App Permissions Explained: How to Review Camera, Microphone, Location, Files, and Background Access

    App Permissions Explained: How to Review Camera, Microphone, Location, Files, and Background Access

    Apps ask for permissions because they need access to parts of your device that are normally protected. A maps app may need location. A video-call app needs the camera and microphone. A photo editor may need access to selected images. The problem starts when an app receives more access than its job requires.

    Smartphone camera illustrating camera and photo permissions requested by apps
    Camera and photo access should match the feature you are using. A scanning app may need the camera while you scan a document, but it may not need unrestricted access to your entire photo library. Where the operating system offers selected-photo access, choose only the images required for the task and expand permission later if the app proves it genuinely needs more.

    This guide explains common app permissions in plain English, how to decide whether a request makes sense, how to review old permissions, and how to reduce unnecessary access without breaking useful features.

    Think of permissions as doors

    Each permission opens a door to a part of your device. Camera access opens the camera. Microphone access opens audio input. Location access reveals where the device is. Contacts access exposes an address book.

    The safest approach is not to deny everything. It is to open only the doors a feature actually needs.

    Permission should match the action

    If a flashlight app asks for contacts, the request is hard to justify. If a navigation app asks for location while giving directions, the request makes sense.

    Review permissions at the moment of request

    Do not tap Allow automatically. Read what the app is asking for and what you were trying to do at that moment.

    If you just pressed “scan document,” camera access is expected. If you opened a calculator and it suddenly asks for microphone access, pause.

    Context is a useful test

    The closer the permission request is to a feature you intentionally started, the easier it is to evaluate.

    Camera permission

    Camera access lets an app capture photos or video. Messaging apps, video-call apps, document scanners, QR-code readers, and social media apps commonly use it.

    Many operating systems let you grant camera access only while using the app.

    Disable camera access for apps that no longer need it

    If you used a banking app once to scan a check but no longer use that feature, you can often revoke access and grant it again later if needed.

    Microphone permission

    Microphone access supports calls, voice messages, speech recognition, recording, and some accessibility features.

    Because audio can contain sensitive conversations, review which apps have this permission.

    Watch the system microphone indicator

    Modern Android, iOS, Windows, and macOS versions show indicators when the microphone is active. Learn what the indicator looks like on your device.

    Location permission

    Location can come from GPS, Wi-Fi, Bluetooth, cellular networks, and other signals.

    Maps, weather, ride-hailing, fitness, delivery, and nearby-device apps may need it.

    Choose approximate location when exact location is unnecessary

    A weather app may only need your general area. A turn-by-turn navigation app needs more precision.

    “While using the app” versus “always”

    Background location allows an app to receive location even when you are not actively looking at it.

    This can be useful for workout tracking, family safety features, automation, or delivery services, but it is more sensitive than foreground access.

    Grant always-on location only with a clear reason

    If the feature works with “while using,” use the narrower option.

    Contacts permission

    Contacts access can expose names, phone numbers, email addresses, birthdays, and notes stored in your address book.

    Messaging and calling apps may use it to identify people you know.

    Your contacts contain other people’s data

    Granting this permission affects more than you. Avoid giving the full address book to apps that can work without it.

    Photos and media permission

    Older systems often gave an app access to the entire photo library. Newer systems may let you select individual photos.

    Use selected-photo access when an app only needs a few images.

    Photo libraries can contain sensitive information

    Screenshots, IDs, documents, tickets, personal photos, and location clues may all exist in one library.

    Files and storage permission

    File access may let an app read or write documents beyond its own private storage.

    File managers, backup tools, editors, and office apps may need broad access. A simple game probably does not.

    Prefer folder-level access where available

    If the app only needs one project folder, do not grant an entire drive.

    Notification permission

    Notifications are lower risk than camera or contacts, but they affect attention and privacy.

    A lock-screen notification can reveal message text, verification codes, transaction alerts, or names.

    Adjust notification previews

    For sensitive apps, hide message contents until the device is unlocked.

    Bluetooth and nearby-device access

    Bluetooth permission can support headphones, watches, trackers, keyboards, cars, and smart-home accessories.

    Nearby-device permissions may also reveal information about devices around you.

    Grant it to apps that manage real hardware

    A wearable app needs Bluetooth. A calculator usually does not.

    Local network permission

    Some operating systems ask whether an app can discover devices on your local Wi-Fi network.

    This is useful for printers, smart TVs, speakers, media servers, and home-automation tools.

    Deny local-network access to unrelated apps

    You can usually grant it later if a feature stops working.

    Calendar permission

    Calendar access may include event names, attendees, times, locations, and notes.

    Scheduling and meeting apps may need it.

    Use add-only permission when available

    If an app only needs to add events, it may not need to read your entire calendar.

    Reminders and tasks

    Task and productivity apps may request access to system reminders.

    Review whether they need read, write, or both.

    Phone and call permissions

    Android and other platforms may expose permissions related to calls, call logs, or phone state.

    Dialer, spam protection, and carrier apps may need them.

    Call logs are sensitive

    Do not grant them to apps without a clear communications function.

    SMS permission

    SMS access can expose personal conversations and verification codes.

    Default messaging apps and certain backup or device-transfer tools may need it.

    Be cautious with authentication codes

    An app that can read SMS may see one-time login codes sent by text.

    Accessibility permission

    Accessibility services can be extremely powerful. They may read screen content, observe interactions, or control parts of the interface.

    Legitimate assistive tools need this access, but malware also abuses it.

    Grant accessibility access only to trusted apps

    Read the system warning carefully and verify the developer.

    Screen recording and screen capture

    Screen-sharing apps, meeting software, support tools, and recording utilities may request permission to capture the screen.

    Your screen can contain passwords, private messages, customer data, or browser tabs.

    Stop sharing when the task ends

    Do not leave screen-capture permissions active unnecessarily.

    Background app refresh

    Background activity lets apps update data when they are not open.

    This can improve notifications and syncing but may use battery and data.

    Disable background activity for rarely used apps

    You can often keep notifications for important services while reducing background work elsewhere.

    Startup permission

    Desktop apps may launch automatically when the computer starts.

    Too many startup apps slow login and increase background activity.

    Keep security and essential sync tools

    Disable convenience apps you do not need running all day.

    Full disk access on desktop systems

    Some backup, security, search, or migration tools request broad access to files.

    This is a high-impact permission.

    Review the developer before granting it

    Use official software and remove access after uninstalling or replacing the tool.

    Administrator permission

    Administrator access lets software make system-level changes.

    Installers, drivers, security tools, and system utilities may require it.

    Do not approve admin prompts you do not understand

    Unexpected elevation requests can be a malware warning sign.

    Browser permissions

    Websites can request camera, microphone, location, notifications, clipboard, and other capabilities through the browser.

    Browser site permissions are separate from operating-system app permissions.

    Review site permissions periodically

    A website you used for one video call last year may still have camera permission.

    Browser extension permissions

    Extensions can request permission to read and change data on websites.

    Some extensions need broad access to perform their function, but that access can expose browsing content.

    Remove extensions you no longer use

    Fewer extensions reduce attack surface and permission complexity.

    Why apps ask for permissions before they need them

    Some apps request everything during setup because it is easier for the developer.

    You do not have to grant every request immediately.

    Use just-in-time permission

    Grant access when you reach the feature that needs it.

    What happens when you deny a permission

    The app may disable one feature while the rest continues to work.

    For example, a social app can often work without contacts. You may simply need to search for people manually.

    Review permissions monthly

    Open the privacy settings on your phone or computer and scan camera, microphone, location, contacts, photos, files, accessibility, and full-disk access.

    Revoke permissions from apps you no longer use.

    Unused apps deserve special attention

    If you have not opened an app for months, uninstalling it may be better than maintaining its access.

    Review after major app updates

    A redesigned app can add new features and request new permissions.

    Read the request instead of assuming it is necessary because the app was already trusted.

    Review after changing phones or computers

    Device migration can restore apps with different permission states.

    Take a few minutes to review the new device instead of assuming every restored setting is ideal.

    Check privacy dashboards

    Android and iOS provide privacy views that show recent access to camera, microphone, and location. Desktop systems provide similar settings.

    Use these tools to see which apps actually used sensitive permissions.

    Watch battery and data use

    Unexpected background battery or mobile data use can reveal an app that is more active than expected.

    This is not proof of wrongdoing, but it is a useful reason to investigate.

    Use official app stores where possible

    Official stores are not perfect, but they add review, update, and publisher information.

    For desktop software, use the vendor’s official site when a trusted store is not available.

    Read the developer name

    Popular apps often have copycats with similar icons and names.

    Verify the publisher before granting sensitive permissions.

    Example: photo editing app

    Grant selected-photo access first. Deny contacts and location unless a feature needs them. Allow camera only if you capture photos inside the app. Review cloud-upload settings before editing private images.

    Example: navigation app

    Allow precise location while using the app. Consider background location only if you need live trip sharing or another feature that requires it. Deny contacts unless you want contact-based destination search.

    Example: video meeting app

    Allow camera and microphone. Allow screen recording only when you need to share. Review calendar access separately. Disable automatic startup if you do not want the app running constantly.

    Common permission mistakes

    Allowing everything during setup, granting always-on location unnecessarily, giving full photo access for one upload, ignoring accessibility warnings, keeping old browser permissions, and leaving unused extensions installed are common mistakes.

    Permission review checklist

    Match access to the feature. Prefer while-using over always. Prefer selected photos over full library. Review camera and microphone indicators. Limit contacts and files. Remove old browser permissions. Check accessibility and full-disk access carefully. Uninstall unused apps. Review after major updates and device migrations.

    Conclusion

    App permissions are not something to fear. They are a control system.

    Grant access when a feature clearly needs it. Choose the narrowest option that works. Review old permissions because an app that once needed access may not need it forever.

    A few minutes of permission maintenance can reduce privacy exposure, background activity, and accidental data sharing without making your device harder to use.

    Wireless network illustrating network and nearby-device permissions
    Nearby-device, Bluetooth, and local-network permissions can expose information about the devices around you. Grant them to apps that control speakers, smart-home hardware, wearables, or local network tools, but question them in unrelated apps. If a feature still works after the permission is removed, leave it off and reduce the amount of background access the app can use.
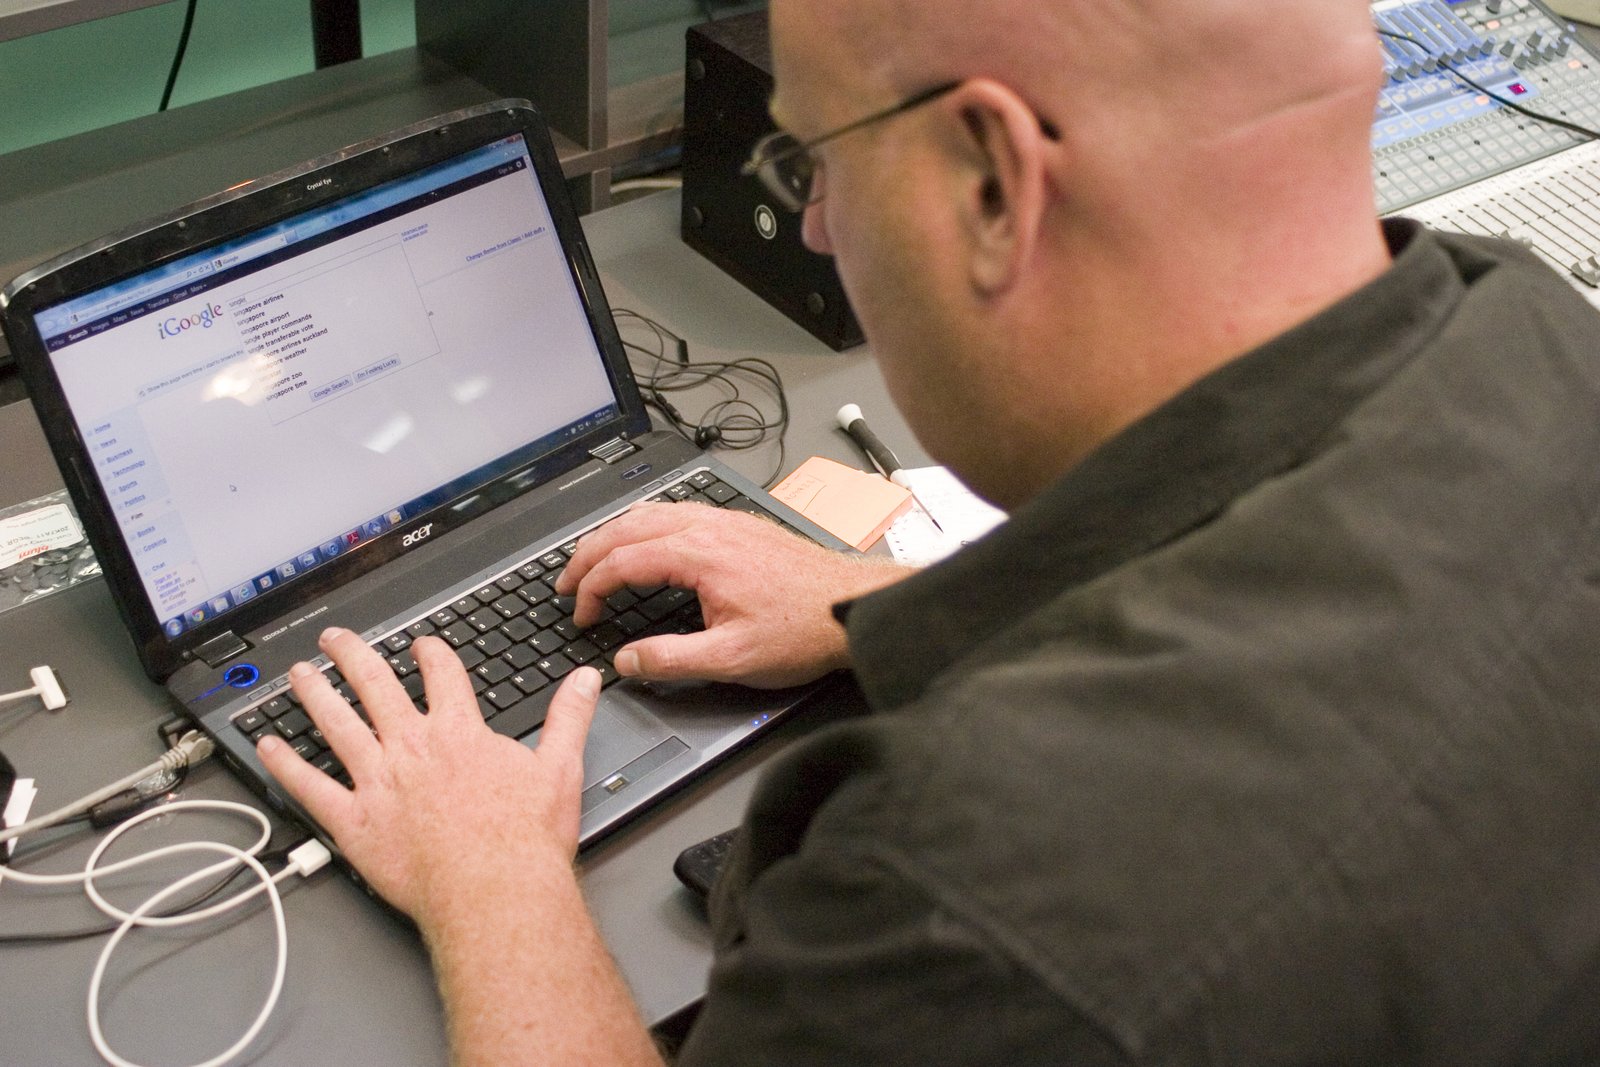
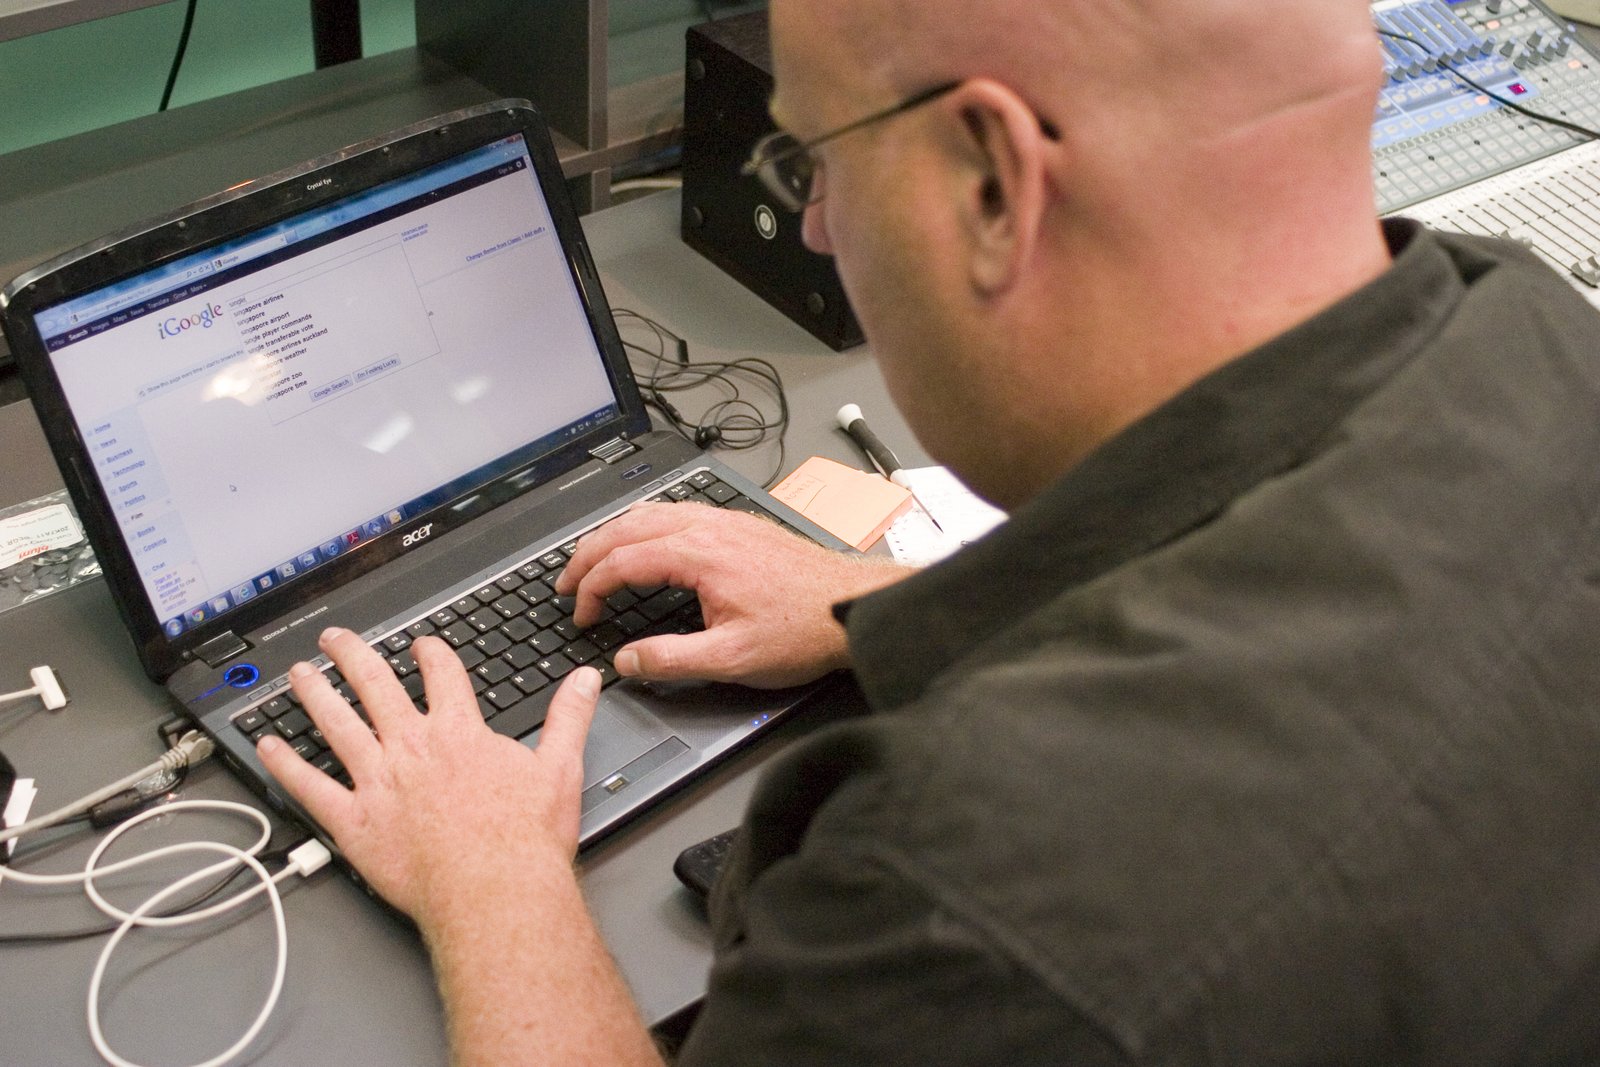
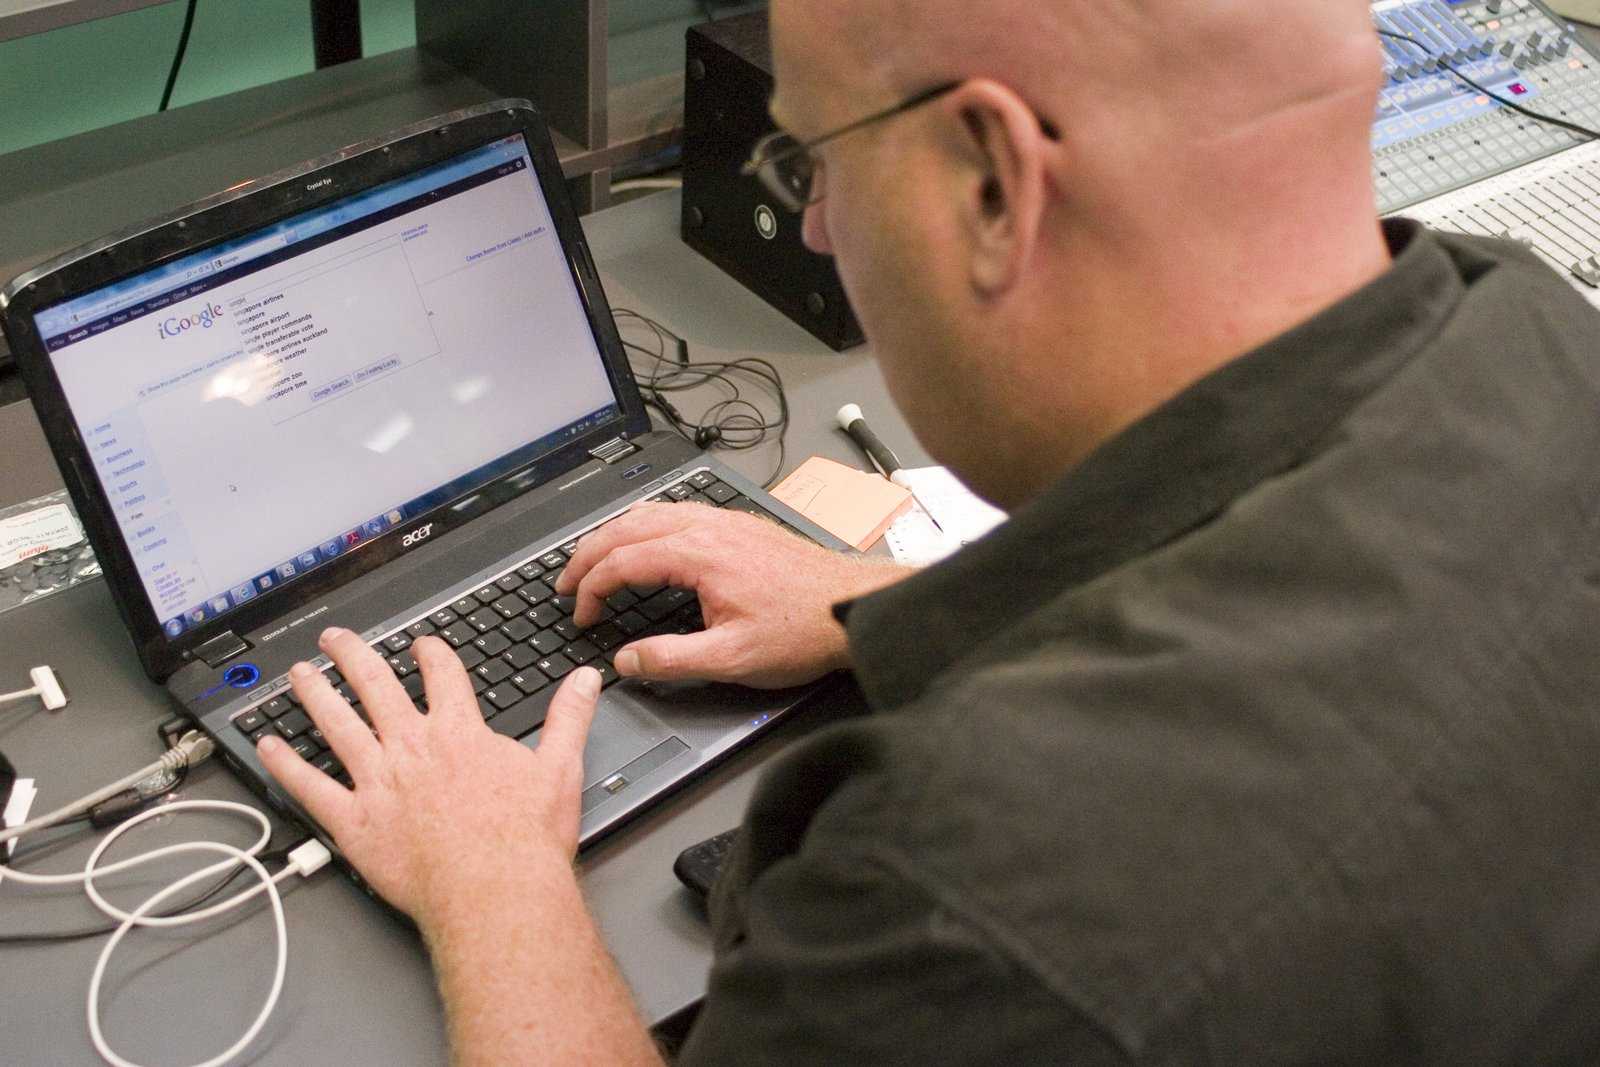
    Laptop used to check why an application requests a sensitive permission
    When a permission request seems unusual, check the developer’s official help page and the app-store description before accepting it. Look for a clear explanation tied to a real feature. Avoid granting sensitive access merely because a pop-up blocks progress; sometimes the better choice is to use a different app that performs the same task with narrower permissions.
    Smartphone maintenance illustrating a regular app permission review
    Make permission review part of normal device maintenance. Every few months, check location, camera, microphone, contacts, photos, files, notifications, and background access. Remove permissions from apps you no longer use and uninstall abandoned apps. This reduces privacy exposure and can also cut unnecessary background activity, battery use, and notifications without affecting the apps you actually depend on.
  • Email Inbox Organization That Actually Works: Rules, Labels, Search, Archives, and a Weekly Reset

    Email Inbox Organization That Actually Works: Rules, Labels, Search, Archives, and a Weekly Reset

    A messy inbox creates two different problems. The first is obvious: important messages get buried. The second is less visible: people spend too much time organizing email instead of doing the work the email represents.

    Weekly planning notes used to organize email priorities and follow-up tasks
    Start by deciding what the inbox is for. Keep messages there only when they still need a reply, decision, or action. Archive completed conversations and move real work into a task system when it takes more than a few minutes. Use a Waiting label for replies you expect from other people and add a follow-up date. This separates communication from project management, so a long email thread does not become the only place where an important deadline exists.

    The goal of a good inbox system is not to reach zero messages every night. The goal is to make urgent items visible, routine messages easy to process, and old information easy to find. This guide shows how to build a simple system with labels, folders, rules, search, archives, and a short weekly reset.

    Stop treating the inbox as permanent storage

    Your inbox works best as a temporary queue. A message arrives, you decide what it means, and then you take the next action.

    That action may be reply, delegate, schedule, save, archive, unsubscribe, or delete.

    An inbox is not a filing cabinet

    If thousands of old messages remain mixed with current work, every new email has to compete for attention.

    Define what deserves inbox visibility

    Keep messages that still require a decision or action. Move completed conversations to archive or another folder.

    You do not need to organize every message perfectly. Search is often faster than creating dozens of folders.

    Use a simple rule

    If the message still needs something from you, keep it visible. If the work is done, archive it.

    Use archive instead of delete for useful history

    Archiving removes a message from the main inbox while keeping it searchable.

    Services such as Gmail and Microsoft Outlook provide different interfaces, but the idea is similar.

    Delete low-value mail

    Promotions, expired notifications, duplicate alerts, and obvious junk do not need permanent storage.

    Create fewer folders than you think you need

    Too many folders turn email management into another job.

    Most people can work with a small set such as Action, Waiting, Receipts, Travel, Projects, and Archive.

    Search can replace detailed filing

    If you remember the sender, project name, date, or keyword, modern search can often find the message faster than browsing nested folders.

    Use labels for overlapping categories

    A folder usually puts a message in one place. Labels can let one message belong to several categories.

    A client invoice might be labeled Client A, Finance, and Waiting.

    Do not label every email

    Labels should help retrieval or workflow. If a label does not change what you do with the message, it may be unnecessary.

    Build an Action label

    An Action label or folder is useful for messages that require work but cannot be completed immediately.

    Move the email there and add the actual task to your task manager if the work takes more than a few minutes.

    Email should not replace a task system

    A long-term project hidden inside an email thread is easy to forget. Put deadlines and next actions in a calendar or task app.

    Build a Waiting label

    Use Waiting for messages where someone else owes you a reply, approval, file, payment, or decision.

    Review this label during your weekly reset.

    Add a follow-up date

    If the email service supports snooze or reminders, use them. Otherwise, create a task with a date.

    Use rules for predictable mail

    Rules and filters can automatically label, move, mark, forward, or archive messages based on sender, subject, keywords, or other conditions.

    Automation works best for messages that behave the same way every time.

    Good rule candidates

    Receipts, software notifications, newsletters, automated reports, calendar alerts, monitoring emails, and system status messages are common examples.

    Do not auto-archive messages you might need urgently

    A rule that moves important client or security messages out of sight can create more problems than it solves.

    Start by applying a label. After a few weeks, decide whether automatic archiving is safe.

    Test rules with a narrow condition

    A rule for “invoice” may catch unrelated messages. A rule for a known billing sender is safer.

    Create a VIP or priority list carefully

    Some email systems can highlight messages from selected people.

    Use this for a small number of contacts whose messages genuinely require fast attention.

    Too many VIPs defeats the purpose

    If half your address book is marked important, priority loses meaning.

    Unsubscribe aggressively from low-value mail

    Reducing incoming volume is more effective than improving filing.

    If you consistently delete a newsletter without reading it, unsubscribe.

    Be careful with suspicious spam

    Do not click unsubscribe links in obvious scam messages. Mark them as spam instead.

    Separate newsletters from conversations

    Create a Reading label or use a dedicated newsletter address if you subscribe to many publications.

    This lets you read them when you choose instead of allowing them to interrupt work.

    Use search operators

    Search can find mail by sender, date, attachment, subject, recipient, or keyword.

    Learn the search syntax of your email provider.

    Create saved searches where available

    Useful examples include messages with attachments from a client, unread messages older than seven days, or emails from a billing address.

    Search by attachment type

    If you are looking for a PDF, spreadsheet, or image, combine file-type or attachment filters with sender and date.

    This is faster than opening every message in a long thread.

    Search by time window

    Dates are useful when you remember roughly when a conversation happened.

    Search only the relevant month or year instead of the entire mailbox.

    Use clear subject lines when you start a thread

    A good subject makes later search easier.

    “Q4 Website Migration Approval – Due Friday” is more useful than “Quick question.”

    Change the subject when the topic changes

    Do not let one email thread become a five-topic project archive.

    Keep one topic per thread when practical

    This makes search, forwarding, and responsibility clearer.

    If the conversation moves from design feedback to billing, start a new thread.

    Use snooze for messages that matter later

    Snooze temporarily removes a message and returns it at a chosen date.

    This is useful for check-in messages, travel details, renewal notices, and tasks that cannot be handled today.

    Do not snooze forever

    A constantly postponed email is often a task that needs a clear decision.

    Use templates for repeated replies

    If you send the same structure every week, create a template.

    Examples include meeting follow-ups, document requests, support acknowledgments, and scheduling replies.

    Personalize before sending

    A template saves typing. It should not make the recipient feel like the message was never read.

    Turn off unnecessary notifications

    Not every email needs an immediate alert.

    Keep notifications for important accounts or people, and check the rest at planned times.

    Batching reduces context switching

    Checking email three or four focused times can be more productive than reacting every few minutes.

    Use separate addresses or aliases for different purposes

    You may use one address for important personal communication, another alias for shopping, and a work address for business.

    This can simplify filtering and reduce exposure of the primary address.

    Protect the email account itself

    Email often controls password recovery for other services.

    Use a unique password or passkey, enable multi-factor authentication, and review signed-in devices.

    Security messages should stay visible

    Do not bury login alerts, password-reset notices, and security warnings in an auto-archived folder.

    Watch automatic forwarding

    Forwarding rules can send mail to another account without you noticing.

    Review forwarding settings if you suspect compromise or after an employee leaves a business.

    Review connected apps

    Third-party apps can have permission to read or send email.

    Remove old integrations that are no longer needed.

    Clean large attachments if storage is full

    Search for messages with large attachments before buying more storage.

    Save important files to an approved storage location, then delete truly unnecessary messages if appropriate.

    Do not delete records required by policy

    Businesses may have retention requirements. Follow company rules before removing mail.

    Create a weekly email reset

    Set aside 20 to 30 minutes once a week.

    Review Action, Waiting, snoozed items, old unread messages, and important threads.

    Use the reset to improve rules

    If you notice the same low-value sender every week, create a filter or unsubscribe.

    Monthly maintenance

    Review filters, forwarding, connected apps, large attachments, old labels, and blocked senders.

    Remove rules that no longer match your workflow.

    A practical daily workflow

    Open the inbox. Delete spam and obvious junk. Reply to messages that take less than a few minutes. Move longer work into Action and your task system. Put delegated work into Waiting. Archive completed conversations.

    Stop when the queue is clear enough

    You do not need to process every newsletter to finish the session.

    Example: freelancer inbox

    Create labels for Leads, Active Clients, Finance, Waiting, and Reading. Filter receipts into Finance. Keep new client messages in the inbox. Use Waiting after sending proposals. Archive finished project threads.

    Example: small business owner

    Use separate aliases for support, billing, and general inquiries. Create rules that label each address. Keep security and payment alerts visible. Send team notifications to a low-priority folder. Review Waiting twice a week.

    Example: personal inbox

    Filter shopping receipts, travel bookings, newsletters, and account alerts. Unsubscribe from unused promotions. Keep family and important services in the main inbox.

    Common mistakes

    Creating dozens of folders, auto-archiving important mail, using email as a task manager, keeping every notification unread, marking too many people as VIP, and checking mail constantly are common problems.

    Simple inbox checklist

    Keep active messages visible. Archive completed work. Use a small folder set. Create rules for predictable mail. Unsubscribe from low-value content. Use Action and Waiting. Put deadlines in a task system. Learn search operators. Protect the account. Review filters and forwarding. Run a weekly reset.

    Conclusion

    A good email system should reduce decisions, not create more of them. The most useful setup is usually simple: inbox for active items, archive for completed mail, a few workflow labels, and rules for predictable noise.

    Search replaces detailed filing. Snooze handles future items. A task manager handles real work. Security settings protect the account that protects many of your other accounts.

    Instead of trying to organize every old email, improve what happens to the next one. Within a few weeks, the inbox becomes easier to trust.

    Email account security controls used during an inbox cleanup
    Protect the account before automating it. Use a unique password or passkey, enable strong multi-factor authentication, and review signed-in devices. Check forwarding rules and connected apps because attackers sometimes create hidden rules that continue sending mail after a password change. Keep login alerts and password-reset messages visible instead of auto-archiving them. For a primary email account used for banking or account recovery, security rules should always take priority over inbox-cleanup convenience.
    Network connection used to sync email folders labels and archives across devices
    Make sure the system behaves the same on every device. Open the account on your phone and computer, then check the inbox, sent mail, archives, labels or folders, and search. Avoid local-only folders unless you deliberately want mail stored on one device. If a rule works on the web version but not in a desktop client, confirm where that rule is actually executed. A dependable workflow should survive a phone replacement or computer change without losing the organization you built.
    Laptop used for a weekly email inbox reset and filter review
    Use a short weekly reset to keep the system healthy. Review Action and Waiting, clear tasks that were completed elsewhere, check old unread messages, and scan spam for false positives. Review new filters created during the week and confirm that none are hiding an important sender. If the inbox still feels noisy, reduce incoming volume before creating more folders: unsubscribe from unused newsletters, change app notification settings, and route routine system reports to a separate label or address. A simpler flow is easier to trust. Once a month, also review storage use, large attachments, blocked senders, auto-forwarding, recovery addresses, and third-party apps with mailbox access. Remove rules that no longer match your workflow. If you share a business mailbox, document the few important rules so another person can understand why a message moves or receives a label. This prevents useful automation from becoming invisible behavior that nobody knows how to maintain. Keep one simple measure of success: important mail should be easy to notice and old information should be easy to find. If a new label or rule does not improve either outcome, remove it rather than adding more complexity.
  • Travel Tech Kit Guide: Power Bank, eSIM, Tracker, Cables, Adapter, and Offline Backup

    Travel Tech Kit Guide: Power Bank, eSIM, Tracker, Cables, Adapter, and Offline Backup

    A good travel tech kit should make a trip easier without turning your bag into a box of chargers and spare gadgets. The most useful items solve predictable problems: keeping your phone powered, getting mobile data, finding luggage, connecting to local outlets, protecting accounts, and keeping important information available when the internet fails.

    Smartphone charging setup for a compact travel technology kit

    The goal is not to pack every accessory you own. It is to create a small system with fewer points of failure. This guide walks through the pieces worth considering and shows how to test them before departure.

    Start with the devices you will actually carry

    Make a list: phone, laptop, tablet, smartwatch, earbuds, camera, e-reader, portable game console, or medical device. Then write the charging port and power requirement beside each one.

    This prevents duplicate cables and reveals whether one charger can cover several devices.

    Leave optional gadgets at home

    Every extra device needs power, security, storage, and attention. If you will not use it more than once, consider whether your phone can do the job.

    Standardize on USB-C where possible

    USB-C can simplify travel because many current phones, tablets, laptops, cameras, and power banks use the same connector.

    You may still need one proprietary watch cable or older USB-A accessory, but reducing cable types makes replacements easier.

    Carry one spare critical cable

    If your phone and laptop both depend on USB-C, two good USB-C cables create useful redundancy without much weight.

    Choose one multi-port charger

    A compact USB-C Power Delivery charger can often replace separate phone and laptop adapters.

    Choose enough total wattage for the devices you may charge simultaneously.

    Read the port allocation

    A charger marked 100W may offer 100 watts only with one port in use. When several devices are connected, the power may split. Make sure the laptop still receives enough power.

    GaN chargers are useful for packing light

    Modern gallium nitride chargers can deliver high output from a relatively small adapter.

    GaN is not a guarantee of quality. Buy from a reputable manufacturer and check the electrical specifications.

    Understand plug adapters versus voltage converters

    A plug adapter changes the physical plug shape so your charger fits a local outlet. A voltage converter changes electrical voltage.

    Many laptop and phone chargers accept 100–240V input and need only a plug adapter. Check the label on every power adapter.

    Never assume universal voltage

    Hair tools and other high-power appliances may not support the destination voltage even when your phone charger does.

    Choose a universal travel adapter carefully

    A universal adapter can be convenient for multi-country trips. Check supported plug types, AC maximum load, safety shutters, fuse design, and USB-C output if included.

    A built-in USB-C port may be too weak for a laptop even if it charges a phone.

    Carry a power bank sized for your day

    A power bank helps during long flights, train journeys, navigation-heavy days, festivals, and remote travel.

    Capacity is usually listed in milliamp-hours, but the actual energy delivered to your phone is lower because of voltage conversion and efficiency losses.

    Choose based on use, not the largest number

    A small pack is easier to carry daily. A larger pack can cover several devices but adds weight.

    Check airline battery rules before flying

    Lithium battery and power-bank restrictions vary by capacity and airline policy. Spare lithium batteries and power banks generally belong in carry-on baggage rather than checked luggage, but verify your airline’s current rules.

    Check guidance from your airline and aviation authority before travel.

    Capacity may be shown in watt-hours

    If the pack lists only mAh and voltage, the manufacturer may also provide the Wh rating needed for airline limits.

    Use a power bank with USB-C input and output

    This lets you recharge the bank with the same cable and charger used for other devices.

    For laptops, check whether the bank supports enough USB PD output.

    Test the power bank before the trip

    Charge it fully. Use it to charge your phone from a low battery. Confirm the cable stays connected and the bank does not shut off unexpectedly.

    An old battery pack may have lost significant capacity.

    Consider a magnetic battery pack for convenience

    Magnetic wireless packs can be useful while walking or waiting in airports because they attach without a cable.

    Wired charging is more efficient, so use a cable when you need maximum energy from the pack.

    Set up an eSIM before departure when practical

    An eSIM can provide local or regional mobile data without changing a physical SIM card. Availability depends on phone model and carrier.

    Install the eSIM while you still have reliable Wi-Fi and access to account verification.

    Do not activate too early without reading the plan

    Some travel eSIM plans begin their validity period at installation, while others begin on first network connection. Check the provider terms.

    Confirm your phone is unlocked

    A carrier-locked phone may reject a third-party travel eSIM.

    Check unlock status with your carrier before buying a plan.

    Keep your home number active if needed

    Dual-SIM phones can often keep a home line for calls and verification while using a travel eSIM for data.

    Review roaming settings so the home line does not create unexpected data charges.

    Turn off data roaming on the wrong line

    Label SIMs clearly in settings and choose the travel plan as the mobile-data line.

    Understand SMS verification abroad

    Some banks and accounts still send codes to your home number. Make sure you can receive them without expensive roaming.

    Where available, stronger authentication methods such as passkeys, authenticator apps, or security keys can reduce dependence on SMS.

    Download essential apps before leaving

    Install airline, train, hotel, map, rideshare, translation, banking, password-manager, and eSIM apps in advance.

    Sign in and complete account verification while at home.

    Do not install urgent apps from random airport links

    Use official app stores and the official provider website.

    Download offline maps

    Mobile service can disappear in subways, remote roads, border areas, and crowded events.

    Download destination maps in Google Maps or another navigation app that supports offline use.

    Save the hotel and transport hubs

    Mark your hotel, airport, train station, car-rental location, and important meeting points before you arrive.

    Save travel documents offline

    Keep local copies of boarding passes, booking confirmations, hotel addresses, insurance details, visa information, and emergency contacts.

    Do not rely on an email inbox that requires a data connection.

    Protect sensitive documents

    Use device encryption and a strong screen lock. Avoid leaving passport scans in an unprotected photo gallery if a secure document app is available.

    Use a password manager

    Travel creates more account logins on unfamiliar networks and devices. A password manager reduces password reuse and can help detect lookalike phishing domains through domain-aware autofill.

    Make sure you can unlock the vault offline if needed.

    Prepare account recovery

    If your phone is lost, can you access email, the password manager, airline accounts, and banking from another device?

    Store critical recovery codes securely and separately from the phone.

    Do not keep the only recovery code on the lost device

    A printed copy in secure luggage or another protected method can provide redundancy.

    Enable device tracking

    Turn on the manufacturer’s device-finding service before travel.

    Apple users can review Find My, while Android users can use Google’s current device-finding features where supported.

    Use luggage trackers thoughtfully

    Bluetooth network trackers can help locate bags, keys, or backpacks. They are not real-time GPS devices in every environment.

    Performance depends on nearby participating devices and network coverage.

    Do not use trackers to follow people without consent

    Use anti-stalking alerts and platform safety features as intended.

    Place a tracker inside checked luggage

    A tracker can help show whether your bag reached the destination or remained at another airport.

    Airline baggage systems remain the official process for lost-luggage handling.

    Do not attach your home address visibly to luggage

    Use a phone number or email contact and follow airline requirements. Avoid advertising that your home may be empty.

    Carry wired earbuds as a backup

    Bluetooth earbuds can run out of battery. A small wired pair or airline adapter can be useful for long flights.

    Check whether your phone requires a USB-C audio adapter.

    Download entertainment

    Save music, podcasts, books, and video before boarding. Streaming may be unavailable or expensive.

    Confirm downloads actually play offline.

    Bring only the adapters you need

    A bag full of HDMI, Ethernet, card readers, and dongles adds clutter.

    If you are presenting, bring the exact video adapter required by the venue or a known universal hub.

    Test the laptop hub

    Connect power, display output, storage, and any required accessories before the trip.

    Cheap hubs can fail under simultaneous load.

    Back up your devices before travel

    A lost or damaged phone should not mean losing the only copy of photos, contacts, documents, or authentication data.

    Run a current cloud or computer backup before departure.

    Verify the backup, do not just start it

    Check the last successful backup date and confirm important data is included.

    Plan photo backup during the trip

    If photography matters, decide how you will protect new images. Options include cloud upload on hotel Wi-Fi, a laptop copy, an external SSD, or a second memory card.

    Do not wait until the last day to discover your storage is full.

    Use hotel Wi-Fi carefully

    Confirm the network name with the hotel rather than connecting to a similar-looking hotspot.

    Keep your operating system and browser updated and prefer HTTPS services.

    A VPN can help in some situations

    A reputable VPN can protect traffic between your device and the VPN service on untrusted local networks, but it does not make phishing sites safe or replace HTTPS.

    Your mobile data connection may be simpler

    For banking or sensitive account work, using your own cellular connection can reduce exposure to an unknown local Wi-Fi network.

    Do not use public USB charging ports blindly

    Use your own wall charger or power bank when possible. If you must use an unfamiliar USB port, a charge-only cable or data blocker can reduce data-pin exposure.

    Modern phones ask for permission before many USB data connections, but controlling the hardware path is still simpler.

    Carry a compact extension only when needed

    Older hotels may have one inconvenient outlet. A compact multi-outlet travel strip can help, but it must support local voltage and power requirements.

    Keep cables organized by function

    Use a small pouch. Carry one short daily cable, one longer hotel cable, and any proprietary watch or camera cable.

    Label similar cables if their capabilities differ.

    High-speed cables are not always required

    A charging cable can be lighter and cheaper than a Thunderbolt cable. Bring high-speed data capability only if you need external SSD transfers, a monitor, or a dock.

    Pack a small microfiber cloth

    It protects screens and camera lenses without using random clothing that may contain grit.

    Consider a phone lanyard or secure grip

    Crowded transit and tourist areas can increase drop or theft risk. A case with a secure grip or tether can help.

    Do not attach the phone in a way that creates a safety hazard during cycling or driving.

    Use a privacy screen only if the tradeoff works for you

    A privacy protector can reduce side viewing on planes and trains but may reduce brightness and viewing angles.

    It does not stop someone directly behind you from seeing the display.

    Turn on automatic screen lock

    Use a short lock timeout and strong PIN or passcode. Biometric unlock adds convenience.

    Do not use a four-digit code that is easy to observe in a crowded place if stronger options are available.

    Protect notification content

    Hide message previews and one-time codes from the lock screen if you travel through crowded areas.

    Review emergency features

    Update medical ID and emergency contacts. Learn how to trigger emergency calling on your phone.

    If your device supports satellite emergency communication, review the supported regions and run the official demo before remote travel.

    Save local emergency numbers

    Do not assume every country uses the same number. Government travel resources can provide current information.

    Use an e-reader when battery endurance matters

    If you read for hours, an e-ink device can last far longer than a phone or tablet and reduces pressure on your main communication device.

    Download books before travel.

    Protect devices from heat

    Do not leave phones, power banks, or laptops on a car dashboard or in direct sun. High heat accelerates battery aging and can trigger shutdowns.

    Protect devices from cold

    Very low temperatures can reduce temporary battery performance. Keep electronics close to your body when not in use and follow manufacturer operating limits.

    Think about waterproofing

    A phone’s IP rating does not make an open charging port, power bank, laptop, and passport waterproof.

    A simple zip pouch or dry bag can protect a travel tech kit during rain or boat trips.

    Do not rely on one card stored in one phone wallet

    Mobile payments are convenient, but carry an alternative payment method if the phone dies or the terminal does not support your wallet.

    Carry a little redundancy, not duplicate everything

    Useful redundancy means two ways to charge the phone, offline copies of critical documents, and an alternative payment method.

    It does not mean carrying two laptops.

    Build a departure-night checklist

    Charge phone, laptop, earbuds, watch, and power bank. Confirm eSIM. Download maps and entertainment. Run backups. Save travel documents offline. Check cable pouch. Update device tracking. Verify flight battery rules.

    Build an arrival checklist

    Confirm mobile data works. Turn off unwanted roaming. Save the hotel location. Secure valuables. Test local transit and payment apps. Avoid immediately joining unknown Wi-Fi networks.

    A minimal travel tech kit

    For many travelers: one phone, one 45- to 65-watt USB-C charger, two USB-C cables, a plug adapter, a small power bank, earbuds, a luggage tracker, and offline maps.

    Add a laptop only if the trip needs it.

    A work-travel kit

    Add a laptop, higher-power multi-port charger, USB-C hub, display adapter, hardware security key if used, and a backup method for presentation files.

    A photography-travel kit

    Add camera batteries, memory cards, a card reader, an external SSD, and a clear photo-backup workflow.

    A practical travel tech checklist

    List devices. Standardize cables. Choose a safe multi-port charger. Check destination plugs and voltage. Carry a tested power bank. Verify airline rules. Set up eSIM. Download maps and documents. Protect accounts. Enable device tracking. Back up before leaving. Plan photo backup. Keep an alternative payment method. Protect electronics from weather. Carry only useful redundancy.

    Conclusion

    The best travel tech kit is not the one with the most gadgets. It is the one that keeps your essential devices powered, connected, recoverable, and secure with the least clutter.

    Standardize charging where possible. Test your power bank and adapter. Set up connectivity before arrival. Download maps and documents for offline use. Protect accounts with strong authentication and make sure a lost phone does not become a lost trip.

    A small amount of preparation at home solves most travel technology problems before they happen. Pack for the failures that matter—dead battery, no data, lost bag, weak Wi-Fi, or damaged phone—and leave the rest of the gadget drawer behind.

    Wireless network equipment representing travel connectivity and mobile data planning
    Smartwatch included in a lightweight travel gadget setup
    Travel planning notes and laptop used to save offline documents and backups
  • Smartphone Camera File Formats Explained: JPEG, HEIF, HEIC, RAW, DNG, and ProRAW

    Smartphone Camera File Formats Explained: JPEG, HEIF, HEIC, RAW, DNG, and ProRAW

    Modern smartphones can save the same scene in very different file formats. One format may be small and easy to share. Another may preserve more editing information but use several times more storage. A third may look great on your phone but create compatibility problems when you send it to an older computer or website.

    Smartphone camera used to capture JPEG HEIF and RAW photo formats

    You do not need to become a photography expert to choose the right format. You only need to understand what each format is designed to preserve and what you plan to do with the photo afterward.

    This guide explains JPEG, HEIF, HEIC, RAW, DNG, and ProRAW in practical terms, with examples for everyday photos, editing, social media, printing, and long-term storage.

    Start with the job the photo needs to do

    Before changing camera settings, ask what happens after you take the picture. If you want to send family photos quickly, compatibility matters. If you want to edit a landscape heavily, RAW data can help. If you shoot hundreds of travel photos, storage efficiency becomes important.

    One format does not need to cover every situation

    You can use a normal efficient format for daily photos and switch to RAW only when a scene deserves more editing control.

    What JPEG is

    JPEG is one of the most widely supported photo formats. Phones, computers, browsers, printers, editing apps, websites, and messaging services can usually open it without trouble.

    JPEG uses lossy compression. It reduces file size by discarding some image information in a way designed to keep the photo looking good.

    JPEG is a strong default for compatibility

    If you regularly send files to different people, upload images to older software, or want the fewest surprises, JPEG remains practical.

    What “lossy” compression means

    Lossy compression permanently removes some detail to reduce file size. At a reasonable quality setting, the missing information may be difficult to notice.

    Problems become more visible after heavy compression or repeated saving.

    Avoid repeatedly re-saving JPEG files

    Each lossy export can reduce quality. Keep the original and create new copies for web or social use.

    What HEIF and HEIC are

    HEIF means High Efficiency Image File Format. HEIC is a common file extension used for images stored with HEIF-based technology, especially in Apple ecosystems.

    The format can achieve smaller file sizes than JPEG at similar visual quality and can support features such as image sequences or additional metadata.

    Efficiency is the main benefit

    If your phone takes thousands of photos, smaller files can save meaningful storage without making every image visibly worse.

    HEIC compatibility has improved

    Modern operating systems and many applications can open HEIC files, but compatibility is still not as universal as JPEG.

    Older Windows software, websites, printers, or third-party tools may reject the file.

    Test your real workflow

    Take a HEIC photo and try opening it on the computer, editing app, cloud service, website, and printer you normally use. If everything works, compatibility may not be a problem.

    Phones can convert automatically when sharing

    Some systems convert HEIC photos to JPEG when you send them to an incompatible destination.

    This improves convenience but can make file management confusing because the original and shared copy may use different formats.

    Check the camera compatibility setting

    On iPhone, Apple Support documents camera format settings such as High Efficiency and Most Compatible. Menu names can change across software versions.

    Android manufacturers also use different file-format options in their camera apps.

    What RAW means

    A RAW photo stores much more of the sensor data before the phone applies a final compressed look.

    RAW is designed for editing flexibility rather than easy sharing.

    RAW is not automatically a better-looking photo

    A RAW image can initially look flatter or less processed than the phone’s normal JPEG or HEIF. Its value appears when you adjust exposure, white balance, shadows, highlights, color, and noise in an editor.

    Why RAW files are larger

    They preserve more image information and use less aggressive processing or compression.

    A phone that can store many thousands of normal photos may fill quickly if every image is RAW.

    Use RAW selectively

    Turn it on for difficult lighting, important landscapes, architecture, product shots, or photos you know you will edit. Leave it off for receipts, casual snapshots, and quick social images unless you have a reason.

    What DNG is

    DNG, or Digital Negative, is a RAW file format developed by Adobe. Many Android camera apps and phones can save RAW captures as DNG.

    DNG files can be opened by many photo-editing applications.

    DNG does not mean every phone captures identical data

    The sensor, camera pipeline, lens, metadata, and manufacturer implementation still affect what is stored.

    What Apple ProRAW is

    Apple ProRAW combines RAW-style editing flexibility with parts of Apple’s computational photography pipeline on supported iPhone models.

    It can preserve more adjustment range while still benefiting from multi-frame processing.

    ProRAW files can be very large

    Use them for images where editing control matters, not automatically for every photo.

    Computational photography changes the RAW comparison

    Smartphones do not behave exactly like traditional cameras. A normal phone photo may combine several frames for noise reduction, HDR, sharpening, and motion handling.

    A basic RAW capture can preserve sensor information but may lose some of the polished multi-frame look of the standard camera mode.

    Compare the actual outputs

    Photograph the same scene in normal and RAW modes. Edit the RAW file and decide whether the extra flexibility produces a result you prefer.

    JPEG and HEIF often win for people photos

    Modern phone processing can handle skin tones, faces, HDR, and motion quickly. The normal processed format may look better immediately than an unedited RAW file.

    For family and event photos, speed and consistency can matter more than maximum editing latitude.

    RAW can help with difficult highlights

    A bright sky and dark foreground can challenge the camera. RAW may preserve more information that lets you recover highlight or shadow detail.

    It cannot recover areas where the sensor captured no usable information at all.

    RAW can help with white balance

    Indoor mixed lighting can create color casts. RAW gives more freedom to change white balance after capture.

    JPEG and HEIF can also be adjusted, but large corrections may degrade faster.

    Night photography is complicated

    Phone Night modes often combine many frames to produce a clean image. A single RAW frame may contain more noise.

    Some advanced RAW modes also use computational processing, so test the specific phone.

    Zoom can change file-format behavior

    When you use digital zoom, the phone may crop, merge, or process data differently. Some RAW modes are limited to specific physical cameras.

    Check whether RAW works on ultrawide, main, and telephoto lenses individually.

    Portrait mode may not produce normal RAW depth effects

    Portrait blur often depends on computational depth maps and image processing.

    A RAW file may not include the final portrait effect in the same way as the processed photo.

    Live Photos and motion features add complexity

    Some photo modes save a still image plus short motion or audio information. The container and sharing behavior can differ from a simple JPEG.

    Exporting a single frame may create a new file.

    Metadata matters

    Photos can include date, time, camera model, lens information, exposure settings, and location.

    RAW formats often contain detailed camera metadata useful during editing.

    Location metadata can be sensitive

    Before sharing a photo publicly, consider whether the location reveals your home, workplace, school, or another private place.

    Social platforms often recompress uploads

    Uploading a huge RAW file directly to a social platform rarely preserves all that information. The service may convert and compress the image.

    Edit the RAW file first, then export a high-quality JPEG or other supported web format.

    Websites prefer efficient delivery formats

    For a website article, uploading a 30 MB RAW file is unnecessary. Export the finished image at the actual display size.

    JPEG, WebP, or AVIF may be better for web delivery depending on your CMS and browser support.

    Keep RAW as the master file

    Store the original separately if you may re-edit it later.

    Printing benefits from a good master file

    A print lab usually wants a finished image in a supported color space and file type, not your unedited phone RAW file.

    Edit first and follow the lab’s upload requirements.

    Large prints reveal editing mistakes

    Noise, over-sharpening, halos, and missed focus become more visible in large prints. Review at full size before export.

    Storage planning becomes important with RAW

    If one RAW photo is many times larger than one HEIC photo, a holiday with 1,000 images can consume a large amount of space.

    Check free storage before a long trip or event.

    Do not fill the phone completely

    Operating systems and apps need working space. Leave enough free storage for updates, temporary files, and normal operation.

    Cloud photo libraries may count original file size

    Services such as iCloud, Google Photos, and other backup systems can store original files, but plan limits and settings vary.

    RAW libraries can increase monthly storage requirements.

    Check whether your cloud service preserves RAW originals

    Do not assume every sync or social backup stores the exact master file. Review upload quality and original-file settings.

    Back up important RAW files independently

    If you spend time editing important images, keep more than one copy.

    A practical setup can include the phone or computer working copy, an external backup, and an off-site or cloud copy.

    File names can become confusing

    Some camera modes save a processed JPEG or HEIF beside a RAW file with nearly the same name.

    Photo-management software can group these pairs or display them separately.

    Understand before deleting duplicates

    The two files may contain different image information. Do not delete the RAW copy because it looks like a duplicate until you know which file you want to keep.

    Editing apps handle formats differently

    Adobe Lightroom, Apple Photos, Google Photos, Snapseed, manufacturer gallery apps, and desktop editors have different RAW and HEIF support.

    Test the exact format before committing your entire library.

    Older computers may need codecs

    Windows versions and older applications may require additional support to open HEIC or some RAW formats.

    Use official extensions or reputable software rather than random format-converter downloads.

    Online converters create a privacy question

    Uploading a private photo to an unknown conversion website sends that image to a third party.

    For sensitive images, convert locally with trusted software.

    Conversion does not restore lost information

    Turning a JPEG into DNG does not recreate the original RAW sensor data. Changing the file extension is not the same as changing the underlying image information.

    Choose the normal format for family sharing

    If grandparents, schools, printers, and messaging apps need to open the file, JPEG is the safest compatibility choice.

    HEIC can still be efficient inside a modern ecosystem with automatic conversion when needed.

    Choose HEIF/HEIC for efficient everyday storage

    If all your devices support it and you take many photos, High Efficiency formats can reduce storage pressure.

    Keep a conversion option for older destinations.

    Choose RAW for serious editing

    Use RAW when exposure and color adjustments matter, when the scene is difficult, or when you want a stronger editing master.

    Expect larger files and extra workflow.

    Choose ProRAW or computational RAW when you want both

    On supported devices, these modes can combine more editing flexibility with smartphone processing.

    The storage cost is the main practical tradeoff.

    Do not confuse resolution with format

    A 48-megapixel photo can be JPEG, HEIF, RAW, or another format depending on the phone.

    Resolution describes pixel dimensions. File format describes how the image data is stored.

    Higher megapixels also increase storage

    A full-resolution image can be much larger than a binned 12-megapixel photo.

    Use maximum resolution when the extra detail helps cropping or printing.

    Check camera settings after software updates

    Major operating-system updates can add formats, change defaults, or reset camera preferences.

    Before an important event, confirm your preferred settings.

    Example: everyday family photos

    Use JPEG or HEIF/HEIC. Let the phone perform its normal processing. Keep location sharing under control. Back up automatically.

    Example: sunset landscape

    Capture both a normal processed photo and RAW if your phone allows it. Use RAW for highlight and color editing, but keep the normal image as a quick reference.

    Example: product photography

    Use RAW when you need careful white balance and controlled editing. Keep the product’s real color accurate. Export a compressed web image after editing.

    Example: travel

    Use HEIF or a normal efficient format for most shots. Switch to RAW for special scenes. Monitor storage and back up during the trip.

    A practical format checklist

    Check what formats your phone supports. Test compatibility with your computer and editor. Decide whether you need maximum sharing compatibility or storage efficiency. Use RAW selectively for important editing. Keep master files. Export separate web or social copies. Review location metadata. Back up originals. Monitor storage.

    Conclusion

    JPEG, HEIF, HEIC, RAW, DNG, and ProRAW exist because photographers need different balances of size, compatibility, processing, and editing flexibility. There is no single best format for every photo.

    For most daily photography, a phone’s normal JPEG or HEIF mode is fast, efficient, and polished. RAW becomes valuable when you need more control over exposure, color, and detail. Computational RAW modes can offer a useful middle ground at the cost of larger files.

    Choose the format based on what you will do after the shutter press. A good file workflow is not about saving the most data every time. It is about saving enough information for the result you actually need.

    Smartphone prepared for a long mobile photography session
    Laptop workflow used to organize and edit smartphone image files
    Computer used to check image format compatibility and photo software support
  • Matter Smart Home Explained: What It Fixes, What It Does Not, and How to Build a Compatible Setup

    Matter Smart Home Explained: What It Fixes, What It Does Not, and How to Build a Compatible Setup

    Smart-home products used to force buyers to think about ecosystems before features. A light bulb might work with one assistant but not another. A lock might require a proprietary hub. Moving from one platform to another could mean replacing working devices. Matter was created to reduce that fragmentation.

    Security and privacy controls for Matter smart home devices
    Before adding devices, map the roles already present in your home. Identify the main smart-home platform, any always-on controller, and whether you already own a Thread border router. A device can be a Matter controller without being a Thread border router, and a Thread device still needs the right network path. Checking those roles first avoids buying duplicate hubs or discovering after setup that a battery-powered Thread accessory has no border router to reach the rest of the home.

    Matter does not make every device identical, and it does not remove every app, bridge, or account. It provides a common application standard that lets supported products work across multiple smart-home platforms. This guide explains the pieces in plain English and shows how to build a Matter setup without creating a new kind of compatibility confusion.

    What Matter is

    Matter is a smart-home connectivity standard developed through the Connectivity Standards Alliance. Major technology companies and device makers participate in the ecosystem.

    Its goal is to make supported smart-home devices easier to set up and use across platforms.

    Matter is an application standard

    It defines how supported device types describe features and communicate, while underlying network technologies such as Wi-Fi, Ethernet, and Thread carry the traffic.

    Matter does not replace Wi-Fi

    Some Matter devices use normal Wi-Fi. Others use Thread. Wired controllers may use Ethernet.

    Your home network still matters.

    Think of Matter as a shared language

    Wi-Fi or Thread is the road. Matter is the language devices use when they reach each other.

    What Thread is

    Thread is a low-power wireless mesh networking technology designed for smart-home and IoT devices.

    Battery-powered sensors, locks, and small accessories can use Thread without joining your normal Wi-Fi network directly.

    Thread is not the same as Matter

    A device can support Thread without supporting Matter, and some Matter devices use Wi-Fi instead of Thread.

    What a Thread border router does

    A Thread border router connects the Thread mesh to your normal IP network.

    Some smart speakers, streaming boxes, routers, and hubs include this function.

    You may already own one

    Check your platform’s current hardware documentation before buying another hub.

    What a Matter controller does

    A controller manages Matter devices in an ecosystem. A phone may help with setup, while a hub or smart speaker can keep automations running when the phone is away.

    Different ecosystems use different controller hardware.

    Controller and border router are different roles

    One device can provide both, but do not assume every controller is a Thread border router.

    Why Matter setup uses QR codes

    Matter devices usually include a setup code or QR code.

    The commissioning process securely adds the device to your smart-home fabric and exchanges credentials.

    Keep setup codes safe

    Do not throw away documentation until the device is fully configured and backed up according to the manufacturer’s guidance.

    Multi-admin is one of Matter’s biggest advantages

    Matter can allow the same device to be shared across multiple compatible platforms.

    For example, one household member may prefer one voice assistant while another uses a different platform.

    You do not have to choose one ecosystem for every person

    The exact feature support can still differ between platforms.

    Platform features can extend beyond Matter

    Matter defines common capabilities for supported device types. Manufacturers can still offer advanced features in their own app.

    A light may expose on/off and brightness through Matter but keep firmware tools or special effects in the vendor app.

    Do not delete the manufacturer app immediately

    You may still need it for firmware updates, diagnostics, or device-specific settings.

    Matter device categories keep expanding

    The standard supports a growing set of device types such as lighting, plugs, locks, sensors, thermostats, blinds, appliances, media devices, and energy-related equipment.

    Support varies by Matter version and ecosystem.

    Check the exact feature, not only the Matter logo

    A platform may support the device category but not every optional function.

    Matter over Wi-Fi

    Wi-Fi Matter devices join your home Wi-Fi network.

    This is common for devices with enough power and bandwidth, such as plugs, appliances, and some cameras or bridges.

    Wi-Fi setup still needs a healthy network

    Weak coverage, overloaded routers, and poor 2.4 GHz configuration can still cause problems.

    Matter over Thread

    Thread Matter devices join the local Thread mesh.

    They can relay traffic for other Thread devices when designed as routing nodes, while sleepy battery devices conserve power.

    Mesh strength improves with good placement

    Always-powered Thread devices can help create a stronger mesh around the home.

    What happened to Zigbee and Z-Wave?

    Existing Zigbee and Z-Wave devices do not automatically become native Matter devices.

    Some hubs and bridges can expose older devices to Matter platforms.

    Bridges protect existing investments

    You may be able to keep working bulbs and sensors instead of replacing them.

    Matter bridges

    A bridge translates between a vendor’s existing device network and Matter.

    The Matter controller sees bridged devices through the bridge.

    Bridge support varies by product

    Check which device types and features the bridge exposes.

    Do not replace a stable smart home only for Matter

    If your current setup is reliable, secure, and supported, there may be no reason to rebuild it immediately.

    Matter is most useful when adding new devices or reducing ecosystem lock-in.

    Start with one platform

    Even though Matter supports multi-admin, setup is easier if you choose one main platform first.

    Use that platform for core automations and household organization.

    Add secondary platforms later

    Once the device works reliably, share it to another ecosystem if needed.

    Choose a reliable home hub

    Automations should continue when your phone is away.

    A capable always-on home hub can provide more reliable control than phone-only setups.

    Check Thread support before buying Thread devices

    If your home has no Thread border router, a Thread-based Matter accessory may require additional hardware.

    Look at the exact hub or smart speaker model.

    Use Ethernet for fixed hubs when possible

    A wired connection can improve reliability for central controllers, bridges, and access points.

    This reduces dependence on wireless conditions.

    2.4 GHz still matters

    Many Wi-Fi smart-home devices use 2.4 GHz because it has longer range and lower power requirements.

    A modern router should provide a compatible network for these devices.

    Band steering can confuse setup

    If a device will not onboard, follow the manufacturer’s router guidance rather than disabling security randomly.

    Use a guest or IoT network carefully

    Network isolation can improve security, but Matter relies on local device discovery and communication.

    An overly isolated guest network can prevent controllers from finding devices.

    Check router support for IoT networks

    Some routers provide an IoT mode that allows required local communication while blocking unnecessary access.

    Local control is a major Matter design goal

    Many Matter commands can work across the local network instead of requiring a vendor cloud for every action.

    This can improve speed and resilience.

    Cloud services may still exist

    Remote access, analytics, firmware, advanced features, and account services can still use the internet.

    What happens when the internet goes down

    Local Matter control may continue if controllers, devices, and local networking remain available.

    Cloud-dependent voice assistants or remote access may stop working.

    Test your important automations offline

    Turn off the internet connection briefly and see whether lights, locks, and basic scenes behave as expected.

    Privacy still depends on the ecosystem

    Matter provides a technical framework, but your controller platform and manufacturer may still collect account or usage data.

    Review privacy policies and app permissions.

    Firmware updates still matter

    Smart-home devices can remain installed for many years.

    Choose manufacturers with a clear security update history.

    Update bridges and controllers too

    A secure end device depends on the surrounding ecosystem.

    Account security

    Protect smart-home accounts with strong passwords or passkeys and multi-factor authentication where supported.

    Remove old household members and devices.

    Guest access

    Some platforms let you give temporary or limited access to guests, cleaners, or contractors.

    Use limited access instead of sharing the main household account.

    Smart locks deserve extra care

    For locks, test offline behavior, battery alerts, manual key or backup entry, guest codes, and platform compatibility.

    Do not make a cloud automation the only way to enter your home.

    Smart thermostats

    Check HVAC compatibility before buying.

    Matter support does not solve wiring or equipment compatibility.

    Lighting

    Matter lights and plugs are an easy place to start.

    Basic on/off, brightness, and automation features are straightforward.

    Advanced scenes may remain vendor-specific

    Check if dynamic effects or entertainment syncing matter to you.

    Sensors

    Motion, contact, temperature, and occupancy sensors can drive local automations.

    Battery life and placement matter more than bandwidth.

    Cameras

    Camera support and video features are more complex than simple sensors.

    Check the current Matter specification and platform support rather than assuming all cameras are interoperable.

    Energy management

    Newer Matter versions continue adding energy-related features.

    This can help smart plugs, appliances, chargers, and energy systems share standardized information.

    Automation portability is still limited

    Sharing a device across platforms does not necessarily copy automations and scenes.

    You may need to rebuild routines in the second ecosystem.

    Device naming matters

    Use clear names such as Kitchen Ceiling, Hall Motion, and Bedroom Lamp.

    Avoid six devices named “Light.”

    Rooms and zones improve voice control

    Organize devices consistently across platforms.

    Keep a home inventory

    Record device name, model, room, network type, controller, and setup code location.

    This makes troubleshooting and replacement easier.

    Troubleshooting onboarding

    Update the phone and controller. Confirm Bluetooth is enabled if required for setup. Keep the phone near the device. Check Wi-Fi or Thread infrastructure. Restart the accessory according to official instructions.

    Troubleshooting Thread

    Check whether the border router is online. Move the device closer temporarily. Update hubs. Avoid resetting every device at once.

    Troubleshooting multi-admin

    Confirm the device supports sharing and that both platforms are updated.

    Use a fresh Matter setup code generated by the first ecosystem when required.

    When a manufacturer app is still useful

    Firmware updates, calibration, energy graphs, advanced scenes, diagnostics, warranty registration, and device-specific settings may live there.

    Buying checklist

    Confirm the Matter logo. Check device category support in your chosen platform. Identify Wi-Fi or Thread. Confirm you have a controller and, for Thread, a border router. Review update policy. Check manufacturer-specific features. Read independent reliability reports.

    Migration checklist

    Do not replace everything at once. Add Matter support through bridges where possible. Choose one main controller. Add new devices gradually. Test local control. Document setup. Share to secondary ecosystems only after stable operation.

    Conclusion

    Matter improves smart-home interoperability by giving supported devices a shared language across major ecosystems. Its biggest value is reducing the need to choose hardware only by one voice assistant or app.

    It does not eliminate networking, hubs, vendor apps, firmware updates, or privacy decisions. Thread and Wi-Fi still matter. Controllers and border routers still matter. Advanced features can still differ.

    Build slowly, keep your network healthy, choose supported manufacturers, and use Matter as a compatibility layer rather than a reason to replace devices that already work.

    Smartphone used to add and manage Matter smart home devices
    Use one primary ecosystem for the first setup, then add secondary platforms through Matter’s multi-admin feature only after the device works reliably. This keeps troubleshooting simple because you know which controller performed the original commissioning. When you share the device later, compare the features exposed in each platform. Basic controls may appear everywhere while advanced scenes, firmware tools, energy graphs, or calibration remain available only in the manufacturer’s app.
    Smart home inventory used to document Matter controllers bridges and devices
    Keep a small inventory with the product name, model, room, network type, controller, bridge if any, and the location of the setup code. This becomes valuable when you replace a hub, change Wi-Fi, or troubleshoot a device months later. It also helps you see which older Zigbee or Z-Wave products can stay in service through a bridge instead of being replaced only to gain Matter compatibility.
    Connected phone and accessories representing everyday Matter smart home use
    Migrate slowly rather than rebuilding a stable home at once. Add one Matter device, test local control, confirm automations continue when the internet is unavailable where expected, and review account permissions. Then add the next device or bridge. A staged approach makes failures easier to isolate and protects useful existing hardware. Matter is most valuable as an interoperability layer that reduces lock-in, not as a reason to discard devices that are still secure, supported, and reliable.
  • How to Move Between Note-Taking Apps Without Losing Notes, Links, Attachments, or Structure

    How to Move Between Note-Taking Apps Without Losing Notes, Links, Attachments, or Structure

    Changing note-taking apps sounds simple until you discover that your notes are more than plain text. They may contain folders, tags, backlinks, attachments, scanned documents, tables, checklists, code blocks, dates, reminders, and links between pages. A careless migration can leave you with hundreds of files but no useful structure.

    Laptop used to verify export and import options for note-taking applications
    Before moving the full library, compare the official export options of the old app with the import options of the new one. Test a sample that includes plain notes, long notes, images, PDFs, checklists, tables, tags, and internal links. If any of those items change format, decide whether you can accept the change or need a conversion step. A small pilot is easier to fix than a complete migration of thousands of notes.

    This guide shows how to move from one notes app to another without losing the organization that made your notes useful. The process applies whether you are leaving a cloud notebook, moving to a local Markdown system, switching between productivity suites, or simply creating a long-term archive.

    Decide why you are moving

    Start with the problem you want the new app to solve. You may need better offline access, stronger privacy, easier collaboration, lower cost, better search, Markdown files, more reliable export, or a simpler mobile experience.

    If you do not define the reason, you may spend days migrating only to discover that the new app creates a different problem.

    Write three non-negotiable requirements

    For example: full offline access, easy PDF attachment support, and export to open formats. Use those requirements to judge the destination before moving everything.

    Inventory what you actually have

    Count notebooks, folders, tags, total notes, attachments, large files, shared notebooks, encrypted notes, templates, and special content types.

    A small personal collection of 200 text notes is very different from a business knowledge base with 20,000 pages and hundreds of files.

    Find unusual content before export

    Look for handwritten notes, audio, embedded spreadsheets, drawings, databases, web clips, formulas, and reminders. These are the items most likely to convert poorly.

    Check the export options in the current app

    Use the official export feature whenever possible. Common formats include Markdown, HTML, PDF, plain text, JSON, CSV, and proprietary archives.

    Read the documentation from your current provider. For example, Microsoft OneNote, Apple Notes, Evernote, and other tools have different export capabilities.

    Prefer formats that preserve structure

    PDF is useful for reading but poor for future editing. Markdown or HTML often preserves editable text better. A native archive may preserve the most features if the destination can import it.

    Check what the new app can import

    Do not assume that because the old app can export Markdown, the new app will import every Markdown feature correctly.

    Test the destination importer with a small sample first.

    Importers change over time

    Use current official instructions. A migration guide from three years ago may describe a feature that has since changed.

    Create a full backup before touching anything

    Export the original collection and keep it unchanged. If the app offers a full archive, save that too.

    Store one backup outside the device performing the migration.

    Do not make the migration your only copy

    If the import fails halfway through, the original export should still be available.

    Run a pilot with 20 to 50 notes

    Choose a representative sample: short notes, long notes, attachments, tables, tags, links, images, lists, and old notes.

    Import only that sample into the new app.

    Compare side by side

    Open the same note in both systems. Check title, body, line breaks, images, file attachments, links, dates, and tags.

    Test internal links

    Many note systems support links from one note to another. These links may use proprietary IDs that do not survive export.

    If your knowledge system depends on backlinks, test them carefully.

    Broken links are easy to miss

    A migration can look successful because all pages exist, while thousands of cross-links silently point nowhere.

    Understand backlinks and graph features

    Apps such as Obsidian make links and backlinks central to the workflow. Other apps treat links as simple URLs.

    If you move into a Markdown-based system, you may need to convert old note identifiers into filenames or wiki-style links.

    Preserve note titles carefully

    Some systems allow duplicate titles. File-based systems may not.

    If two notes are both called “Meeting Notes,” the export process may rename files automatically.

    Use unique naming where practical

    Adding a project name or date can prevent collisions.

    Watch filename restrictions

    Characters allowed in a note title may not be allowed in Windows, macOS, Linux, or cloud filenames.

    Migration tools may replace slashes, colons, question marks, or other symbols.

    Preserve creation and modification dates

    Dates can be important for journals, research, legal notes, project history, and archives.

    Some export formats keep these values in metadata. Others turn every note into a newly created file.

    Decide which date matters

    You may need original creation date, last modified date, imported date, or all three.

    Plan your folder structure

    Do not automatically recreate every old folder if the old system was messy.

    A migration is a good time to simplify.

    Use fewer top-level folders

    For example: Work, Personal, Reference, Archive. Use tags or links for secondary organization.

    Map tags before import

    Export tools may convert tags into plain text, folders, metadata fields, or filenames.

    Write a simple mapping plan before a large migration.

    Clean obvious duplicate tags

    “project,” “projects,” and “Project” may become three different tags in the new app.

    Decide what to do with attachments

    Attachments can be stored inside the app database, in a media folder, or as cloud links.

    Check whether exported notes contain actual files or only references to the old service.

    Test offline access

    Disconnect from the internet and open several migrated attachments. This reveals hidden cloud dependencies.

    Check image quality

    Some note apps compress images or export previews instead of originals.

    If photos, scans, or diagrams matter, compare file dimensions and quality.

    Handle PDFs and scans separately

    A note may include a PDF with OCR, annotations, or search indexing.

    The new app may preserve the file but lose searchable text or annotations.

    Keep original PDFs

    Do not rely only on extracted text if the document itself has legal or visual value.

    Review tables

    Complex tables are one of the most fragile content types. A rich table may become plain text, HTML, Markdown, or an image.

    Check merged cells, checkboxes, formulas, column width, and links.

    Review task lists and reminders

    A checkbox can migrate as a checkbox, a bullet, or a simple character.

    Reminders and notifications may not migrate at all.

    Move active tasks into a task manager if needed

    If a reminder is business-critical, recreate it deliberately rather than assuming import will preserve it.

    Check shared notes

    Collaboration permissions rarely migrate automatically between unrelated services.

    After import, recreate the sharing structure in the new system.

    Do not accidentally expose private notebooks

    A shared destination workspace may have broader default permissions than your personal account.

    Export web clips carefully

    Web clips may contain simplified articles, screenshots, local images, or links to the original page.

    Some exports keep only HTML, while others lose layout.

    Keep the source URL

    The original page link is valuable even if the clip format changes.

    Check code blocks and technical notes

    Developers should test syntax formatting, indentation, special characters, inline code, and fenced code blocks.

    Plain text migration can damage spacing that matters in code examples.

    Plan for encryption

    If the old app supports encrypted notes, exported content may be decrypted during export.

    Understand where the temporary export files are stored and delete them securely after the migration is verified.

    Do not upload sensitive exports to random converters

    Use trusted local conversion tools for private notes.

    Use open formats for long-term portability

    Plain text, Markdown, standard image files, PDFs, and widely supported metadata are easier to move than proprietary database formats.

    This does not mean you must avoid rich apps. It means you should know how to leave.

    Exit options are part of choosing software

    Before committing years of notes to a service, test its export once.

    Run the full export

    Once the pilot looks correct, export the complete collection.

    Record the date, app version, export format, and any settings you used.

    Import in batches

    For a large collection, import one notebook or folder at a time.

    This makes troubleshooting easier than importing 20,000 notes in one step.

    Keep a simple migration log

    Record which folders were completed and any errors.

    Count before and after

    If the old system has 4,812 notes and the new system has 4,706, investigate.

    Counts may differ for valid reasons, but the difference should be understood.

    Search for known phrases

    Pick several unique phrases from old notes and search for them in the new system.

    This tests indexing and confirms the content is discoverable.

    Test on every device you use

    Open the new system on desktop, phone, tablet, and browser if those devices matter.

    Check sync, offline access, attachment loading, and editing.

    Keep the old app read-only for a transition period

    Do not delete the old account on migration day.

    Use the new app for active work while keeping the old system available for reference for several weeks.

    Avoid editing both systems

    Choose a cutover date. New notes should go into the new app after that date.

    Remove old sharing links

    When the migration is complete, old public links may still expose content.

    Review shared notebooks and external links in the old service.

    Download one final archive

    Before canceling a paid subscription or deleting an account, create a final export and store it safely.

    Example: moving to a Markdown-based app

    Export notes as Markdown or HTML. Test filename conversion. Copy attachments into a media folder. Convert internal links. Review tags in front matter. Open the folder in the new app. Check backlinks and search. Keep the original archive separately.

    Example: moving from a local app to a cloud app

    Export a sample. Import it into a private test workspace. Check what data syncs to the provider. Review encryption and sharing settings. Then upload the full collection in batches.

    Example: moving a team knowledge base

    Inventory owners, permissions, templates, databases, and shared pages. Migrate the content first. Recreate access groups. Test key pages with team members. Set the old workspace read-only. Keep a rollback export.

    Common migration mistakes

    Skipping the backup, testing only simple notes, forgetting attachments, ignoring internal links, editing both apps after cutover, trusting note counts without spot checks, and deleting the old account too early are common mistakes.

    Migration checklist

    Define requirements. Inventory content. Export a backup. Test 20 to 50 notes. Check titles, dates, tags, links, attachments, tables, tasks, and search. Import in batches. Count before and after. Test every device. Set a cutover date. Keep the old system read-only. Remove stale shares. Save a final archive.

    Conclusion

    A successful note migration is not just a file transfer. It is a transfer of structure, history, and trust.

    Test the difficult content first. Preserve an untouched backup. Use open formats when practical. Check links, attachments, tags, and dates instead of assuming the importer handled them correctly.

    Once the new app works across your normal devices and you can find old information reliably, the migration is complete. Until then, keep the original archive.

    Data security reminder for protecting note exports during migration
    Treat the export as sensitive data. Notes can contain addresses, account details, work records, private ideas, scans, and attachments that were never meant to be public. Keep the migration files in a protected folder, avoid unknown online converters, and delete temporary copies after verification. If the old app stores encrypted notes, check whether export removes that encryption. The safest migration keeps one untouched backup while the working copy is imported and tested.
    Network connection used to sync notes across devices after migration
    Cloud sync can make an import look complete before every attachment has uploaded. After the first sync, open the new note library on a second device and search for several old notes. Download attachments, follow internal links, and test offline access if you rely on it. This confirms that the content is actually stored and indexed by the new system rather than sitting only in a local cache on the computer that performed the import.
    Laptop used to perform a final recovery test after moving notes
    Finish with a recovery test. Export a small sample from the new app, open those files outside the app, and confirm that text and attachments remain usable. Then keep the old service read-only for a short transition period instead of deleting it immediately. Use only the new app for new notes after the cutover date. Once search, sync, links, and attachments have stayed reliable across your normal devices, archive the original backup and remove duplicate working copies.